
Make these Colorful DIY Birthday Cards the next time your pal’s birthday rolls around! Lots of easy ideas for kids of all ages to make by themselves!
Invited for a birthday party? Look no further for greeting cards. When you have a birthday party to attend, there’s lots to think about. You need to get a gift, wrapping paper, and a bow, as well as a birthday card. Of course, you can get a card from the store, but where’s the fun in that?
We believe nothing can match the charm of a handmade birthday card, no matter how simple it may be. When you’ve made it yourself, it’s a unique piece – there is no single copy of it in the entire world! A handmade card says, “I spent time thinking about you,” which is often more valuable than the gift itself.
If you’d like to make a card but don’t know where to start, check out these ideas for 20 bright and colorful DIY birthday cards for kids to make for their friends and loved ones. From pop-up cakes to button balloons, we have something for every skill level.
Why Handmade Cards Are Best for Kids
Before we grab the glue sticks, let’s talk about why this activity is so beneficial. Beyond saving a few dollars at the store, making cards is a developmental powerhouse for children:
- Fine Motor Skills: Cutting with scissors, peeling stickers, and handling small buttons help strengthen the small muscles in the hands that are essential for writing.
- Emotional Intelligence: Creating a card encourages a child to think about the recipient. What colors do they like? Would they prefer a dinosaur or a flower? This builds empathy.
- Creative Confidence: There is no “right” way to make art. Completing a project from start to finish gives kids a sense of pride and accomplishment.
The Essential Card-Making Kit
You don’t need a professional craft room to make amazing cards. Here is a quick checklist of supplies you likely already have:
- Cardstock: Sturdy paper is the foundation. White is great, but colored cardstock adds an instant “pop.”
- Washi Tape: Colorful, patterned tape that is easy for kids to tear and stick.
- Buttons & Pom Poms: Perfect for adding 3D elements.
- Watercolors or Markers: For adding personal drawings.
- Glue: A glue stick for paper and liquid white glue (or glue dots) for heavier items like buttons.
- Scissors: Kid-safe scissors for the little ones.
Top 5 “Hero” Birthday Cards (Step-by-Step)
Here are detailed instructions for five of our favorite, foolproof card designs.
1. The “Blow Up” Balloon Card
This is an interactive card that is incredibly fun to receive.
- What you need: A deflated balloon, a permanent marker, cardstock, and tape.
- How to make it:
- Blow up the balloon (don’t tie it!) and write “Happy Birthday” or a secret message on it with a marker. Let the ink dry completely.
- Deflate the balloon. The message will shrink and become unreadable.
- Tape the deflated balloon to the front of a folded card.
- Write instructions on the card: “Blow me up to see a surprise message!”
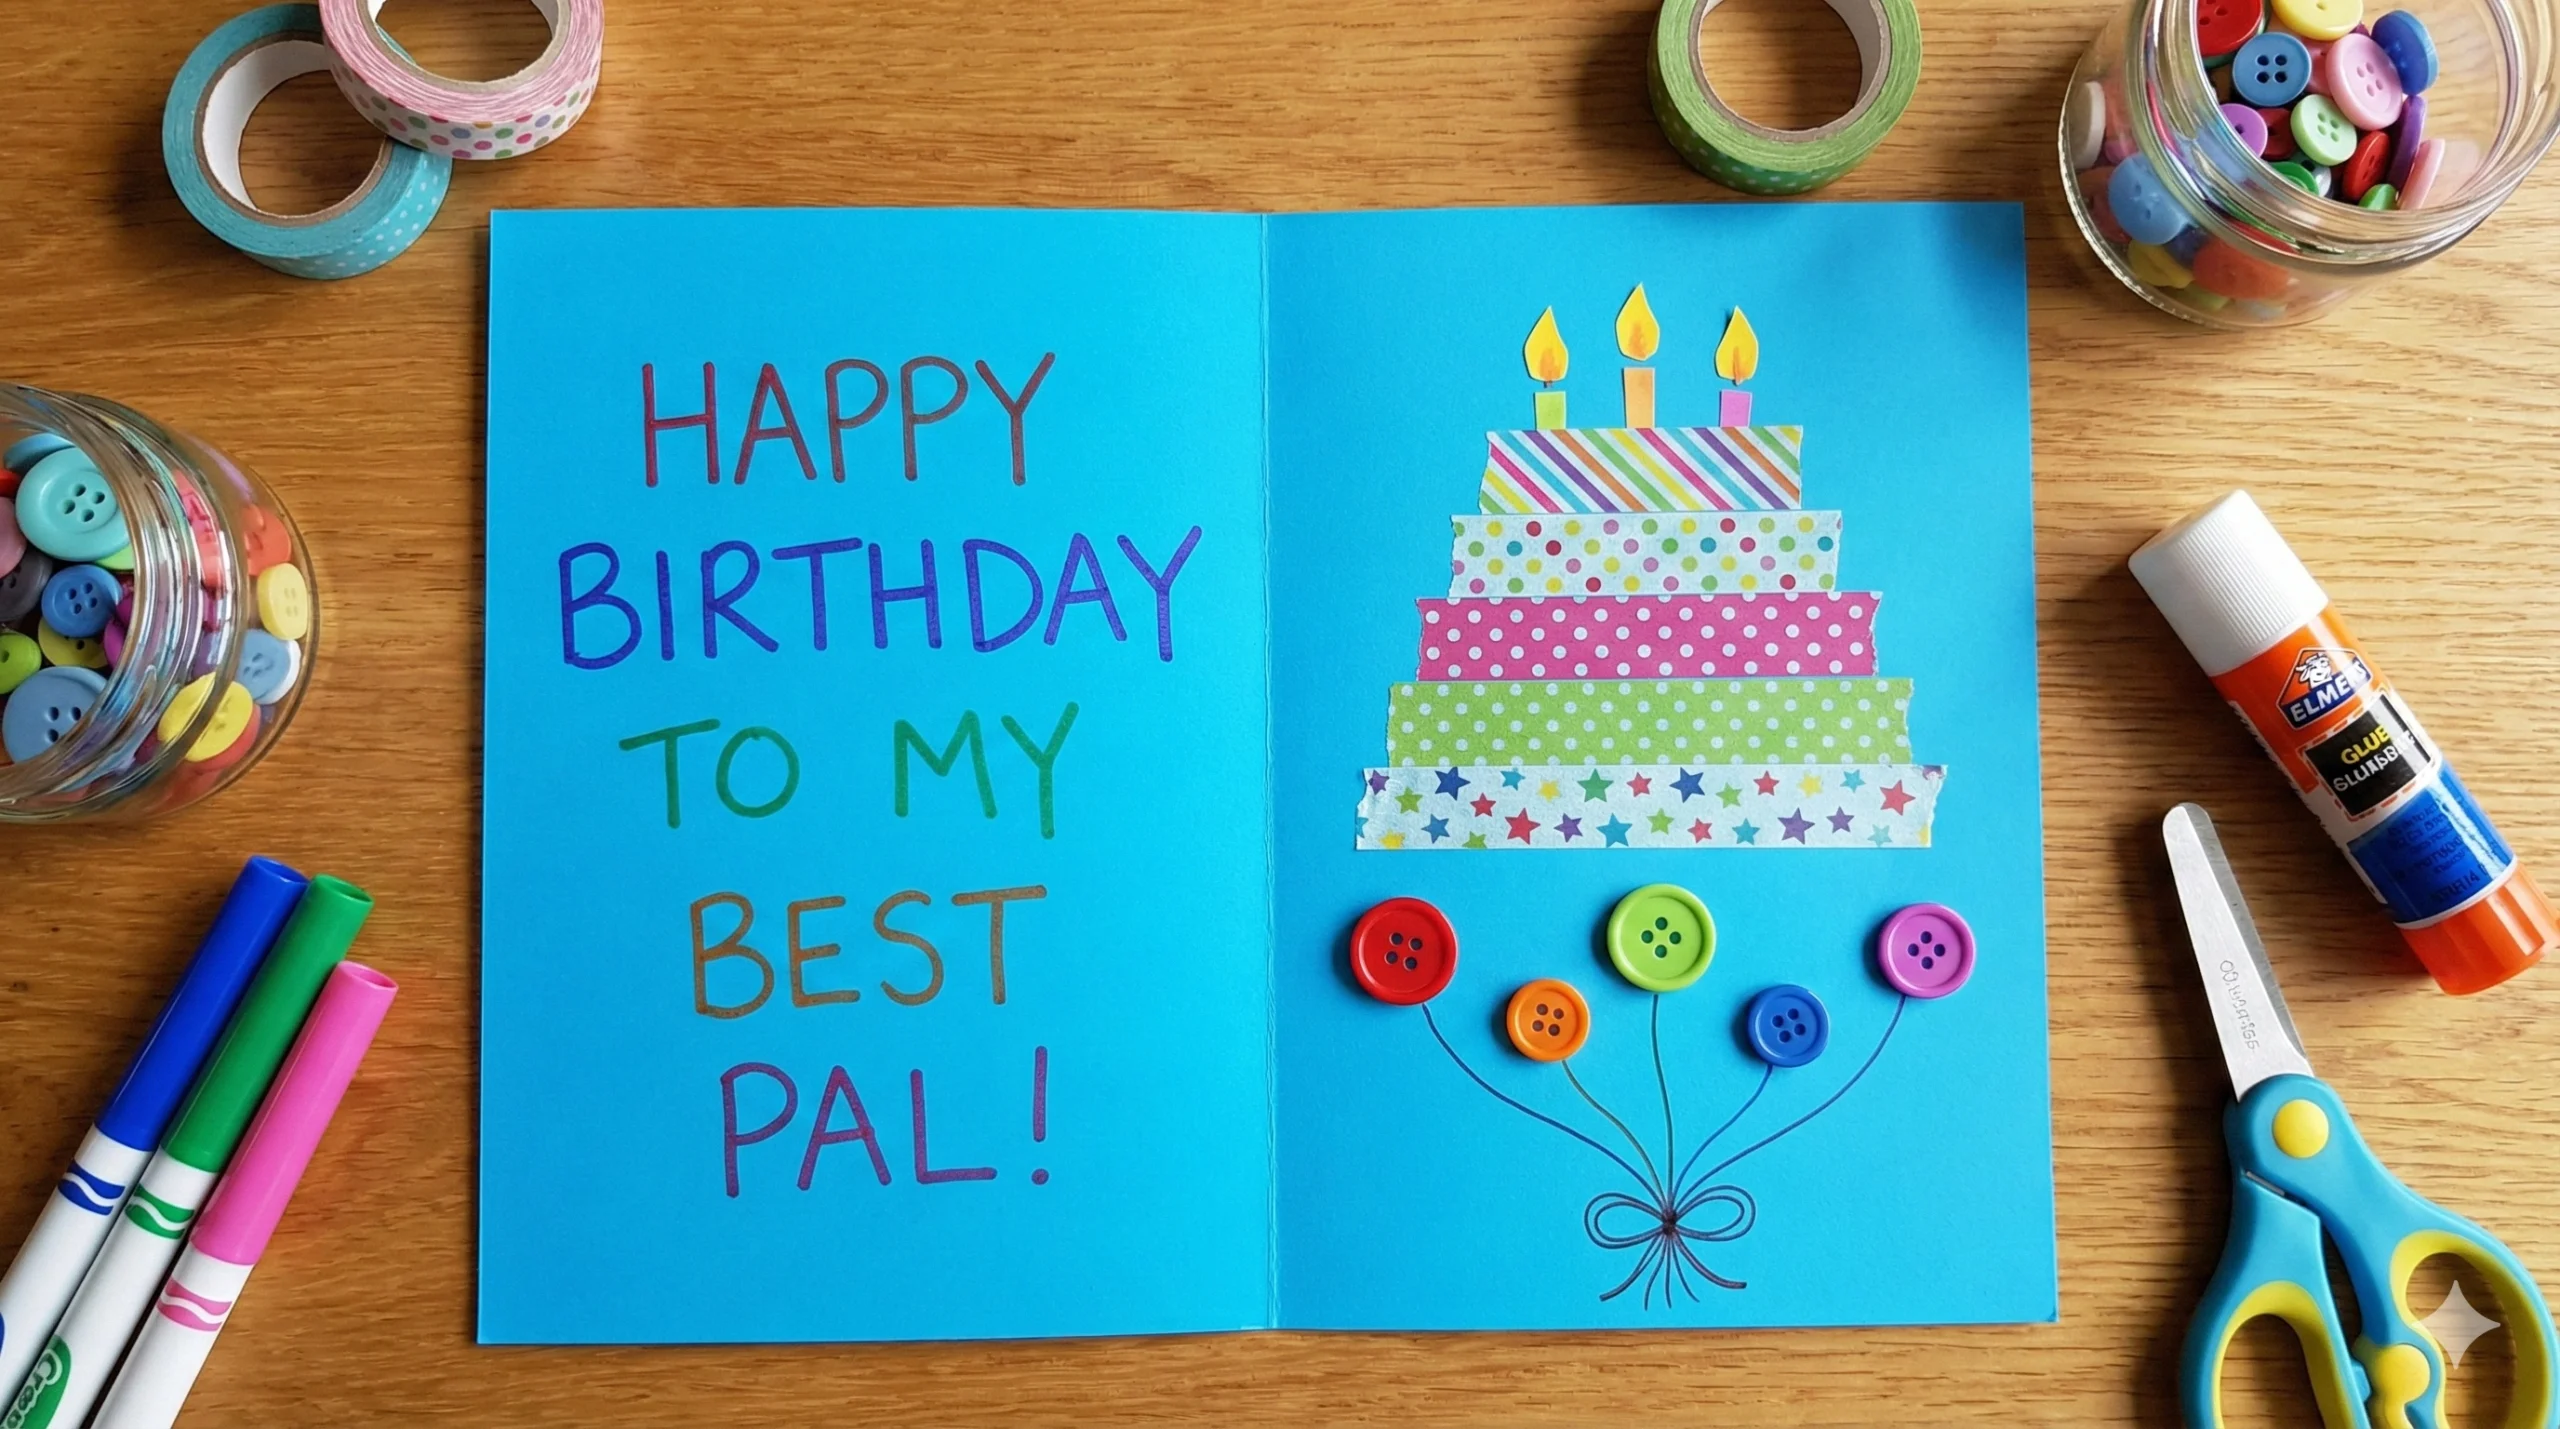
2. The Button Balloon Bouquet
A great way to use up spare buttons!
- What you need: Colorful buttons of different sizes, a black fine-liner pen, and glue.
- How to make it:
- Glue various buttons near the top of the card. These are your balloons.
- Use the black pen to draw strings coming down from each button, gathering them into a “knot” at the bottom.
- You can draw a little hand holding the strings or just tie a real ribbon bow where the strings meet.
3. Washi Tape Layer Cake
Perfect for toddlers because no messy glue is required.
- What you need: Washi tape in different patterns/colors, yellow paper, and a marker.
- How to make it:
- Tear strips of washi tape in decreasing lengths.
- Stick the longest strip at the bottom, the medium in the middle, and the shortest on top to form a tiered cake shape.
- Draw candles on the top tier using a marker.
- Cut small yellow teardrop shapes from paper and glue them on the candles as “flames.”
4. Fingerprint Dandelion
Simple, artistic, and messy in a good way.
- What you need: White cardstock, a black marker, and colorful ink pads (or paint).
- How to make it:
- Draw a simple black line for a stem and a small circle at the top.
- Have the child dip their finger into different colored inks.
- Press fingerprints all around the top of the stem to create a fluffy, colorful dandelion head.
- Add a few fingerprints “floating” away in the wind.
5. The Pop-Up Pixel Heart
For the Minecraft or video game fan.
- What you need: Red paper, scissors, and a base card.
- How to make it:
- Fold a piece of red paper in half.
- Make a series of cuts and folds (look up a simple “kirigami heart” pattern) or simply cut out a pixelated heart shape.
- Glue the heart to a small strip of folded paper (a “spring”) inside the card so it pops out when opened.
20 Bright and Colorful Card Ideas (The Mega List)
Need more inspiration? Here is a list of 20 creative themes and ideas to mix and match.
- Confetti Shaker Card: Cut a window in the front, cover it with plastic wrap, and fill the inside with sequins.
- Monster Hugs: Trace the child’s hand, cut it out, and glue it to the card to look like a monster waving hello. Googly eyes are a must!
- Pom Pom Ice Cream: Glue three pom poms in a triangle on a brown paper triangle cone.
- Dinosaur Roar: Draw a dino and glue a small party hat on its head. Caption: “Have a Dino-mite Birthday!”
- Pasta Bow Ties: Paint dry farfalle (bow tie) pasta and glue them onto the card.
- Lego Brick Stamp: Dip Lego bricks in paint and stamp them to create a block pattern.
- Paper Chain Snake: Make a mini paper chain and glue it in a winding S-shape on the card.
- Cotton Ball Sheep: Glue cotton balls for the body and draw a head/legs. Caption: “Ewe are awesome!”
- Real Candle Card: Glue a real (unlit) birthday candle to the front of the card for a 3D effect.
- Galaxy Watercolor: Wet the paper and drop blue, purple, and black paint for a space theme. Add star stickers.
- Fabric Scraps: Cut old clothes or fabric into heart shapes for a textured card.
- Q-Tip Pointillism: Bundle Q-tips together to stamp perfect polka dots.
- Origami Boat: Glue a simple origami boat on blue paper waves.
- Sticker Resist: Place letter stickers spelling “HAPPY,” paint over them, and peel them off to reveal the white text.
- Cupcake Liner Dress: Fold a cupcake liner in half to make a skirt for a ballerina or princess figure.
- Pipe Cleaner Words: Bend pipe cleaners into the age of the birthday boy/girl (e.g., a big “5”) and glue it down.
- Bubble Wrap Stamp: Paint bubble wrap and press it onto the card for a cool honeycomb background.
- Puzzle Piece Message: Glue old puzzle pieces on the card. Caption: “We fit perfectly friends!”
- Sunburst: Strips of yellow and orange paper radiating from the corner.
- Emoji Card: Draw a giant yellow circle and let the child draw their favorite emoji face.
Tips for a Professional Finish
Even though these are made by kids, a few tricks can make them look extra special:
- Use Envelopes: A card feels much more “official” when it comes in a proper envelope. You can make one out of wrapping paper if you don’t have one.
- Layering: Glue your artwork onto a slightly larger piece of colored paper before gluing that onto the folded card. This creates a frame or “matting” effect that looks very professional.
- Inside Matters: Don’t forget to decorate the inside! A simple sticker or a border drawn with markers makes the inside just as fun as the outside.
Conclusion
We hope this list has inspired you to skip the store aisle and head to the craft table. Whether you choose the Washi Tape Cake for its simplicity or the Button Balloon Bouquet for its charm, the recipient is guaranteed to smile.