
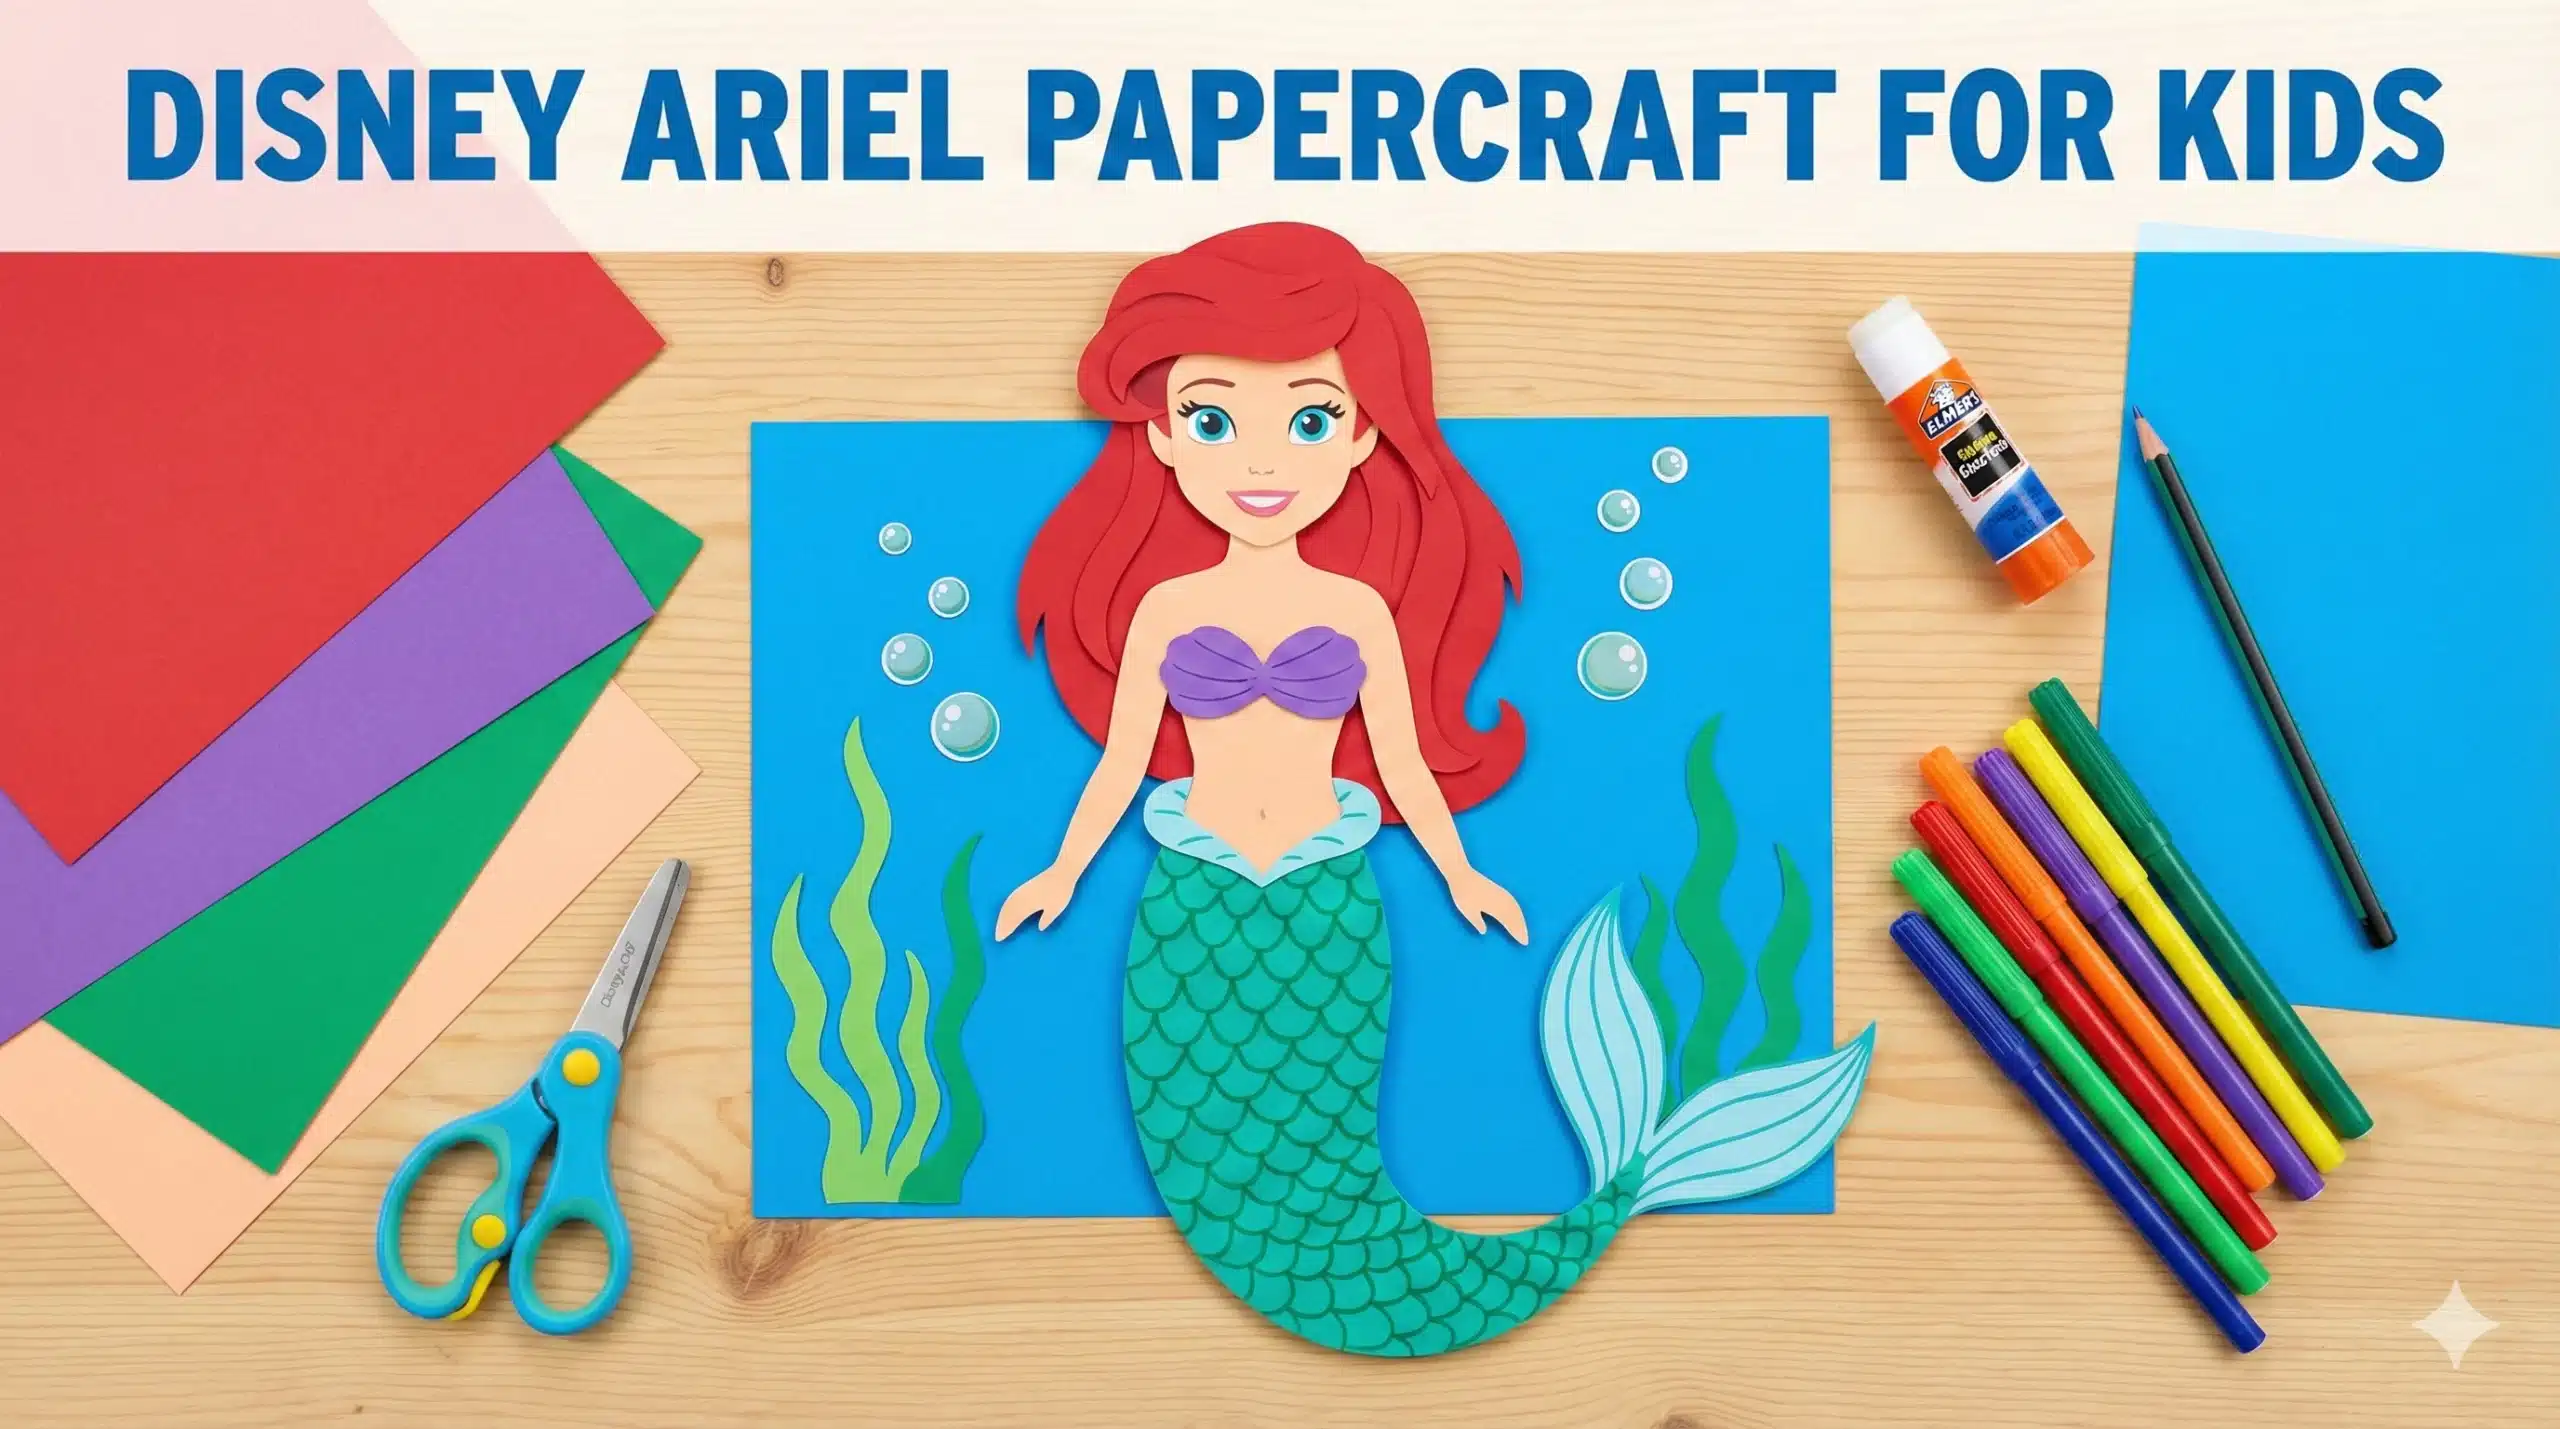
Love mermaids? Then you are going to absolutely adore this gorgeous Disney Ariel Papercraft for Kids! It is super easy to make, budget-friendly, and the perfect way to bring a little “Under the Sea” magic into your home.
If there is one Disney Princess who captures the hearts of children and adults alike, it is the spirited redhead, Ariel. Disney princesses have many things in common; they are headstrong, smart, loyal, and selfless. The Little Mermaid is similar in all these aspects, but she has one major difference – she doesn’t have legs (at first!) and she lives in a vibrant underwater kingdom.
It is to Disney’s credit that they created such a beautiful underwater world as the setting for Ariel’s story—a story that has had families laughing, crying, and singing along for decades. If you have a mermaid fan or an Ariel enthusiast at home, we have the perfect afternoon activity for you.
You might think making a mermaid out of paper is a difficult task reserved for professional artists, but this project proves otherwise. This guide is designed for kids of all ages (with a little help from adults for the cutting). So, gather your craft papers, your brightest markers, and let’s get crafting!
Why Papercrafts are Great for Kids
Before we dive into the Atlantic Ocean to find our favorite mermaid, let’s talk about why this activity is so beneficial. In a world dominated by screens, returning to basic paper crafts offers immense value:
- Fine Motor Skills: Cutting complex shapes like Ariel’s flowing red hair or her fin helps children refine their hand-eye coordination and dexterity.
- Color Recognition: assembling the specific colors (Purple for the shells, Green for the tail, Red for the hair) helps younger children identify and match colors.
- Creativity Boost: While we provide a guide, children can add their own flair—glitter scales, a different colored flower in her hair, or a unique background.
- Patience and Focus: Following a step-by-step assembly process teaches kids the reward of patience and following instructions.
Supplies You Will Need
One of the best things about this craft is that it doesn’t require expensive materials. You likely have most of these items in your craft drawer already.
- Card Stock or Construction Paper: You will need specific colors to match Ariel’s iconic look:
- Bright Red (for the hair)
- Sea Green or Teal (for the tail)
- Light Purple or Lavender (for the bustier/shells)
- Skin Tone (Cream, beige, or brown – let your child choose!)
- Light Blue (for the fins/accent)
- Colored Markers: Black for the eyes/mouth, and darker green/purple for detailing.
- Scissors: A child-safe pair for the kids and a sharper pair for adults to handle tricky corners.
- Pencil: For tracing shapes.
- Glue Stick: A standard glue stick works best to keep the paper flat, but white school glue works too (just use a tiny dot!).
- Optional: Glitter glue, sequins, or a popsicle stick (to turn her into a puppet).
Step-by-Step Instructions
Ready to make a splash? Follow these simple steps to bring your Ariel papercraft to life.
Step 1: Prepare Your Shapes
If you are drawing the shapes freehand, here is a quick guide on what you need to sketch out on your cardstock:
- The Hair: Draw a large, wavy shape that looks like a cloud with a side-swept bang. This should be big enough to go behind the head.
- The Head: A simple circle or oval shape in your chosen skin tone.
- The Body: A small rectangular shape (skin tone) for the torso.
- The Tail: A long, curved teardrop shape in green.
- The Fins: Two heart-shaped pieces or fan shapes for the waist and the end of the tail (light green or blue).
- The Bustier: A small figure-8 shape in purple looks just like sea shells.
Tip: If you are doing this with a large class, pre-cut the shapes ahead of time so the kids can focus on assembly!
Step 2: Cut and Trace
Once you have your templates drawn or printed, trace them onto the corresponding colored cardstock.
- Trace the hair on Red.
- Trace the tail on Green.
- Trace the face and body on Skin Tone paper.
- Trace the shells on Purple.
Carefully cut out all the pieces. Encourage older kids to cut slowly to keep the edges smooth. For the jagged edges of the hair, an adult might want to help.
Step 3: Assemble the Tail
Let’s start from the bottom up! Take your main green tail piece.
- Glue the waist fins (the little ruffles) to the top of the tail.
- Glue the bottom caudal fin to the pointy end of the tail.
- Detailing: Use a dark green marker to draw “scales” on the tail. You can do this by drawing little “U” shapes all over the green paper. This adds a lovely texture.
Step 4: Dress the Princess
Now, locate the body (torso) piece.
- Take the purple shell/bustier shape and glue it onto the chest area of the body piece.
- Detailing: Use a purple marker to add lines to the shells to give them a ribbed texture.
Step 5: The Grand Assembly
Now we connect the parts!
- Glue the bottom of the torso to the top of the tail section. Make sure it overlaps slightly so it is sturdy.
- Glue the head (circle) to the top of the neck/torso.
Step 6: The Iconic Red Hair
Ariel isn’t Ariel without her flowing red locks!
- This is usually done in two parts. Glue the main “back” hair piece behind the head.
- Glue the “fringes” or bangs on top of the forehead. This creates a 3D layered look.
- Pro Tip: You can curl the ends of the paper hair by wrapping them gently around a pencil to give her a bouncy blowout look!
Step 7: The Face
Finally, bring her personality to life.
- You can cut small white circles for eyes and draw blue pupils (Ariel has blue eyes!), or simply use a black marker to draw cute cartoon eyes.
- Give her a warm smile.
- Add a dash of pink marker to her cheeks for a rosy glow.
Creative Variations to Try
Once you have mastered the basic Ariel, why not try these fun twists?
1. Ariel Stick Puppet: Glue a jumbo popsicle stick to the back of your finished papercraft. Now, your child can put on a puppet show! You can make a Flounder (yellow fish) and Sebastian (red crab) to join her.
2. Sparkle Mermaid: Mermaids love shiny things! Use glitter glue to outline the tail or add sequin stickers to her waist. This makes the craft feel extra special and magical.
3. Under the Sea Collage: Don’t just leave Ariel floating in space. Glue your finished mermaid onto a piece of dark blue cardstock. Have the kids cut out green strips for seaweed, add bubble stickers, and draw sand at the bottom to create a full scene.
5 Fun Facts About Ariel to Share
While the kids are gluing and cutting, keep them entertained with these fun trivia bits about the Little Mermaid:
- Her Name: Did you know “Ariel” is a Hebrew name that translates to “Lion of God”? It’s a strong name for a strong princess!
- The Sisters: Ariel has six older sisters: Attina, Alana, Adella, Aquata, Arista, and Andrina. Notice a pattern? They all start with the letter ‘A’!
- The Inspiration: Ariel’s flowing hair in the original movie was inspired by astronaut Sally Ride’s hair in zero gravity. That’s why it looks so floaty underwater.
- Her Collection: Ariel is a collector. She calls forks “dinglehoppers” and pipes “snarfblatts.” Ask your kids what funny names they would give to everyday objects!
- The Color: Disney specifically chose the green color for her tail. In fact, the specific shade of blue-green was mixed specially for the movie and is officially called “Ariel Green” by the Disney paint lab.
Conclusion
Creating this Disney Ariel Papercraft is more than just cutting and pasting; it is about storytelling and imagination. It allows children to engage with a beloved character in a tangible way. Whether you are preparing for a mermaid-themed birthday party, looking for a rainy day activity, or just want to celebrate the magic of Disney, this craft is a winner.
So, clear off the kitchen table, put on the movie soundtrack, and get ready to create some underwater magic. We guarantee this is one craft that will go swimmingly!