
I absolutely love things that look pretty and serve a purpose at the same time. I know that’s the way with many of us, and that’s exactly why I’m such a big fan of felt projects!
There is something deeply satisfying about taking a flat, colorful piece of fabric and transforming it into a squishy, huggable friend. Felt plushies—often called “softies”—are the perfect entry point into the world of sewing. They are forgiving, vibrant, and incredibly versatile.
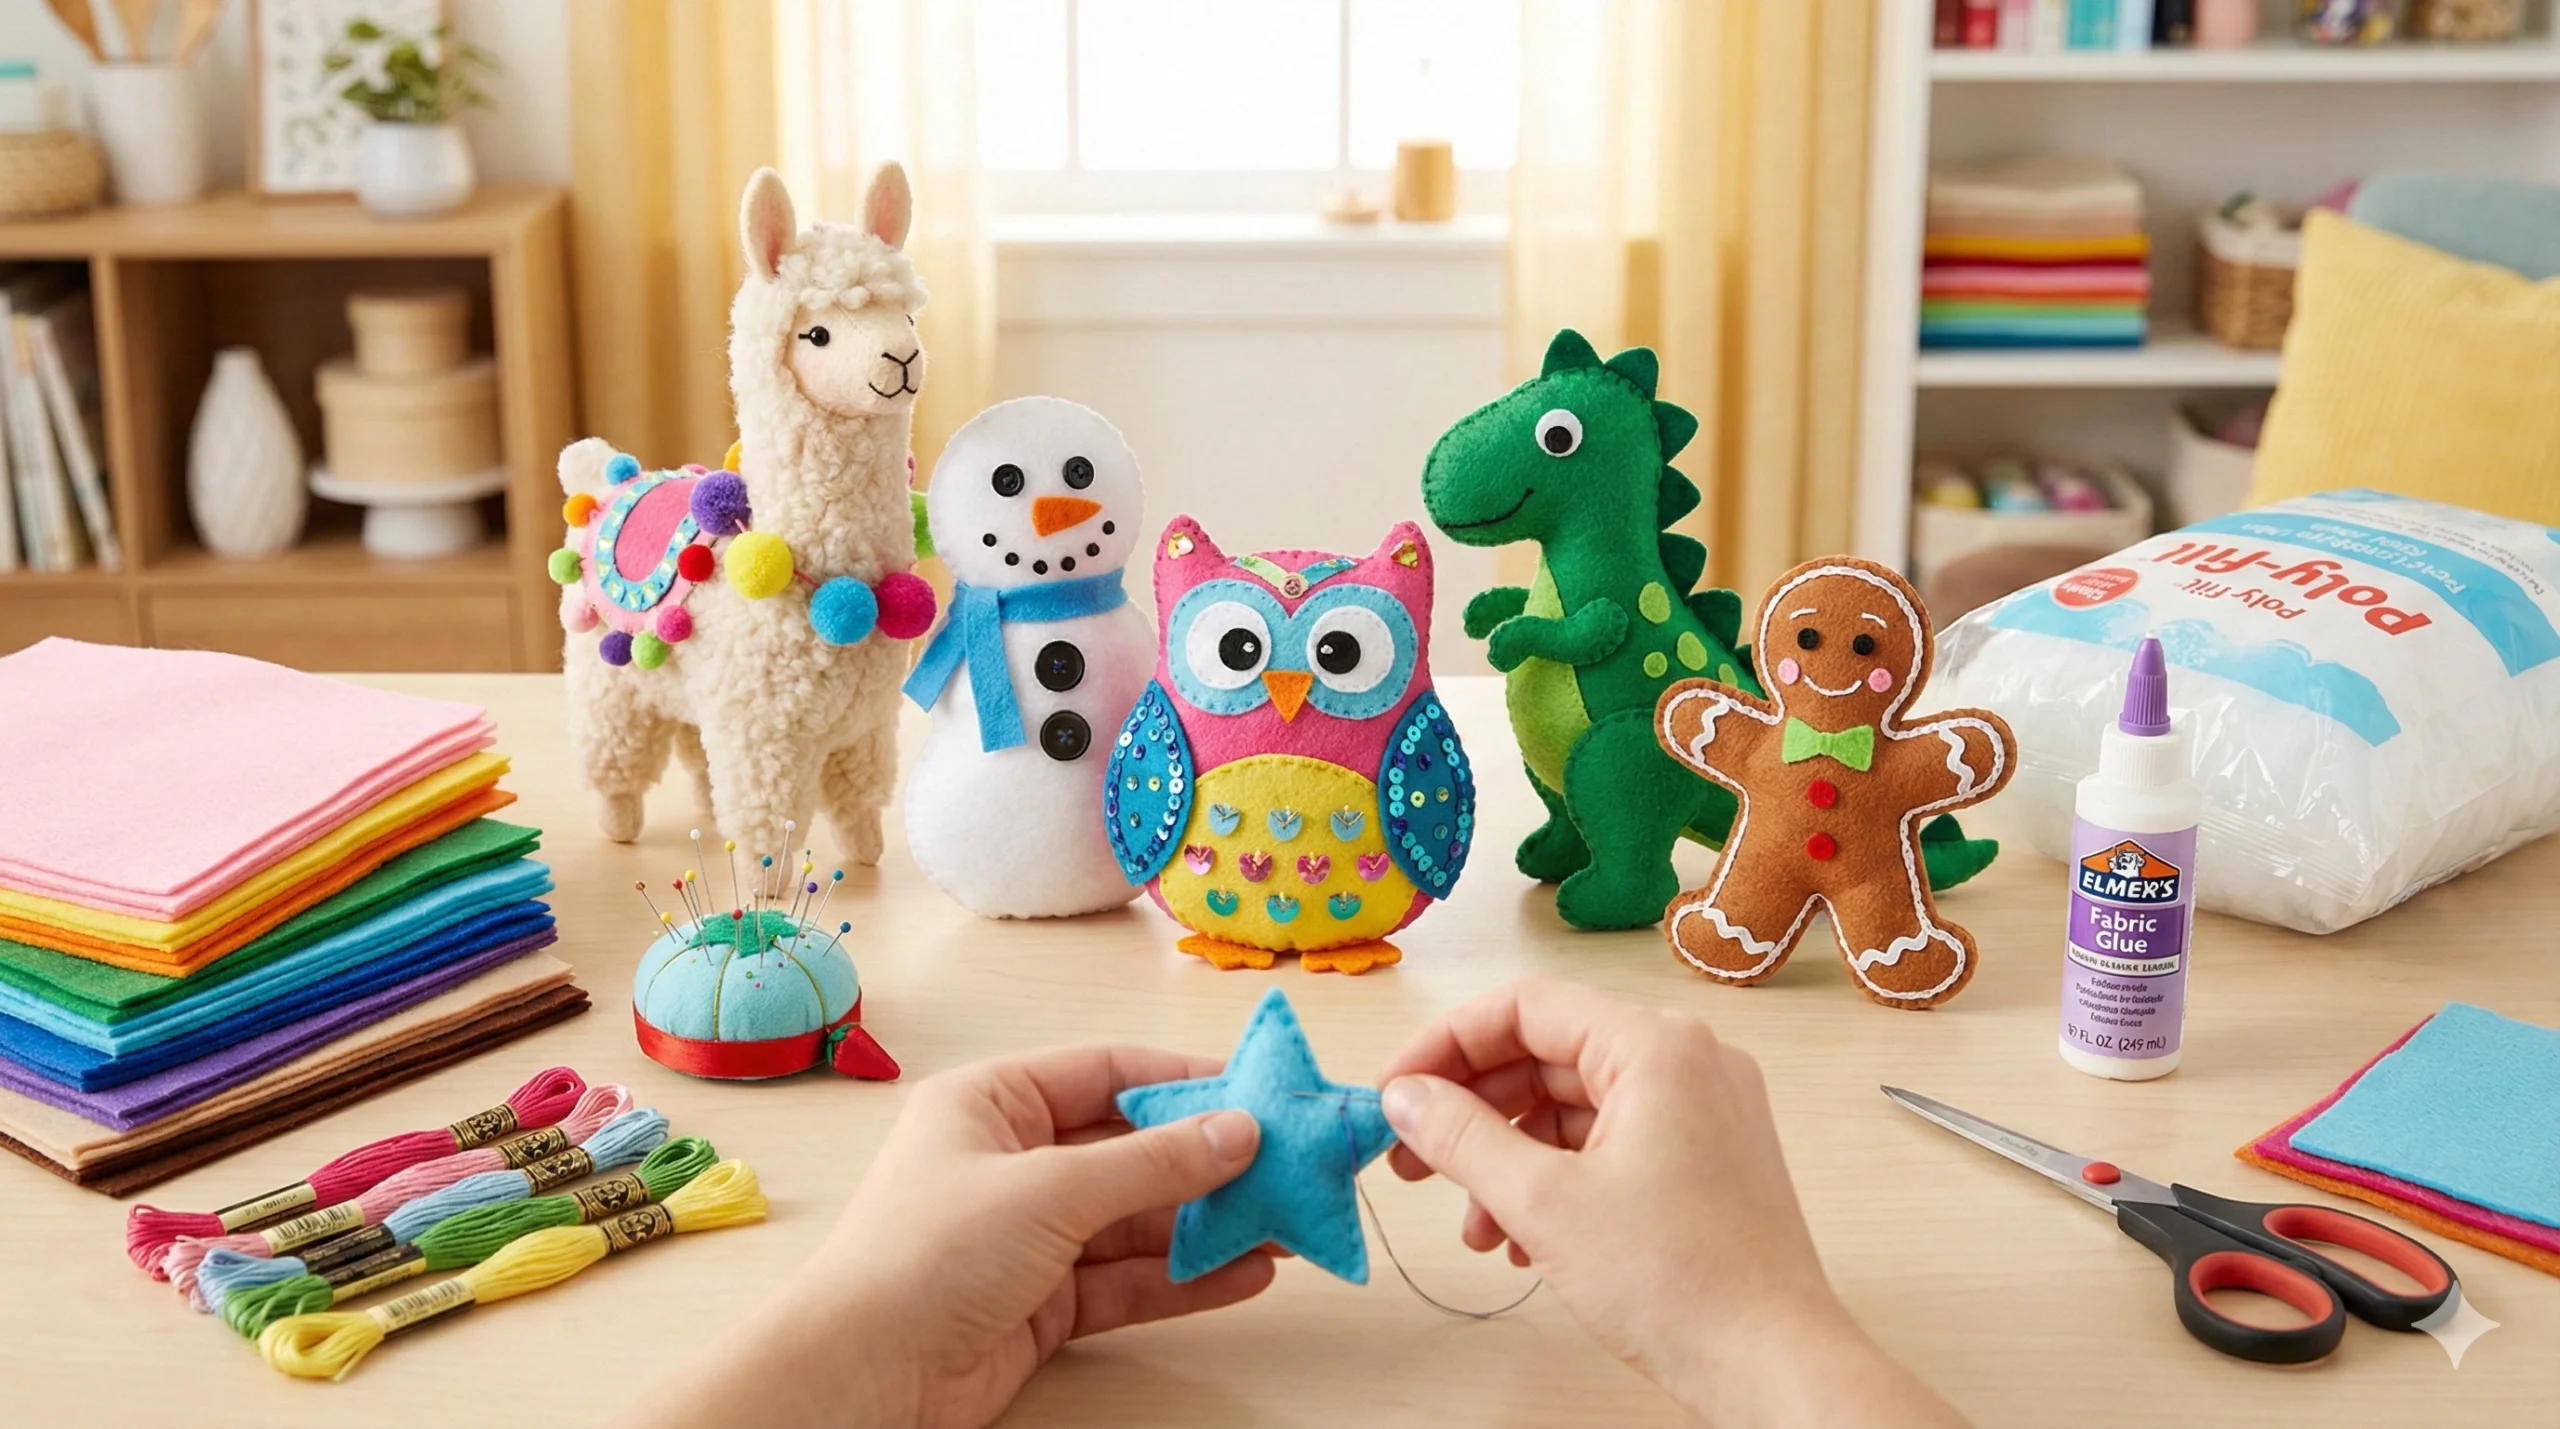
Take these felt plushies for example. They’re as cute as buttons, and they can be refashioned into a variety of things – pocket friends, pencil toppers, refrigerator magnets, bag charms, key chains, and so much more!
If you’re looking for some simple DIY felt plushies for kids, you’ve come to the right place. We have curated a list of ideas and a complete guide on how to get started. Whether you are a teacher planning a craft session, a parent looking for a rainy-day activity, or a beginner wanting to learn the blanket stitch, this guide is for you.
Time to get sewing!
Why Choose Felt for Kids’ Sewing Projects?
Before we dive into the list of 25 adorable ideas, it is important to understand why felt is the “superhero” of crafting fabrics. If you are trying to teach a child to sew, or if you are a beginner yourself, other fabrics like cotton or silk can be slippery and frustrating.
- No Fraying: This is the biggest advantage. unlike woven fabrics, felt does not unravel when you cut it. You don’t need to hem the edges or use a serger. You just cut and sew!
- Stiffness: Felt has a bit of structure to it. It holds its shape well, making it easy for little hands to hold while maneuvering a needle.
- Vibrant Colors: Felt comes in every color of the rainbow, which makes the final result instantly rewarding and eye-catching.
- Affordability: Acrylic craft felt is very cheap. You can make a whole zoo of animals for just a few dollars.
Essential Tools for Your Felt Plushie Station
To get the best results, you need the right tools. Don’t worry, the list is short and budget-friendly.
- Craft Felt: You can use acrylic felt (cheaper, good for kids) or wool blend felt (softer, more durable).
- Embroidery Floss: This is thicker than regular sewing thread and comes in beautiful colors. It stands out against the felt, adding a decorative touch to your stitches.
- Needles: Look for “Embroidery Needles” or “Chenille Needles.” They have larger eyes (easier to thread) and sharper points that glide through felt.
- Poly-fill Stuffing: This is the white fluffy material used to stuff the plushies.
- Fabric Scissors: Sharp scissors are a must for clean edges.
- Fabric Glue: For attaching tiny eyes or cheeks without sewing.
6 Feature Projects to Get You Started
Here are six specific ideas that are perfect for beginners, featuring varied themes from animals to holiday decor.
1. The Party Llama
Get in with the llama craze by making a cute felt llama craft! Llamas are iconic for their fluffy shapes and long necks.
- Make it unique: Go a step further and dress up the llama with tiny multicolored pom-poms glued to its neck to simulate a traditional Peruvian necklace. A colorful “saddle” made from a scrap of contrasting felt makes it truly unique!
2. The Beginner Snowman
This felt snowman is a great project for sewing beginners because it is mostly circles.
- The Technique: Let kids stitch around the white body of the snowman first. Instead of sewing on the tiny coal eyes or carrot nose (which can be fiddly), let them stick on the features using strong fabric glue. This hybrid method (sewing the body, gluing the face) prevents frustration and ensures the project gets finished.
3. The Valentine Owl
DIY felt plushies also make great gifts for a classroom Valentine – like a cute, smiley little owl!
- Design Tip: Make this owl with the brightest pink or red felt you have. Don’t forget the sparkly sequins! You can sew a sequin onto the belly for a bit of sparkle, or glue heart-shaped felt pieces onto the wings to fit the love theme.
4. Elf on the Tree
Forget Elf on the Shelf; instead, go for an Elf on the tree!
- Decor Idea: This little guy will brighten up any place, whether it’s the mantle, the Christmas tree, or simply your desk. By adding a small loop of ribbon between the layers of felt at the top of the hat before sewing it shut, you instantly turn your plushie into a hanging ornament.
5. The Dino Buddy
This is the perfect project for dinosaur lovers to learn sewing!
- Why it works: Dinosaurs have distinct shapes (like the T-Rex or Stegosaurus) that are easy to recognize even with a simple outline. Once you have the basic template, the rest is easy peasy! This dino plushie also makes a great back-to-school gift—imagine it as a lucky charm hanging from a backpack zipper!
6. The Gingerbread Man
Few things are cuter than gingerbread men at Christmas, whether they’re cookies or DIY felt plushies!
- The Details: This little guy is adorable, and the colorful buttons add to his personality! You can use real buttons for the front, and white embroidery floss to stitch “icing” squiggles on the arms and legs.
19 More Adorable Felt Plushie Ideas
To round out our list of 25, here are more fantastic concepts that are easy to draw and sew.
- Sleepy Sloth: Use tan and brown felt. Sew velcro onto the paws so the sloth can “hang” from a pencil.
- Kawaii Toast: A square of light brown felt with a smaller square of yellow “butter” and a smiley face.
- Donut: Two circles with a hole in the middle. Use small straight stitches in different colors to look like sprinkles.
- Unicorn: White body with a rainbow yarn mane and a gold felt horn.
- Narwhal: Similar to a whale shape but with a long tusk. The “Unicorn of the Sea”!
- Cactus: Green felt in a rounded shape. Use pink thread to make little “X” stitches to represent spines. Add a flower on top.
- Pizza Slice: A triangle of yellow felt. Sew on red pepperoni circles.
- Cloud with Rainbow Legs: A white fluffy cloud shape with colorful ribbons hanging down as legs/rain.
- Fox Face: Orange triangle face with white cheeks. Very trendy and cute.
- Mermaid Tail: Just the tail! Decorate with sequins to look like scales. Great as a keychain.
- Space Rocket: A simple cylinder with a triangle top. Add red and orange felt at the bottom for flames.
- Monster: There are no rules here! One eye? Three eyes? Horns? Let the kids design their own monster.
- Strawberry: Red heart-shape (upside down) with green leaves. Use yellow thread for seeds.
- Penguin: Black oval body with a white tummy patch. Simple and winter-ready.
- Heart: The ultimate beginner project. Perfect for learning the whip stitch.
- Star: Use yellow felt. A smiling star makes a great “Good Job” gift.
- Avocado: Dark green skin, light green inside, brown circle pit. The pit can be stuffed separately to pop out!
- Bumble Bee: Yellow and black stripes. Use white felt for wings.
- Emoji Faces: Yellow circles with different expressions stitched in black.
A Quick Guide: How to Make Your First Plushie
If you have never made one before, here is the basic workflow that applies to almost all the ideas above.
Step 1: The Template Draw your shape on a piece of paper or cardstock and cut it out. Keep it simple—avoid thin arms or legs that are hard to turn or stuff.
Step 2: Cutting Pin the paper template to your felt. You will need to cut two identical pieces (one for the front, one for the back).
Step 3: Decorating the Face (Important!) Before you sew the two body pieces together, you must sew the face and details onto the front piece. It is much harder to sew eyes on after the plushie is stuffed! Sew on the mouth, eyes, buttons, or belly patches now.
Step 4: The Stitching Place the front and back pieces together (wrong sides touching). Using embroidery floss, sew around the edge. The Running Stitch (up and down) is easiest for kids, but the Blanket Stitch looks the most professional and protects the edges.
Step 5: Stuffing Stop sewing when you have about a 2-inch gap left. Push the poly-fill stuffing into the plushie using a pencil or chopstick to get it into the corners. Don’t overstuff it, or the stitches might pop!
Step 6: Closing Sew the gap shut and tie a knot. Hide the tail of the thread inside the plushie.
Conclusion
Sewing is a life skill that teaches patience, fine motor coordination, and creativity. By starting with these 25 Adorable DIY Felt Plushies, you aren’t just making toys; you are making memories. Whether you choose the festive Gingerbread Man, the cool Llama, or a simple heart, the result is a handmade treasure that carries the warmth of the maker’s hands.
So, gather your colorful felt scraps, thread your needles, and let your creativity run wild. Happy crafting!