
delight on their faces as they squish the material in their little hands, rolling it into snakes, balls, and imaginary creatures. It is one of the most primal and satisfying forms of play.
But here is the best part: kids don’t have to outgrow this joy. In fact, they can graduate to something even better—clay crafts!
Unlike temporary play-dough, crafting with air-dry or polymer clay allows children to create permanent treasures. From miniature food to functional desk organizers, clay is a medium that bridges the gap between simple play and artistic expression.
With National Clay Week celebrated in the second week of June (June 8th to 14th), there is no better time to get your hands dirty. Whether you are a teacher looking for classroom activities or a parent wanting a screen-free afternoon, this guide to 30 cute and easy clay crafts for kids is your ultimate resource.
Why Clay? The Benefits of Modeling for Kids
Before we dive into the projects, it’s important to understand why clay is such a powerhouse in child development. It isn’t just about making a mess; it’s about building skills.
- Fine Motor Development: Squishing, rolling, flattening, and pinching clay strengthens the muscles in the hands and fingers, preparing children for writing and using scissors.
- Therapeutic Value: The tactile nature of clay is incredibly soothing. It can help reduce anxiety and improve focus in energetic children.
- Spatial Awareness: transforming a 2D idea into a 3D object requires planning and problem-solving.
- Mistake-Friendly: If you don’t like what you made, you just squish it and start over. This teaches resilience and experimentation.
Choosing Your Medium: Polymer vs. Air-Dry Cla
To get the best results, you need the right tools. Generally, there are two main types of clay used for kids’ crafts:
- Air-Dry Clay: This is the most popular choice for younger kids. It feels like traditional earth clay but dries hard when left out for 24-48 hours. It can be painted with acrylics or markers after drying.
- Pros: No oven needed, easy to smooth with water.
- Cons: Can shrink slightly, needs sealing to be waterproof.
- Polymer Clay: This comes in vibrant colors and needs to be baked in a home oven to harden. It creates a plastic-like, durable finish.
- Pros: bright colors (no painting needed), very durable, holds fine detail.
- Cons: Requires adult supervision for baking.
30 Cute and Easy Clay Craft Ideas
We have categorized these ideas to help you find the perfect project for your skill level and interests.
Category 1: Adorable Animals & Creatures
Animals are always a hit with kids. These projects rely on simple shapes like spheres and cylinders.
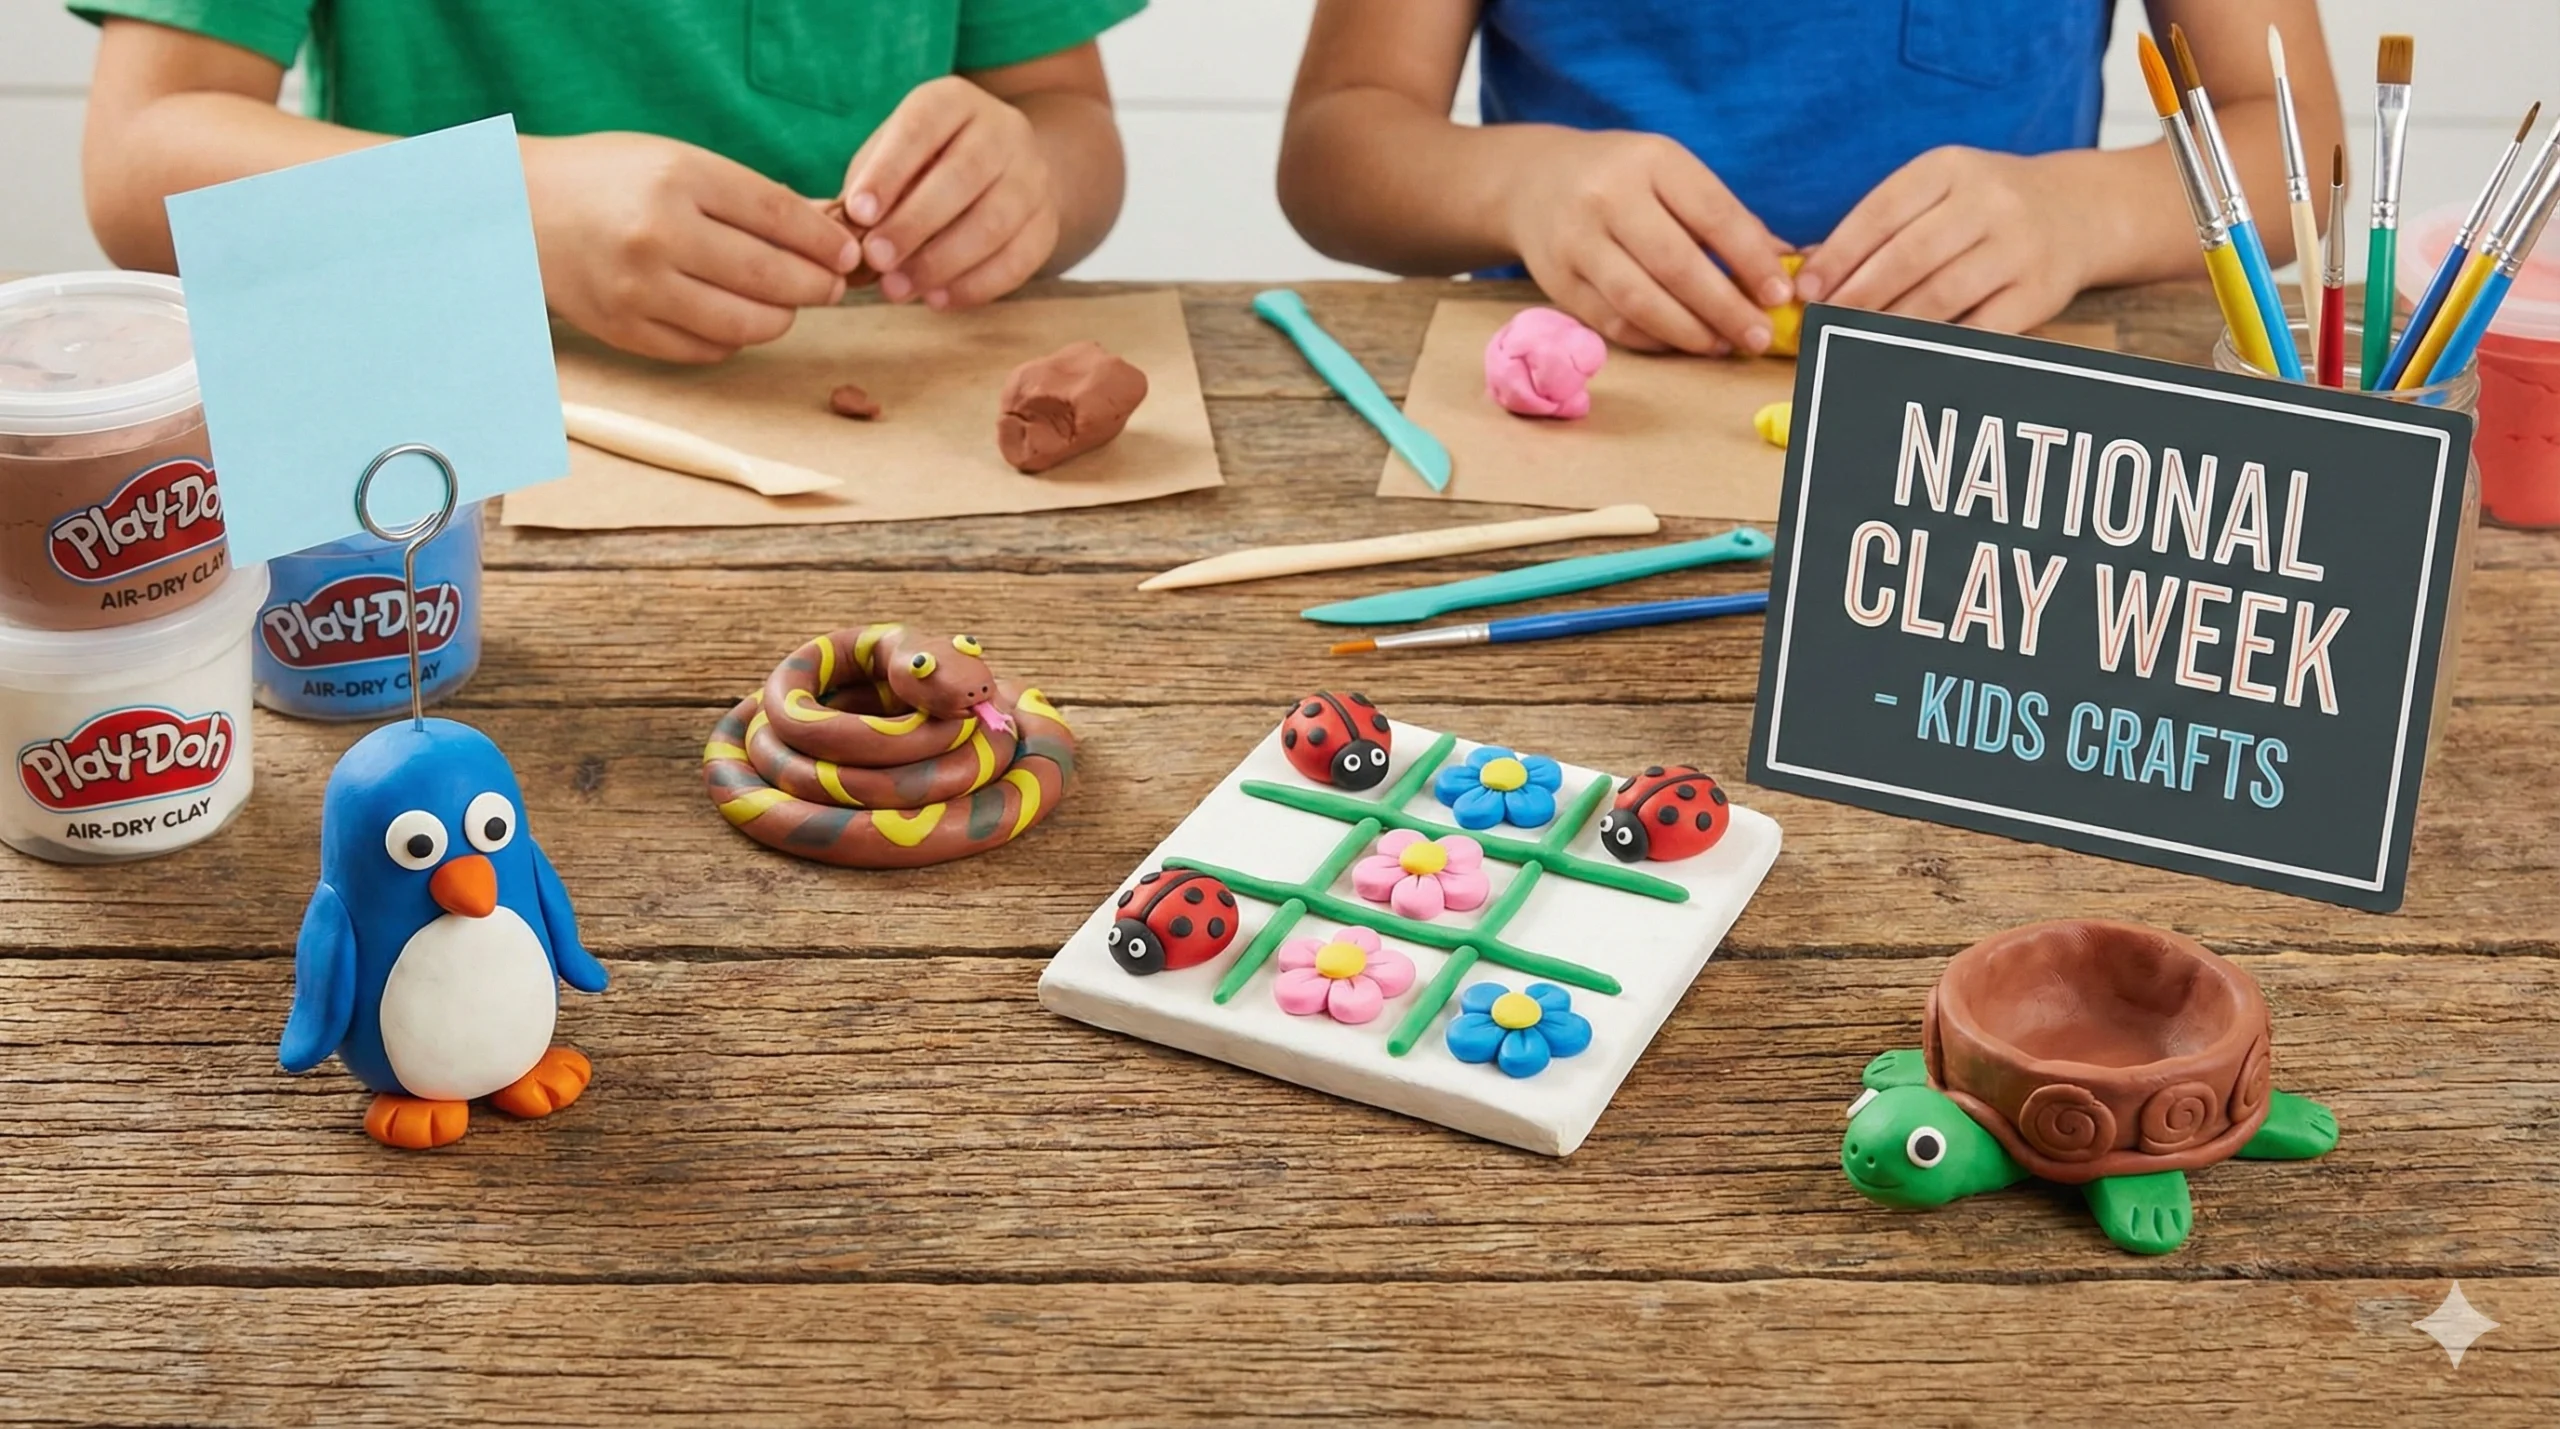
1. Penguin Memo Holder: Create a chubby oval body using black clay. Add a white tummy and an orange beak. Before the clay dries, insert a twisted wire or a paperclip into the top of the head. Once dry, this little penguin can hold photos or notes on a desk.
2. The Classic Coiled Snake: The easiest project for toddlers! Roll a long “snake” of clay. Coil it up into a spiral, lifting the head slightly in the center. Use a texture tool (or a plastic fork) to create scales.
3. Pinch Pot Turtles: Make a simple pinch pot (a bowl shape made by pinching a ball of clay). Turn it upside down to form the shell. Add a head, four legs, and a tail peeking out from underneath. Paint the shell with geometric patterns.
4. Spiky Hedgehogs: Form a teardrop shape. Using a pair of safety scissors, gently snip into the clay on the rounded back to create “spikes” that stick up. Paint the body brown and the face beige.
5. Mini Octopus Buddies: Roll a ball for the head. Then, roll eight smaller “sausages” for legs. Attach the legs to the bottom of the head, curling the ends up for a whimsical look.
6. Snail on a Leaf: Make a flat leaf shape using a real leaf to stamp texture into the clay. Create a snail with a coiled shell and place it on top.
7. Clay Birds in a Nest: Use a garlic press to push clay through—this creates “spaghetti” strands that look like a twig nest. Mold tiny blue birds to sit inside.
Category 2: Fun & Games
Why just look at art when you can play with it?
8. Spring-Themed Tic-Tac-Toe: Forget X’s and O’s. Create a flat slab of clay and score a grid into it. Then, sculpt 5 tiny bees and 5 tiny flowers (or ladybugs). Once dry, you have a custom travel game!
9. Handmade Dice: Shape a perfect cube. Use the end of a paintbrush to indent the dots (1 through 6). This is great for math games!
10. Clay Marbles: Roll tiny, uniform spheres. If using polymer clay, you can swirl different colors together for a galaxy effect.
11. Finger Puppets: Mold clay around the child’s finger (make it slightly loose to account for shrinkage). Create characters like monsters, aliens, or farm animals.
Category 3: Wearable Art (Jewelry)
Perfect for older kids and pre-teens.
12. Fruit Slice Charms: Make a cane (cylinder) of clay that looks like a citrus slice when cut. Slice thin disks, poke a hole at the top, and string them onto a necklace.
13. BFF Heart Pendants: Cut a heart shape out of a flat slab of clay. Use a zig-zag cut to separate it into two halves. Poke holes in both, dry them, and give one half to a best friend.
14. Chunky Bead Necklace: Roll clay into balls, cubes, or tubes. Use a skewer to create a hole through the center. Paint them in neon colors and string them on yarn.
15. Thumbprint Pendants: Flatten a ball of clay into a disk. Have the child press their thumb into the center. These make precious keepsakes for parents or grandparents.
Category 4: Home Decor & Useful Items
Functional art is the best kind of art.
16. Leaf Impression Bowls: Go for a nature walk and find a large leaf with thick veins. Roll out the clay, press the leaf into it, and cut around the edge. Place the clay leaf inside a real bowl to dry so it takes on a curved shape.
17. Succulent Plant Pots: Make a slightly larger pinch pot. Ensure you poke a drainage hole in the bottom. These are perfect for holding tiny succulent plants.
18. Braided Coasters: Roll three long snakes of clay. Braid them together, then coil the braid into a flat circle. Flatten it gently with a rolling pin for a boho-style coaster.
19. Monstera Leaf Key Tray: Cut a slab of clay into the shape of a monstera leaf. Curve the edges up slightly. It’s perfect for holding keys or coins.
20. Incense Holder: Shape a simple mound or a small figure (like a frog or lotus). Poke a hole at the correct angle to hold an incense stick.
Category 5: Miniature Food
Kids love making pretend food for their dolls or play kitchens.
21. Mini Donuts: Shape a small ring of tan clay. Add a layer of pink or chocolate-colored clay for frosting. Use real sprinkles or tiny clay bits for decoration.
22. Pizza Slices: Cut a triangle of dough. Add red sauce (clay) and tiny chopped-up bits of yellow and white clay for cheese.
23. Ice Cream Cones: Twist a cone shape for the base and texture it with a knife. Add a ball of clay on top and give it a “ruffled” edge to look like scooped ice cream.
24. Macarons: Make two small domes and a thin layer of “filling” in the middle. These look adorable in pastel colors.
25. Burger and Fries: Challenge your kids to make a full meal! A tiny burger, fries, and even a drink cup.
Category 6: Seasonal & Fantasy
26. Dragon Eggs: Shape an egg. Cover it with tiny “scales” (flattened tear-drop shapes) starting from the bottom and overlapping as you go up.
27. Fairy House Jars: Take a small glass jar. Cover the outside with clay to make it look like a mushroom house or a tree stump. Leave “windows” so a tea light can shine through.
28. Halloween Pumpkins: Roll a ball, flatten it slightly, and use a tool to make vertical grooves. Add a green stem.
29. Snowmen: The easiest winter craft. Three white balls stacked on top of each other. Use twigs for arms.
30. Easter Bunny Napkin Rings: Create a ring of clay wide enough for a napkin. Attach two bunny ears to the top.
To ensure your National Clay Week projects don’t end in tears (or cracks), follow these pro tips:
1. The Toothbrush Trick (Joining Clay)
If you are attaching two pieces of air-dry clay (like a head to a body), don’t just push them together. They will fall apart when dry. Instead, score both surfaces (scratch them up), add a little water (slip), and then press them together. This works like glue.
2. Avoiding Cracks
Cracks happen when the outside of the clay dries faster than the inside. To prevent this, keep your hands slightly damp while working. If you see a crack forming, smooth it over with a wet finger immediately. For thick projects, let them dry slowly away from direct sunlight or heat vents.
3. Sealing is Secret
Air-dry clay is porous. If you want your pinch pot to hold a plant or your coaster to handle a wet cup, you must seal it. Once the paint is dry, apply a coat of Mod Podge or an acrylic varnish. This makes the colors pop and protects the clay from moisture.
Conclusion
Clay is one of the most versatile materials in the crafting world. It teaches patience, encourages three-dimensional thinking, and results in adorable creations that you can keep forever.
Whether you are making a Spring Tic-Tac-Toe set to play in the garden or a Penguin Memo Holder to organize your desk, these 30 cute and easy clay crafts are sure to keep the kids entertained for hours.
So, this National Clay Week, put away the tablets, roll up your sleeves, and get ready to squish, shape, and create!
Frequently Asked Questions (FAQs)
Q: How long does air-dry clay take to dry? A: It depends on the thickness of the project, but generally, it takes 24 to 48 hours. Turn the object over halfway through drying to ensure the bottom dries evenly.
Q: Can I bake air-dry clay to make it dry faster? A: It is not recommended as it can cause the clay to crack or bubble. Patience is key! However, you can place it near a fan to speed up air circulation.
Q: What is the best paint for clay? A: Acrylic paint is the best choice. It is thick, opaque, and dries quickly. For younger kids, washable tempera paint works, but the finish won’t be as glossy or durable.