
As soon as the first crisp Fall leaf touches the ground, families everywhere start shifting into “spooky mode.” The search begins for the perfect costumes, the spookiest home decor, and, of course, the most engaging crafts to keep the little ones busy!
We have seen countless Halloween crafts made from Popsicle sticks, paper plates, toilet paper tubes, and even dried pasta. However, sometimes the best materials are the simplest ones. This season, we are going a little more creative by using nothing but colorful construction paper to create 3D characters.
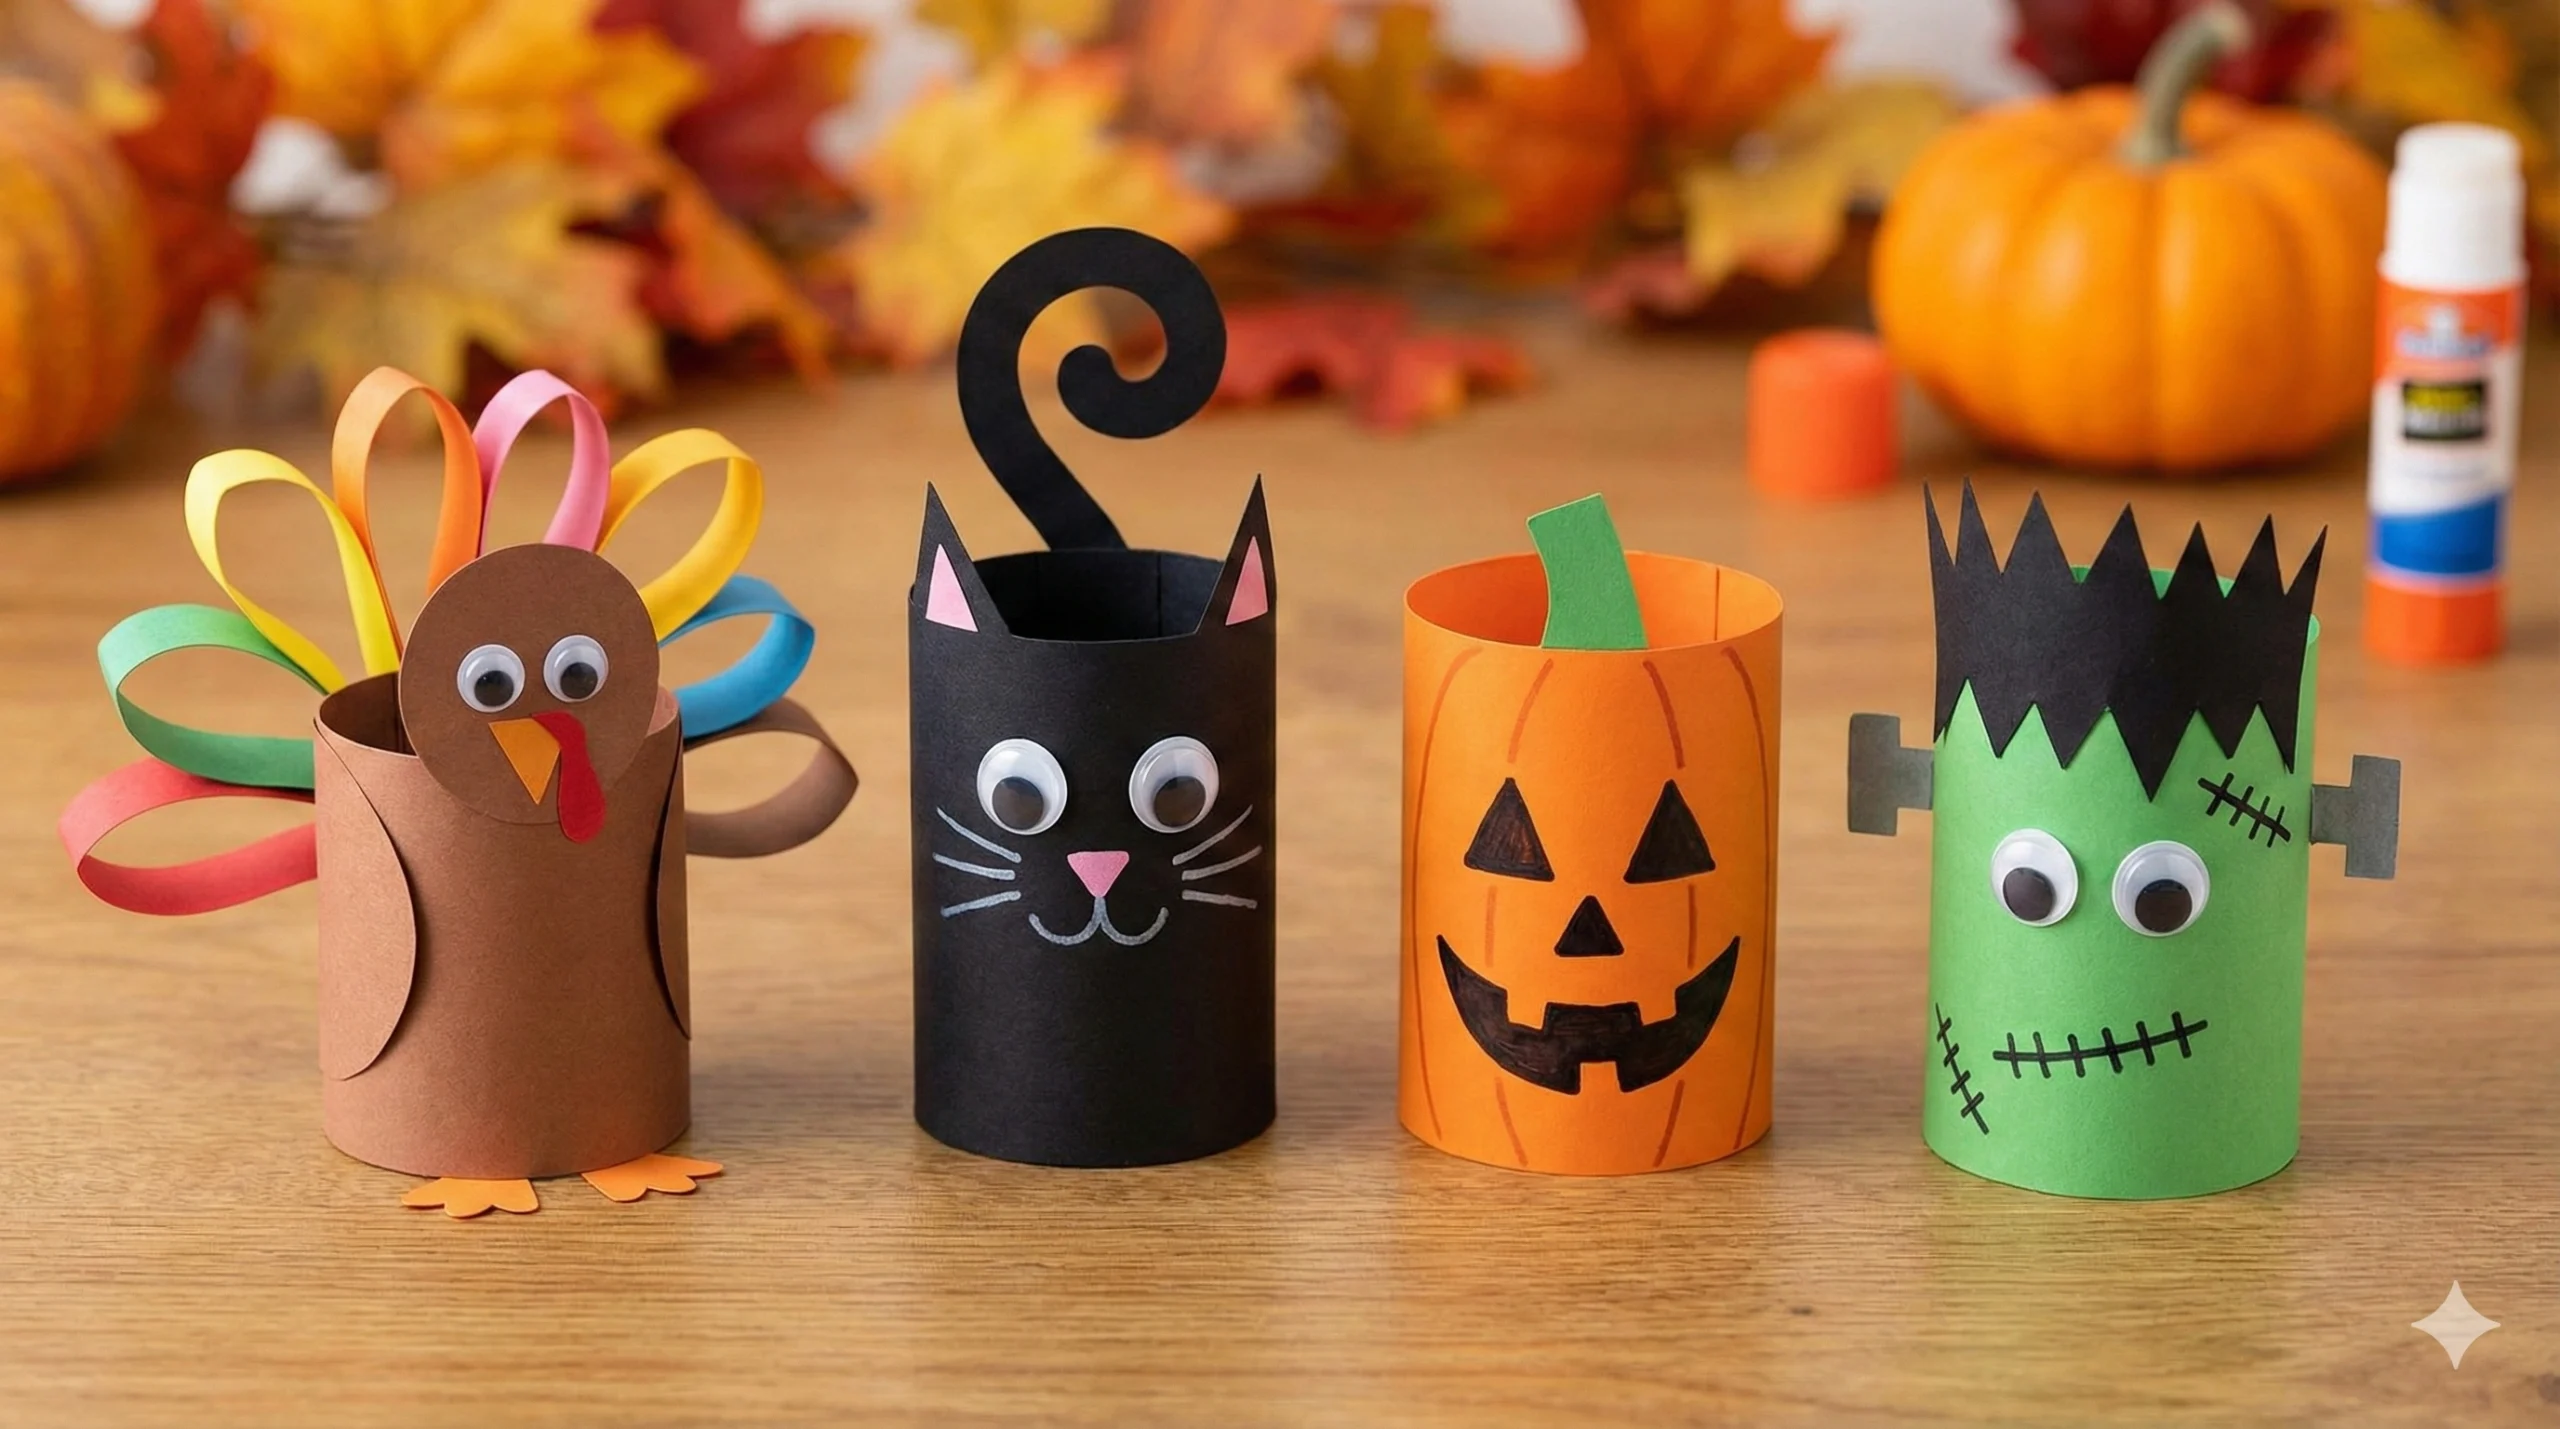
These Rolled Paper Halloween Crafts are perfect for bridging the gap between Halloween and Thanksgiving. The best part? We aren’t just making one character; we are making an entire squad! In this guide, you will learn how to create four distinct characters: Frankenstein’s Monster, a Jack-o’-Lantern, a Spooky Black Cat, and a Thanksgiving Turkey.
These crafts are excellent for developing fine motor skills, require minimal supplies, and make for adorable table centerpieces or mantle decorations.
Why Choose Rolled Paper Crafts?
Before we dive into the glue and scissors, let’s talk about why this specific technique is so great for kids.
- Simplicity: The base of every character is a simple cylinder made from a strip of paper. Once a child masters rolling the paper and gluing it shut, they can make a hundred different variations.
- 3D Structure: unlike flat drawing or coloring, rolled paper crafts stand up on their own. This turns them into toys or statues rather than just pictures for the fridge.
- Low Cost: You don’t need expensive kits. If you have a pack of construction paper and a glue stick, you are ready to go.
- Fine Motor Skills: The act of curling the paper, holding it in place while the glue sets, and cutting out tiny details like beaks and whiskers helps strengthen small hand muscles.
Essential Supplies
You don’t need a trip to the expensive hobby store for this project. Gather these basic household items:
- Craft Paper / Cardstock: You will need specific colors: Orange (Pumpkin), Green (Frankenstein), Black (Cat), Brown (Turkey), and assorted scraps (Red, Yellow, White).
- Googly Eyes: Various sizes add character!
- Adhesive: A glue stick works best for paper, but white school glue is better for attaching googly eyes.
- Scissors: Child-safe safety scissors for the kids and a sharper pair for adults.
- Markers: Black Sharpies or felt-tip pens for drawing mouths, stitches, and whiskers.
- Ruler and Pencil: For measuring the strips (optional, but helps with uniformity).
The Basic Technique: How to Make the Body
All four characters start with the same basic step: creating the Paper Roll Body.
- Cut the Strip: Cut a broad strip of craft paper. A good size is approximately 4 inches wide by 11 inches long (the length of a standard paper sheet). If you want shorter, fatter characters, cut the strip 3 inches wide.
- Apply Glue: Apply a generous line of glue to one of the short edges of the strip.
- Roll and Hold: Gently curl the paper around to form a cylinder. Overlap the glued edge with the other end.
- Secure: Pinch the seam with your fingers for about 10-20 seconds to ensure the glue sets. You now have a standing paper tube!
Now, let’s customize this tube into our four festive friends.
Character 1: The Thanksgiving Turkey
Since Thanksgiving often gets overlooked in the rush for candy, let’s start with the bird! This craft makes a fantastic place card holder for your Thanksgiving dinner table.
Specific Colors: Brown (body), Red, Orange, Yellow (feathers).
Instructions:
- The Body: Create a brown paper roll using the basic technique above.
- The Feathers: Cut 5 to 6 strips of red, orange, and yellow paper. These should be about 1 inch wide and 4 inches long.
- Looping the Feathers: Take one strip, fold it in half so the two ends meet (do not crease the fold, keep it rounded like a teardrop), and glue the ends together. Repeat for all strips.
- Attaching Feathers: Glue these colorful paper loops onto the back of the brown roll, fanning them out so they peek over the top like a turkey tail.
- The Face: Cut a small triangle from orange paper for the beak. Cut a squiggly shape from red paper for the “wattle” (the red bit that hangs down).
- Assembly: Glue the wattle and beak to the front of the roll. Add two googly eyes above the beak. Your turkey is ready to gobble!
Character 2: The Spooky Black Cat
A Halloween classic! This cat is more cute than scary, making it perfect for toddlers and preschoolers.
Specific Colors: Black (body & ears), Pink (nose), White or Yellow (eyes).
Instructions:
- The Body: Create a black paper roll. Tip: Black paper can be hard to see glue on, so use plenty of light.
- The Ears: Cut two small triangles out of black paper. To add depth, cut two slightly smaller pink triangles and glue them inside the black ones. Glue the ears to the top rim of the roll, sticking up.
- The Tail: Cut a long, thin strip of black paper (about 0.5 inches wide). Wrap it tightly around a pencil to curl it. Glue one end to the back of the roll so the curly tail sticks out or wraps around the body.
- The Whiskers: Cut very thin slivers of white or grey paper. Glue three on each side of the face area.
- The Face: Add googly eyes (green or yellow ones look spookiest!). Use a pink marker or paper cutout for a small nose, and draw a mouth with a white gel pen or silver marker if you have one.
Character 3: The Jack-o’-Lantern
You can’t have Halloween without a pumpkin. This is the easiest of the bunch and allows for the most creativity with the facial expressions.
Specific Colors: Orange (body), Green (stem/leaf), Black (face).
Instructions:
- The Body: Create a bright orange paper roll.
- The Stem: Cut a strip of green paper about 1 inch wide. Roll it into a very tight, small tube and glue it. Adhere this inside the top rim of the orange roll so it pokes out.
- The Vines: Cut a thin green strip and curl it with scissors (like curling ribbon for a gift). Glue it next to the stem.
- The Face: This is where your child can choose!
- Option A: Use a black Sharpie to draw triangles for eyes and a toothy grin.
- Option B: Practice scissor skills by cutting shapes out of black paper and gluing them on.
- Option C: Make a “silly” pumpkin with googly eyes and a goofy smile.
Character 4: Frankenstein’s Monster
He’s green, he’s mean, but mostly he’s just adorable. This character involves a bit more detail with the hair.
Specific Colors: Bright Green (body), Black (hair), Grey (bolts).
Instructions:
- The Body: Create a lime green paper roll.
- The Hair: Cut a strip of black paper that is the same width as your green roll (approx. 4 inches) but only about 1.5 inches tall. Use scissors to cut a zigzag or “spiky” pattern along one of the long edges.
- Attaching Hair: Glue the black strip around the top of the green roll. The zigzag edge should be facing down, creating the look of bangs on the monster’s forehead.
- The Bolts: Cut two small shapes resembling the letter ‘T’ out of grey paper. Fold the bottom tab of the ‘T’ and glue one onto each side of the “neck” (lower part of the roll).
- The Face: Add googly eyes. Use a black marker to draw a straight line for a mouth and add a few vertical dashes to look like stitches. Don’t forget to draw a little scar on his cheek!
Tips for a Successful Craft Session
- Paper Weight Matters: While standard construction paper is great, cardstock will make your figures sturdier and longer-lasting. If you only have thin printer paper, consider rolling two layers to make it stand up better.
- Size Variation: Make a “family” of characters! Cut the paper strips at different heights—make a tall, thin Frankenstein and a short, stout Pumpkin.
- Let it Dry: The hardest part for kids is waiting for the glue to dry. If the rolls keep popping open, use paper clips or clothespins to hold the seam together for a few minutes while the glue sets.
- Mix and Match: Encourage creativity! Maybe the cat wants a witch hat, or the pumpkin wants a mustache. There are no rules in art.
Conclusion
Halloween and Thanksgiving are seasons rich with imagery, and bringing that into your home doesn’t have to be complicated or expensive. These Rolled Paper Halloween Crafts offer a fantastic way to engage with your children, reduce screen time, and decorate your home with something personal and handmade.