
There is a magical window in childhood—somewhere between birth and preschool—where books are not just stories; they are toys, friends, and gateways to a new world. I am a firm believer that you are never too young to fall in love with a book. While an 8-month-old might not be analyzing plot structures, they are soaking in the colors, the tactile feel of the pages, and the rhythm of your voice.
One of the absolute best books for this age group is “Charlie Chick” by Nick Denchfield and Ant Parker. It is a pop-up masterpiece about a chick with a massive appetite and a belly to match. It is funny, surprising, and engages children in a way standard flat books sometimes miss.
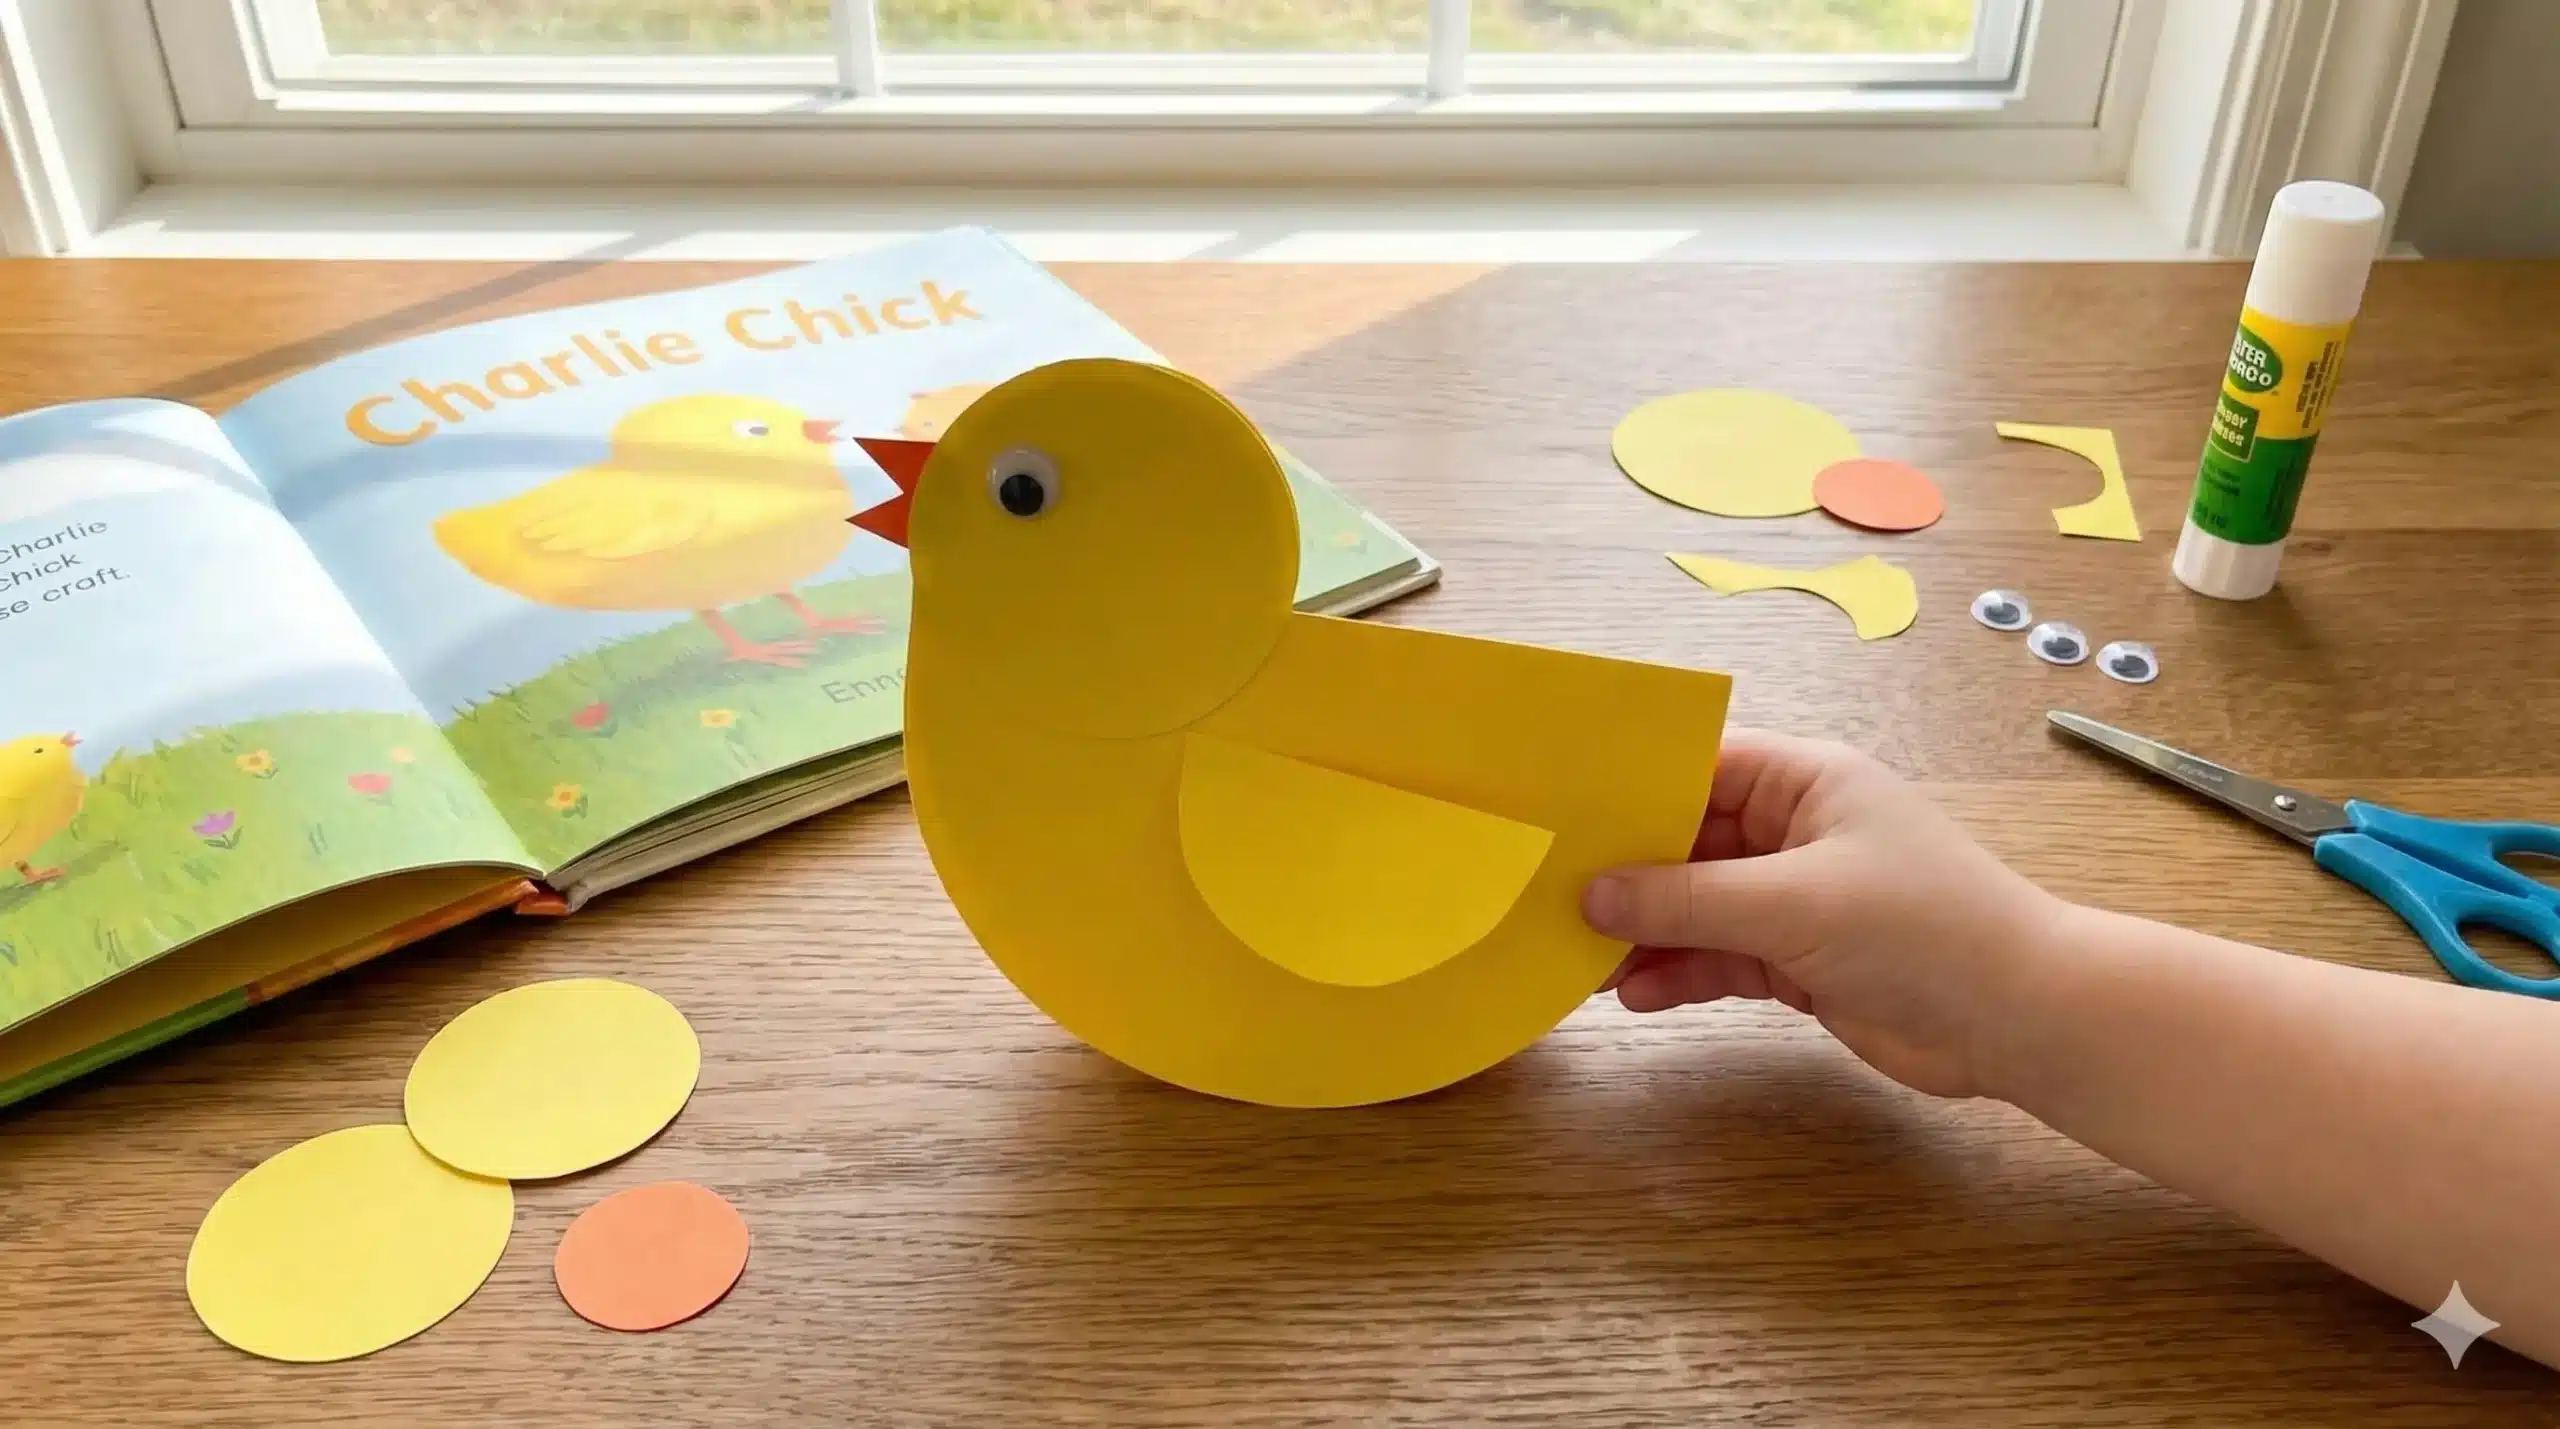
To celebrate the joy of reading (and National Reading Month!), we are bringing Charlie to life off the pages. This Rocking Chick Paper Craft is the perfect extension activity. It moves, it rocks, and it is incredibly easy to make.
Whether you are a teacher looking for a spring classroom activity, a librarian planning storytime, or a parent stuck at home on a rainy day, this guide will walk you through creating an adorable, interactive paper toy.
Why Pair Crafts with Reading?
Before we dive into the glue and scissors, let’s talk about why this activity is worth your time. Combining a hands-on craft with a reading session is known as “Extension Learning.”
- Recall and Comprehension: When a child builds a character from a story, they have to recall details. Is Charlie yellow? Does he have a big beak? This reinforces memory.
- Kinesthetic Connection: Young children learn through doing. Making a chick that actually “rocks” brings the physics of movement into the lesson.
- Fine Motor Development: Cutting circles, gluing small eyes, and folding paper are all excellent workouts for the small muscles in the hands that will eventually be used for writing.
Materials Required
This craft is designed to be budget-friendly. You likely have everything you need in your kitchen junk drawer or basic craft bin.
- Construction Paper (Heavy Stock):
- Yellow: For the body and head.
- Orange: For the beak and feet.
- White: (Optional) If you want to make an eggshell hat.
- Googly Eyes: The bigger, the goofier! If you don’t have these, you can draw eyes with markers.
- A Round Object for Tracing: A small dessert bowl (approx. 6 inches diameter) and a drinking glass or cup (approx. 3 inches diameter).
- Pencil: For tracing shapes.
- Scissors: Child-safe scissors for the kids, sharper ones for adults.
- Glue Stick: Liquid glue works too, but a glue stick is less messy and dries faster for paper-to-paper connections.
- Markers/Crayons: For adding details like wings or feathers.
Step-by-Step Instructions: How to Make Your Rocking Chick
This craft relies on a simple engineering trick: folding a circle in half creates a curved base that allows the paper to rock back and forth without falling over.
Step 1: Trace and Cut the Circles
Shutterstock
Start by preparing the main shapes. You need two circles from the yellow construction paper.
- The Body: Use your larger bowl to trace a big circle. This will become the rocking body.
- The Head: Use the cup or glass to trace a smaller circle.
- Cutting Tip: If your child is learning to use scissors, draw a thick black line with a marker over your pencil trace. It gives them a clearer guide to follow.
Step 2: Create the Rocking Mechanism
Take the large yellow circle and fold it perfectly in half. Crease the fold sharply with your fingernail.
- When you stand it up on the curved edge, it should rock back and forth like a seesaw. This is the body of your chick.
- Note: Keep the fold at the top (like a tent) or at the bottom (like a boat). For this craft, we want it like a boat, so the curved part is on the table.
Step 3: Attach the Head
Take the small yellow circle (the head). Glue it to one end of your folded large circle.
- Apply glue to the bottom edge of the head circle.
- Press it firmly against one of the pointed corners of the folded body.
- Important: Make sure you don’t glue the “boat” shut! The body needs to remain slightly open at the bottom to stand up.
Step 4: Make the Beak and Wings
Now, let’s give Charlie his personality.
- The Beak: Cut a small diamond shape out of the orange paper. Fold it in half to make a triangle. Glue this to the center of the head so the beak can open and close—just like Charlie’s big appetite!
- The Wings: Cut two semi-circles or heart shapes from the remaining yellow paper. Glue one on each side of the body. You can fringe the edges with scissors to make them look like feathers.
Step 5: The Feet (Optional but Cute)
While chickens don’t usually have their feet sticking out when they are nesting, adding feet makes the craft look funnier.
- Cut two L-shapes or small webbed feet from orange paper.
- Glue them to the inside of the bottom fold so they peek out.
Step 6: The Finishing Touches
- Eyes: Peel the backing off your googly eyes and stick them onto the head.
- Feathers: If you have actual craft feathers (yellow or white), glue a tuft to the top of the chick’s head for a playful “bedhead” look.
How to Play: The “Rocking” Action
Once the glue is dry, set your chick on a flat surface (a table or hard floor works best). Give the tail end a gentle tap. The chick should rock forward and backward, pecking at the ground!
Activity Idea: Pour some dried beans or corn kernels on the table. Have your child “rock” the chick toward the food to pretend it is eating, just like Charlie Chick does in the book.
5 Educational Extensions for This Craft
Don’t let the fun stop once the craft is done. Here is how to squeeze more learning out of this activity:
- Science Lesson (Life Cycles): Talk about where chicks come from. You can make a second craft—a white egg—and hide the chick behind it to explain hatching.
- Color Recognition: If you are working with toddlers, make a whole flock of chicks in different colors. Ask them to “Rock the BLUE chick” or “Feed the RED chick.”
- Counting: Make 5 small chicks. Recite the rhyme “Five Little Ducks” (changing it to Chicks) and use the crafts as props for subtraction.
- Emotional Intelligence: In the book, Charlie grows big and surprises everyone. Talk to your child about growing up. What can you do now that you couldn’t do when you were a baby?
- Engineering Basics: Ask your child why the chick rocks. Explain that the curved bottom acts like a wheel, allowing movement. What happens if we make the circle square? (Try it and see—it won’t rock!).
Troubleshooting Tips
- The Chick Won’t Stand Up: If the paper is too thin (like printer paper), the chick might be floppy. Reinforce it by gluing two sheets of paper together before cutting.
- The Chick Tips Over: If the head is too heavy, the chick might face-plant. Glue a small coin or a metal washer to the inside of the tail end of the body. This acts as a counterweight and will make the rocking motion even smoother.
- Glue Mess: If you are doing this with a large group of kids, use glue dots instead of liquid glue. They are instant, strong, and mess-free.
Conclusion
The Rocking Chick is more than just a piece of paper; it is a memory in the making. By connecting this craft to a beloved story like Charlie Chick, you are reinforcing the idea that reading is active, creative, and fun.