
Before we get into the “how-to,” it’s important to share the message behind Save a Spider Day. Many children grow up with a natural fear of spiders, but understanding their role in the ecosystem can turn that fear into respect.
Why Spiders are Environmental Superheroes:
- Natural Pest Control: Spiders act as a chemical-free way to manage pests. They eat common household nuisances like flies, gnats, and—most importantly—mosquitoes that can carry diseases.
- Biodiversity Indicators: The presence of a healthy spider population usually indicates a healthy, thriving local ecosystem.
- Food for Others: They are a vital food source for many beautiful birds and small reptiles.
- Incredible Engineering: Watching a spider weave a web is a lesson in geometry and structural engineering. Their silk is one of the strongest natural fibers on the planet!
The Benefits of Using Styrofoam and Paper Plates
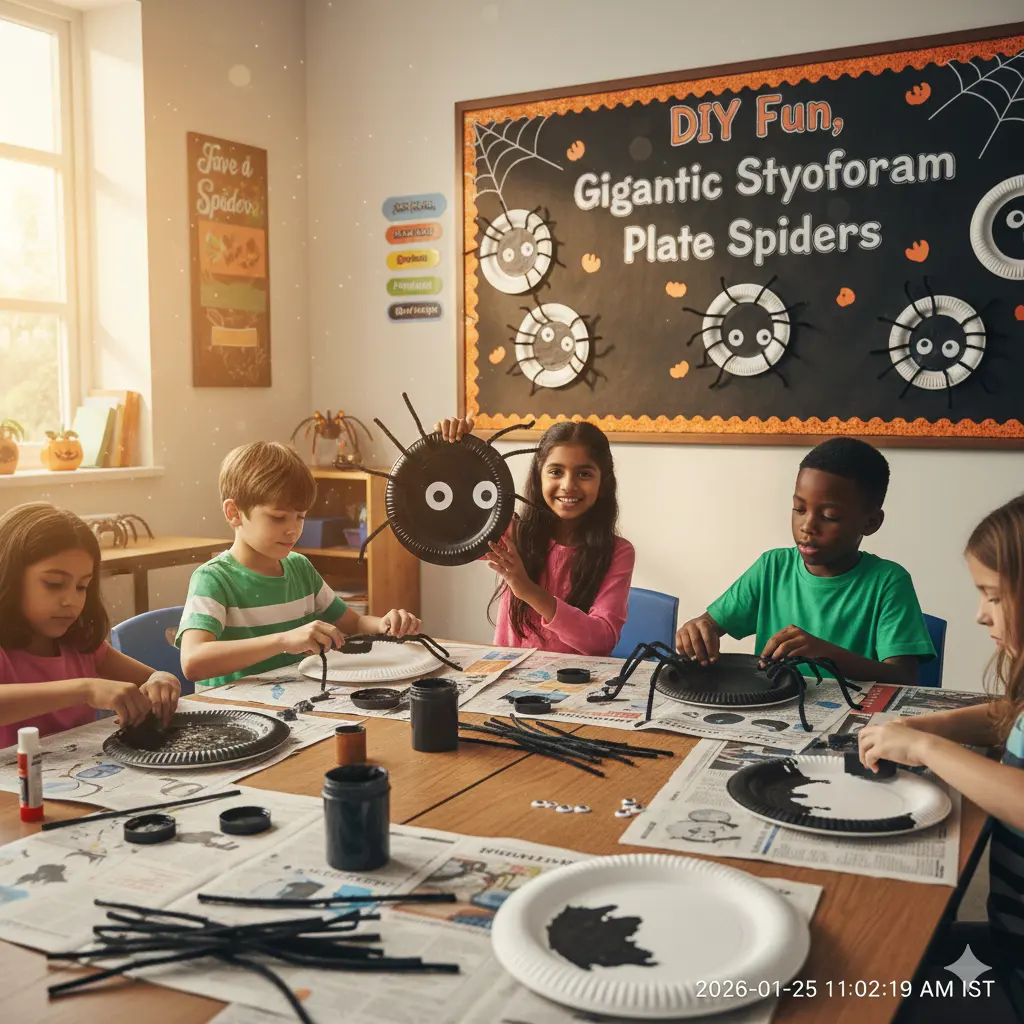
In this project, we advocate for using recycled materials. If you have leftover plates from a party, don’t throw them away!
Using a Styrofoam or leaf plate offers several advantages:
- Durability: Unlike flat construction paper, these plates have a 3D rim that adds depth to the spider’s “body.”
- Texture: The porous surface of Styrofoam and the natural fibers of leaf plates absorb acrylic paint beautifully, creating a rich, matte black finish.
- Ease of Use: It is incredibly easy to pierce these materials with pipe cleaners (chenille sticks), making it a frustration-free experience for little hands.
Supplies Required for Giant Spiders
To make one gigantic spider, you will need:
- 2 Plates: One large (approx. 18″ diameter) for the body and one smaller (approx. 6″ diameter) for the head. You can use paper, Thermocol, Styrofoam, or leaf plates.
- Black Acrylic Paint: For a deep, opaque finish.
- Sponge or Large Brush: To cover the surface area quickly.
- White Paper Circles or Stickers: To create the eyes.
- Black Marker: To draw pupils on the eyes.
- Black Pipe Cleaners (Chenille Sticks): You’ll need several to create long, spindly legs.
- Stapler: To join the head to the body.
- Double-Sided Foam Tape: For hanging your spider on walls or ceilings.
- Old Newspapers: To protect your workspace from paint.
Step-by-Step Instructions: DIY Gigantic Plate Spider
Step 1: Prepare Your Workspace
Spider crafting can get a little messy with black paint! Lay down several layers of old newspaper on a flat table or floor. If you don’t have large plates, you can use black construction paper—just find the largest round object in your house (like a pizza tray), trace it, and cut out your circles.
Step 2: Painting the Body
Flip your plates upside down so the bottom of the plate is facing up. This gives the spider a curved, dome-like appearance. Using a sponge dipped in black acrylic paint, dab the entire surface of both plates.
Pro Tip: Sponging creates a textured, “fuzzy” look that mimics a real spider’s body much better than a smooth brush stroke would. Let the plates dry completely, preferably overnight.
Step 3: Attach the Head to the Body
Once dry, take your smaller plate (the head) and overlap it slightly with the larger plate (the body). Use a stapler to secure them together. Two or three staples should be enough to hold the weight.
Step 4: Adding the Spindly Legs
A spider isn’t a spider without eight legs!
- Method A (Pipe Cleaners): Use a sharp pencil or the end of the pipe cleaner to pierce the rim of the large plate. Poke four holes on the left side and four on the right. Thread the pipe cleaners through and twist them securely. Bend them in the middle to create “knees” so the spider looks like it’s crawling.
- Method B (Accordion Paper): If you don’t have pipe cleaners, cut long strips of black paper and fold them back and forth (accordion style). Staple these to the sides for “bouncy” legs that move when the wind blows.
Step 5: Creating the Face
Spiders have multiple eyes, but for a “cute” look, two large ones work best. Use your white paper circles or stickers. Draw a large black dot in the center of each with your marker and stick them onto the smaller plate. If you want a more realistic (or spooky) spider, give it eight eyes of varying sizes!
Step 6: Installation
Your gigantic spider is ready to roam! Use double-sided foam tape on the back of the large plate to stick it to your front door, hallway walls, or even the ceiling. Because these plates are lightweight, they stay up easily and create a “spooktacular” effect for anyone walking by.
Crafting with a Conscience: Upcycling Tips
The best part of this project is its sustainability. By using washed, used plates, you are keeping plastic and Styrofoam out of landfills. If you want to take the eco-friendly route further:
- Leaf Plates: Use compostable leaf plates for a completely plastic-free body.
- Natural Inks: If you have time, you can even make a “stain” out of concentrated black tea or coffee for a brownish-black natural look.
- Recycled Paper Legs: Use strips of old magazines painted black for the legs instead of buying new pipe cleaners.
Why This Craft is Perfect for Busy Schedules
As many parents know, work can often take over our time. This craft is the ultimate “quickie” because it relies on simple shapes and minimal assembly. The “heavy lifting” is just the drying time for the paint. It allows you to transform a space into a decorated wonderland in just about 20 minutes of active work time.
For children, this activity provides an opportunity to practice symmetry (matching four legs on each side) and spatial awareness. It’s a great way to bond at the end of a long day and helps them feel proud of their contribution to the home decor.
Conclusion
Whether it’s for Save a Spider Day or a fun neighborhood treat-or-trick event, these gigantic Styrofoam plate spiders prove that you don’t need a huge budget or hours of free time to make something amazing. These crafts serve as a bridge, helping kids see that spiders aren’t just “scary” bugs, but incredible, helpful creatures that deserve our protection.
Happy crafting, and may your home be filled with many friendly (and giant) eight-legged guests!