
Before we dive into the ideas, let’s talk about why crafting your own greeting cards is so beneficial for children:
- Fine Motor Development: Every time a child cuts a shape, glues a button, or quills a paper strip, they are strengthening the small muscles in their hands.
- Literacy and Writing: Writing “Happy Birthday” or a personalized message inside helps kids practice their spelling and letter formation in a meaningful way.
- Emotional Connection: Taking the time to brainstorm what a friend likes (their favorite animal or color) fosters empathy and thoughtfulness.
- Cognitive Growth: Planning a card—like figuring out how a 3D pop-up cake will fold—is essentially a mini engineering and math lesson.
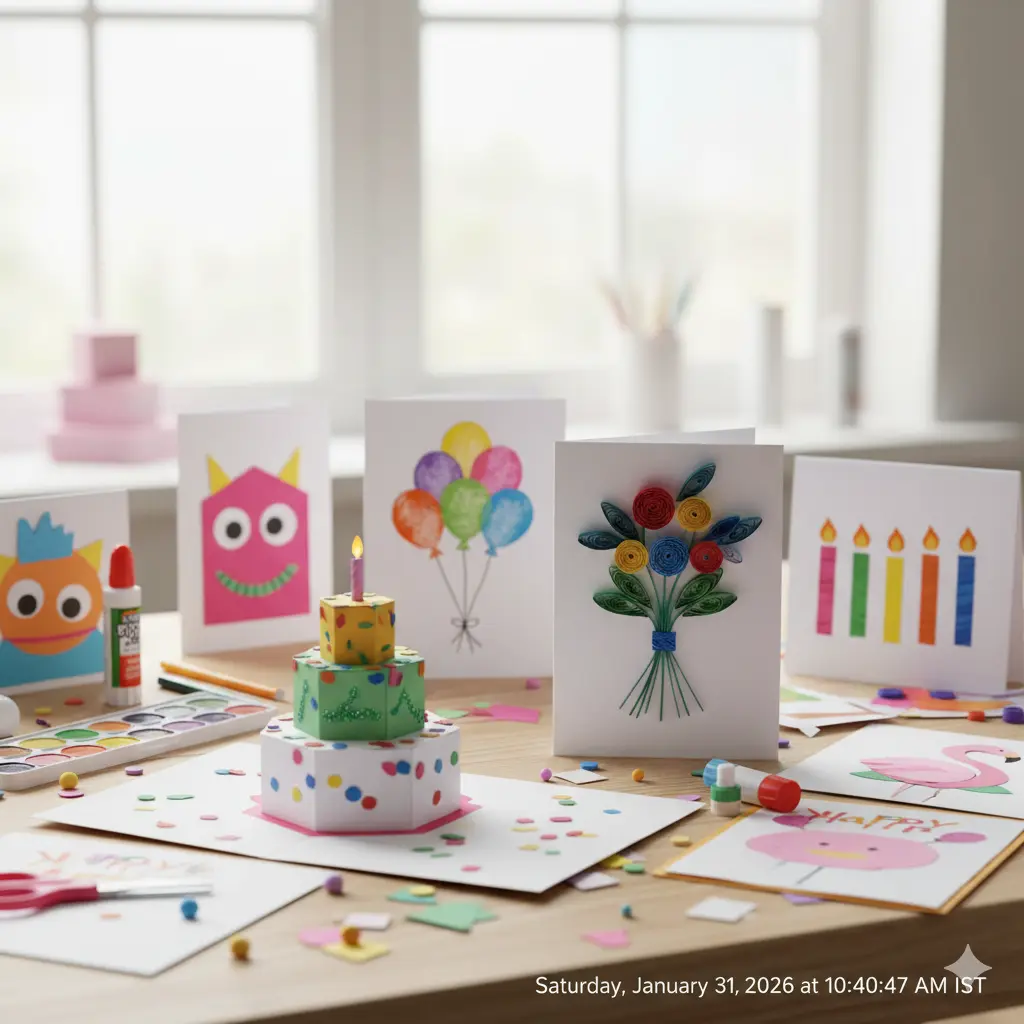
20 Bright and Colorful Birthday Card Ideas
1. The 3D Pop-Up Cake Card
A birthday isn’t complete without a cake! By making a few simple cuts in a folded piece of paper, you can create a “tier” that pops out when the card is opened. Decorate each level with markers to look like frosting and sprinkles.
2. Spring Bouquet Quilling Card
If you can’t gift a fresh bunch of flowers, a paper bouquet is the next best thing. This card uses quilling (rolling thin strips of paper) to create textured flower petals. It’s a great way for older kids to show off their precision and patience.
3. Fingerprint Balloon Card
This is perfect for toddlers! Have them dip their fingertips in different colors of washable paint and “stamp” them onto the front of the card. Once dry, draw simple black lines to turn the prints into a bunch of floating balloons.
4. Washi Tape Candle Card
If you have a collection of decorative washi tape, use it to create “candles.” Simply stick vertical strips of different lengths on the card and draw a small yellow flame at the top of each one.
5. Pom Pom Ice Cream Cone
Ice cream and birthdays go hand-in-hand. Draw a simple triangle for a cone and glue fluffy pom poms on top to represent scoops of ice cream. It adds a wonderful 3D texture that kids love to touch.
6. Paper Scrap Mosaic Card
Don’t throw away those tiny paper scraps! Kids can glue small, colorful bits of paper onto a card to create a mosaic pattern or spell out the birthday person’s name.
7. Button Flower Card
Use spare buttons as the centers of flowers. Draw the petals around them with markers or colored pencils for a whimsical, “shabby-chic” look.
8. Watercolor Stripe Card
This idea is simple yet elegant. Use watercolors to paint thick, horizontal stripes across the card. Because the paint blends naturally, every card looks like a professional piece of art.
9. Handprint Flamingo Card
Pink paint and a handprint can easily turn into a flamingo. The palm is the body, and the fingers are the feathers! Add a long neck and a beak to finish the design.
10. Monster Shape Card
For the little artist, cut out different geometric shapes (circles, triangles, squares) and glue them onto a card. Add googly eyes and “scary” teeth to turn the shapes into friendly birthday monsters.
11. Cupcake Liner Card
Flatten a colorful cupcake liner and glue it to the card. Add a paper “stump” at the bottom and a “cherry” (a red pom-pom) on top for an instant cupcake craft.
12. Unicorn Horn Card
Use glitter paper to cut out a golden horn and glue it to the top of a card. Draw a pair of closed eyes with long eyelashes for a magical, trendy birthday greeting.
13. Accordion Fold Butterfly
Fold a square piece of paper back and forth like a fan. Pin it in the middle with a pipe cleaner to create a 3D butterfly that you can glue onto your card.
14. “Secret Message” Balloon Card
Write a message on a deflated balloon with a permanent marker. Tape the balloon to the card with a note that says, “Blow me up for a surprise!”
15. Crayon Resist Card
Draw a design (like stars or balloons) with a white wax crayon on white paper. Then, paint over it with watercolors. The wax will “resist” the paint, making your hidden design magically appear.
16. Embroidered Heart Card
For kids learning to sew, poke holes in the shape of a heart on the front of the card. Have them use a needle and colorful yarn to “sew” the heart.
17. Paper Chain Pop-Up
Glue a small paper chain (the kind you make for holiday decor) to the inside of the card so it stretches out when the recipient opens it.
18. Money Candle Card
If you are gifting cash, fold the bills into tight cylinders and tape them to the card like candles. Add paper flames to the top for a clever and useful gift!
19. 3D Cat Card
For the pet lovers! Use two circles for the head and body and add triangles for ears. Use thin black paper strips for the whiskers to give the cat a 3D look.
20. Rainbow Paper Strip Card
Glue thin strips of paper in rainbow order across the card. This is a great way to use up leftover construction paper and looks incredibly cheerful.
Supply Checklist for Your Card-Making Station
To make your crafting session smooth, gather these basics:
- Cardstock or heavy paper (A5 size folded in half is standard).
- Scissors (safety scissors for younger kids).
- Glue sticks and liquid school glue.
- Markers, crayons, and watercolors.
- Embellishments: Buttons, pom poms, googly eyes, and washi tape.
Tips for Success
- Work in Layers: Glue your background elements down first, then add the 3D items like buttons or pom poms.
- Let it Dry: Especially when using liquid glue or paint, give the card plenty of time to dry before writing inside to avoid smudges.
- Personalize the Message: Encourage your child to write something specific about the friend, like “I can’t wait to play soccer with you!”
Making a birthday card is a joyful experience that teaches kids that the best gifts come from the heart (and the craft bin!).