
Forests are the lungs of our planet. They provide the oxygen we breathe, the wood for our homes, and the medicinal plants that keep us healthy. By engaging in forest-themed crafts, kids begin to understand:
- Biodiversity: A forest isn’t just trees; it’s a community of fungi, insects, mammals, and birds.
- Sustainability: Learning where paper and wood come from encourages children to use resources more wisely.
- Mental Well-being: Nature-themed art has been shown to reduce stress and improve focus in young children.
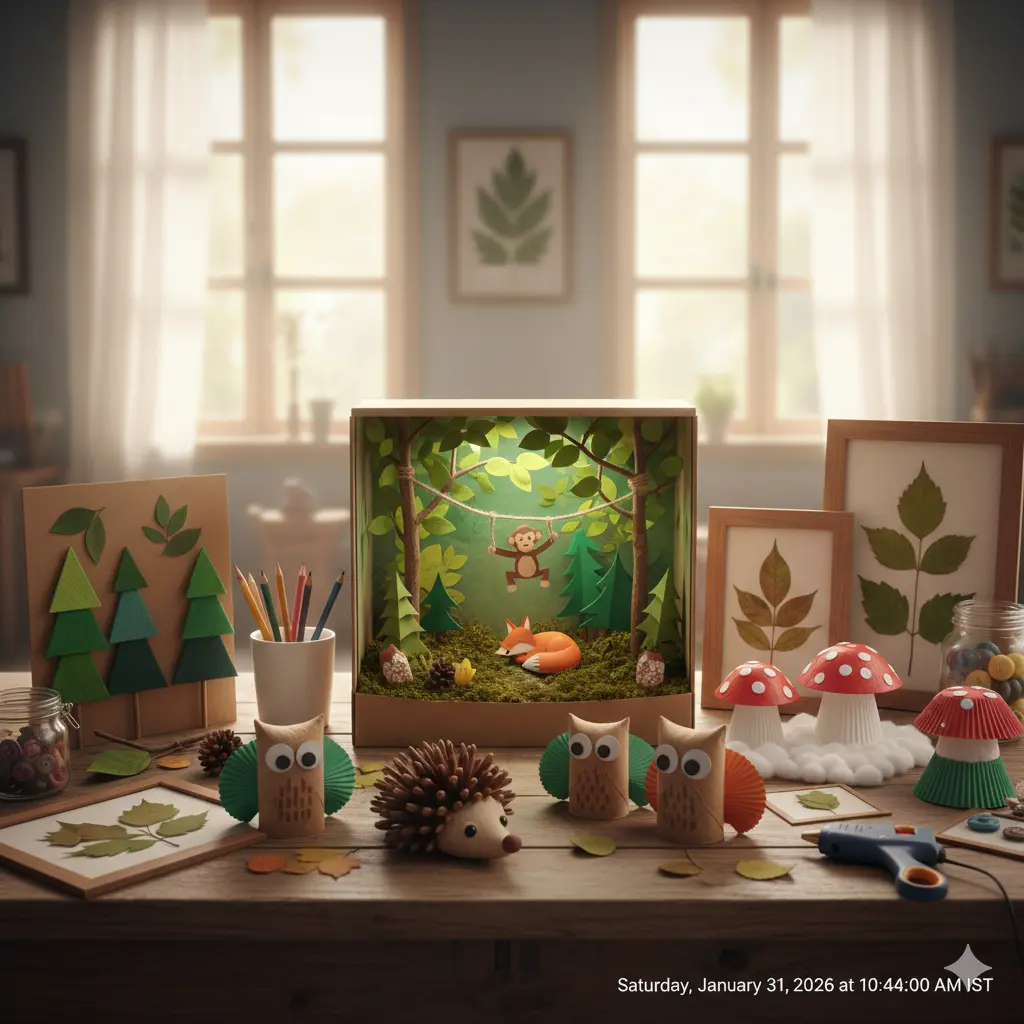
1. The Ultimate 3D Forest Diorama
This is the “crown jewel” of forest crafts. A diorama allows kids to build an entire miniature world inside a box.
- Materials: A recycled shoe box, green construction paper, twigs from the yard, and small animal cutouts.
- The Process: Paint the inside of the box a soft sky blue. Use real twigs to act as trunks for paper-leaf trees. Create a “forest floor” using dried moss or crinkled brown paper.
- The Extra Touch: Hang a piece of twine across the top to act as a vine and attach a paper monkey swinging through the canopy!
2. Felt Triangle Evergreen Forest
This project is perfect for toddlers and preschoolers who are just learning about shapes and colors.
- Materials: Felt scraps in various shades of green, a brown cardstock background, and a glue stick.
- The Process: Cut the felt into triangles of different sizes. Let your child arrange them on the brown “earth” background however they like.
- The Lesson: Since there is no “right or wrong” way to place the trees, this is an excellent open-ended activity that builds confidence and spatial awareness.
3. Fork-Painted Pine Trees
Who knew a kitchen utensil could create such realistic pine needles?
- Materials: Green acrylic paint, white paper, and a plastic fork.
- The Process: Draw a simple brown line for the trunk. Dip the back of the fork into green paint and press it repeatedly in a downward “V” shape along the trunk.
- Visual Appeal: The tines of the fork create a textured, “spiky” look that mimics the needles of a pine or fir tree.
4. Recycled Cardboard Tree Trunk
Give that shipping box a second life by turning it into a sturdy, standing tree.
- Materials: Cardboard, brown paint, and green tissue paper.
- The Process: Cut two identical tree trunk shapes with a slit in the middle (one from the top down, one from the bottom up). Slide them together to create a 3D standing trunk. Glue “clumps” of crumpled green tissue paper to the branches for a lush, leafy look.
5. Nature-Print Leaf Art
What better way to celebrate the forest than by using its own materials?
- Materials: Fresh leaves gathered from a walk, washable paint, and paper.
- The Process: Paint the “veiny” side of a leaf and press it firmly onto paper like a stamp.
- Discovery: Kids will be amazed to see the intricate “skeleton” of the leaf appear on the paper. This is a great time to talk about how leaves help a tree “breathe.”
6. Paper Plate Sleeping Fox
The forest is home to many clever creatures, and the fox is a fan favorite.
- Materials: A paper plate, orange paint, and black markers.
- The Process: Fold the paper plate in thirds to create a triangular face. Paint the outer sections orange, leaving a white V-shape in the middle for the snout. Draw two curved lines for “sleeping” eyes.
- Storytime: Pair this craft with a book about forest animals and their nocturnal habits.
7. Twig-Framed Forest Memories
Turn a simple drawing into a rustic masterpiece using materials found on the forest floor.
- Materials: Four sturdy twigs, twine or glue, and a forest-themed drawing.
- The Process: Have your child draw their favorite forest scene. Then, glue or tie four twigs together to form a frame around the artwork.
- Connection: It encourages kids to look for specific “building materials” next time they are outside.
8. Cardboard Tube Owls
Owls are the watchful guardians of the woods. These are easy to make using items from your recycling bin.
- Materials: Toilet paper rolls, paint, and cupcake liners.
- The Process: Fold the top of the tube inward to create “ears.” Glue two halves of a cupcake liner to the sides for wings. Add large googly eyes to complete the look.
9. Mushroom “Toadstool” Caps
Bright red mushrooms add a pop of color to any forest floor.
- Materials: Small paper bowls, red paint, and white cotton balls.
- The Process: Paint the bottom of a paper bowl bright red. Once dry, glue white cotton balls (or white paper circles) all over the top.
- Safety Lesson: While making these, explain to children that while these look pretty, they should never touch or eat real wild mushrooms!
10. Pinecone Hedgehogs
If you live near pine trees, this is a must-do autumn or spring craft.
- Materials: Large pinecones and brown modeling clay or felt.
- The Process: Use the clay to form a pointed “nose” at the flat end of the pinecone. Add tiny eyes and a black tip for the snout.
- Texture: The natural scales of the pinecone act as the perfect “quills” for the hedgehog.
Forest Crafting Supply List
To get started on your forest adventure, keep these items in your “Nature Nook”:
- Natural Finds: Twigs, dried leaves, acorns, and pinecones.
- Paper Goods: Cardboard boxes, paper plates, and green/brown construction paper.
- Color: Green, brown, orange, and red paints or markers.
- Adhesives: School glue, glue sticks, and perhaps some twine for tying twigs.
Conclusion: Becoming a Forest Guardian
Crafting is a bridge. By spending time creating these 3D dioramas and felt forests, children transition from seeing the forest as just a “background” to seeing it as a living, breathing world that needs their protection.
On this International Day of Forests, let’s encourage our children to put down the screens, pick up a gluestick (and maybe a few twigs), and celebrate the magnificent trees that give us so much.