
If you are new to sewing, felt is your best friend. Unlike cotton or silk, felt is a non-woven fabric, which means:
- It doesn’t fray: You don’t need to worry about finishing the edges or using a serger.
- It’s sturdy: It holds its shape well, making it perfect for 3D plushies.
- Easy to handle: It grips itself slightly, so pieces don’t slide around while you’re pinning them.
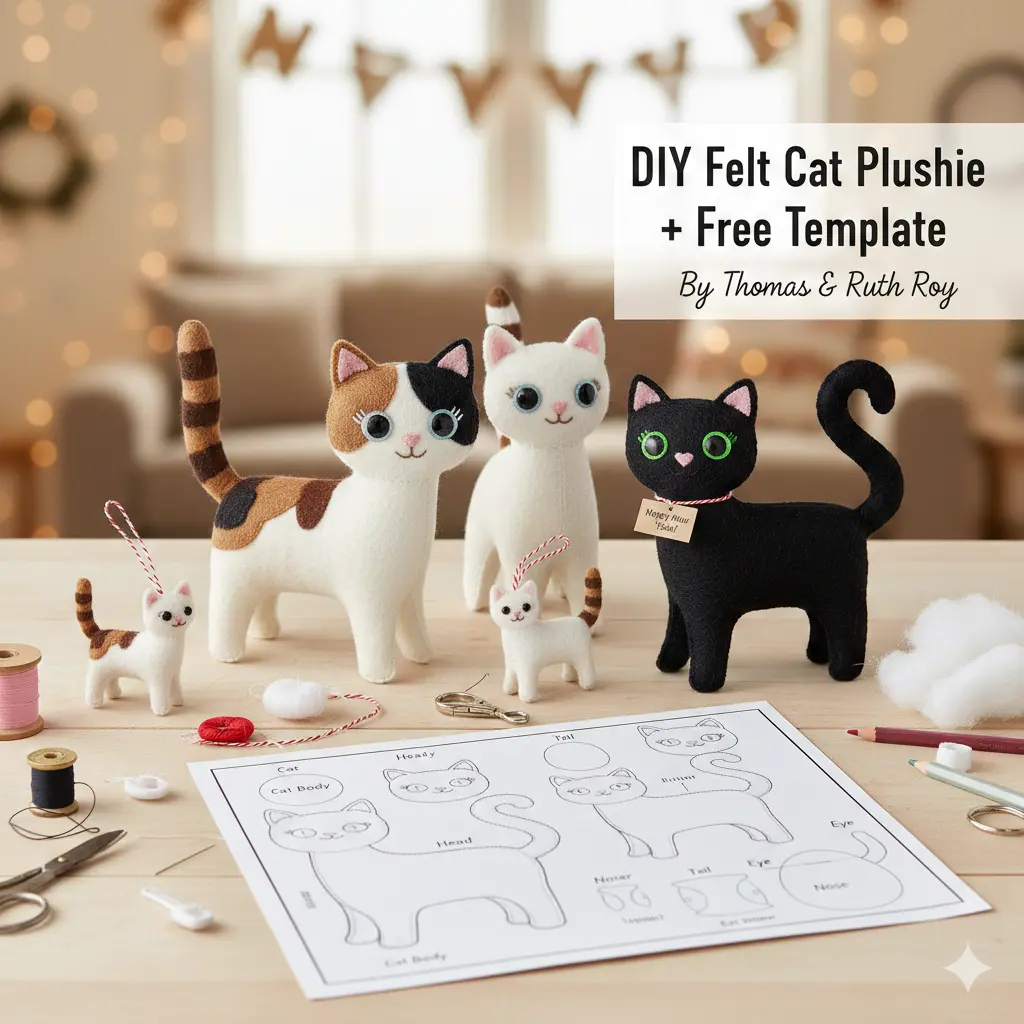
Essential Supplies for Your Felt Cat Plushie
Before you start, gather these basic crafting materials. Most can be found in a standard sewing kit or at any local craft store.
| Material | Purpose |
| Felt Fabric | Colors: Brown, White, Pink, and Black (or your choice!) |
| Free Template | The blueprint for your cat’s body and features. |
| Fabric Marker/Pencil | To trace the template onto the felt. |
| Sharp Scissors | Small embroidery scissors work best for the tiny pieces. |
| Needle & Thread | Matching colors for the body; black/white for details. |
| Stuffing | Polyester fiberfill or cotton scraps. |
Step-by-Step Instructions: Bringing Your Kitty to Life
1. Prepare and Cut the Patterns
First, download and print the free cat plushie template. Once printed, cut the paper shapes out.
- Trace: Use your fabric marker to trace the shapes onto the felt.
- Cut: Neatly cut the felt pieces. You should have a cat body, head, half-body (for texture), tail, tail end, nose, ears, and eyes.
- Pro Tip: For very small pieces like the eyes and nose, use a tiny dab of glue to hold them in place before you begin sewing.
2. Crafting the Face
It is much easier to sew the facial features onto the head before you sew the front and back of the head together.
- The Eyes: Position the black eye circles. Using a white thread, add a tiny “sparkle” stitch (a single French knot or a small dash) to give the cat life.
- The Nose and Mouth: Stitch the pink nose in the center. Directly beneath it, use a backstitch with black thread to create a small “W” shape for the mouth.
- The Ears: Attach the inner pink ear pieces to the main head shape.
3. Layering the Body
This plushie uses a “half-body” piece to add dimension.
- Stitch the fur detail or the half-body piece onto the front of the main body base.
- Attach the tail end to one of the tail cutouts.
4. Assembling the Pieces
Now, lay the pieces out to see how they overlap.
- Place the head onto the top of the body base. It should slightly overlap the neck area.
- Sandwich the tail between the front and back body pieces.
- The Stitching: Use a blanket stitch or a running stitch around the perimeter. The blanket stitch gives a more professional, “handmade” look that reinforces the edges.
5. Stuffing and Finishing
Before you close your plushie entirely, leave a small 1-inch gap.
- Stuffing: Push small bits of polyester fiberfill or even tiny felt scraps into the opening. Use the blunt end of a pencil to move the stuffing into the ears and tail.
- Closing: Continue your stitch to close the gap. Tie a secure knot, hide the thread end inside the body, and snip the excess.
Tips for Crafting with Kids
This project is a fantastic way to introduce children to the world of “slow fashion” and DIY.
- Safety First: If working with younger children, have an adult handle the sharp scissors and the initial needle threading.
- Simplify: Instead of sewing the tiny eyes, kids can use fabric paint or small safety eyes.
- Customization: Encourage kids to make their plushie look like their real-life pet! Does their cat have a white paw? Add a white felt “sock” to the pattern.
SEO & Creative Ideas: What to do with your Plushie?
Once you’ve mastered the basic cat, the possibilities are endless. Because the pattern is lightweight, you can use it for:
- Pet Celebration Ornaments: Hang them on your tree during the holidays.
- Backpack Charms: Add a lobster claw clasp to the top.
- Lavender Sachets: Instead of regular stuffing, fill the body with dried lavender for a calming drawer scent.
- Catnip Toys: If making this for a real cat, fill it with organic catnip. Note: Ensure your stitches are extra tight so your cat can’t get to the stuffing!
Frequently Asked Questions (FAQ)
What type of thread is best for felt?
Standard all-purpose polyester thread works fine, but for a more “primitive” or “folk art” look, embroidery floss (using 2-3 strands) is highly recommended. It’s thicker and shows off your handiwork.
Can I use a sewing machine?
While you can use a machine, the small curves of the tail and ears are much easier to navigate by hand. Hand-sewing also makes it a portable craft you can do while watching a movie.
How do I make the plushie larger?
Simply scale the template up by 150% or 200% when printing. If you go larger, you may want to use a thicker felt (like wool felt) to ensure the structure remains sturdy.
Conclusion
Creating a DIY Felt Cat Plushie is a rewarding experience that honors the bond between humans and their “fur babies.” Thanks to the inspiration from Thomas and Ruth Roy, every day can be a celebration of our feline friends.
By following this guide and using the provided template, you’ve created a unique piece of art that no store-bought toy can replace. Happy crafting!