
Think back to your own school days. Do you remember the simple joy of interlocking strips of colored paper to create a checkerboard pattern? Along with making paper chains and folding paper boats, paper weaving is a classic childhood rite of passage.
But did you know that while we were playing in the classroom, we were actually practicing an ancient craft? Paper weaving is a celebrated folk art in places like China’s Fujian Province, and the principles of weaving date back thousands of years to the very first textiles made by humans. It’s a beautiful way to introduce kids to international culture and history through a simple piece of paper!
The Secret Power of Paper Weaving
Paper weaving is more than just a way to keep hands busy; it is a “workout” for the developing brain. Here are a few reasons why it’s so beneficial:
- Fine Motor Mastery: Navigating strips “over and under” requires precision and control, strengthening the small muscles in the hands and fingers.
- Pattern Recognition: Weaving is essentially math in motion. Kids learn to follow sequences ($1-2-1-2$) and understand how individual parts create a whole.
- Hand-Eye Coordination: Aligning the paper strips so they sit flush against each other requires a high level of focus and visual tracking.
- Patience and Persistence: Weaving takes time! It teaches children that sticking with a project leads to a beautiful, tangible result.
How to Get Started
The perfect age to start paper weaving is around four years old, but even toddlers can enjoy the sensory experience of pulling paper through slits. For older children, the sky is the limit—they can move from simple squares to complex shapes and even 3D objects.
Basic Supplies:
- Construction paper (different colors)
- Scissors or a craft knife (for adults to prep the base)
- Glue stick (to secure the ends)
- Ruler and pencil
15 Creative Paper Weaving Projects
Here are 15 ways to take this traditional craft to the next level:
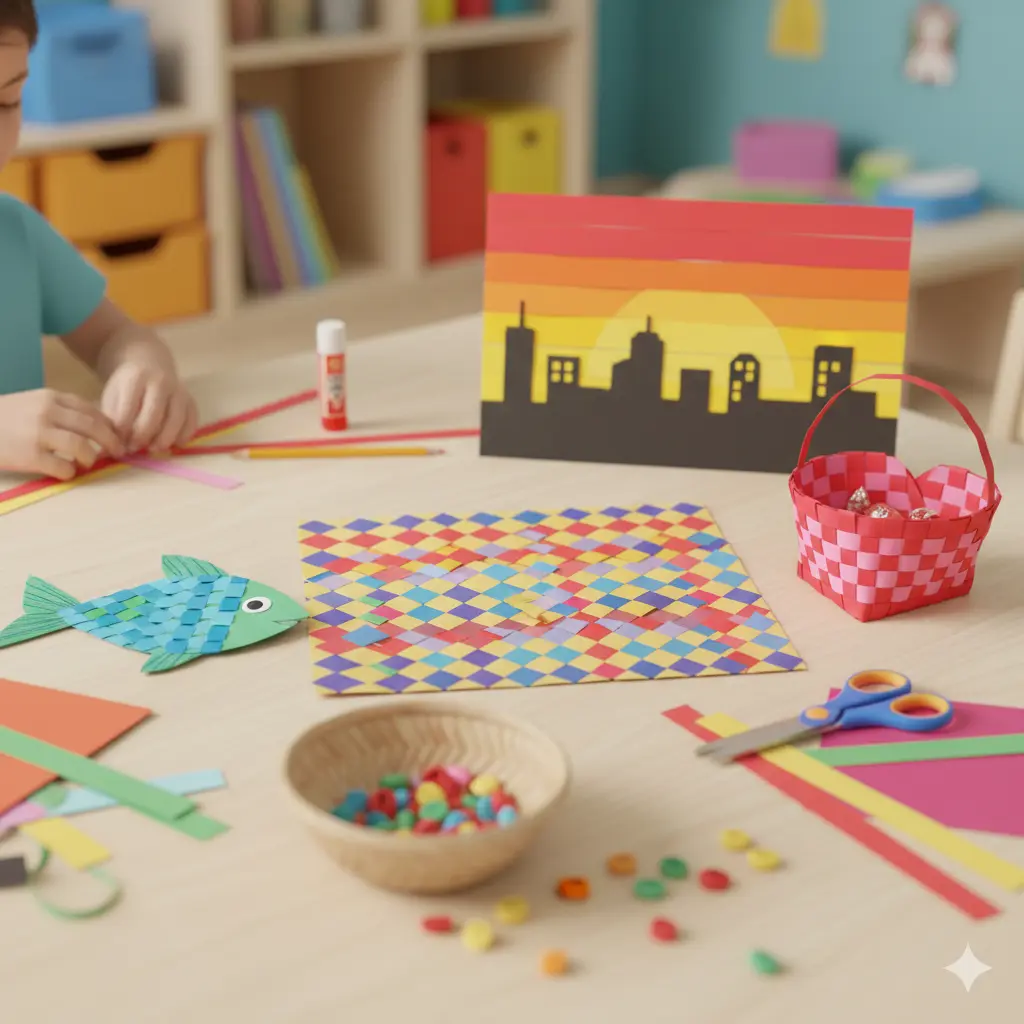
1. The Classic Checkerboard Mat
Start here! Use two contrasting colors. Cut “slits” into a base sheet of paper (leaving a border) and weave separate strips through them. This makes a great place mat or a background for a drawing.
2. Colorful Woven Fish
Cut a large fish shape out of paper. Fold it in half and cut slits along the “body,” leaving the head and tail intact. Weave bright, tropical-colored strips through the body to create vibrant scales.
3. Woven Paper Heart Baskets
A Valentine’s Day favorite! By weaving two U-shaped pieces of paper together, you create a little pouch that can actually hold candy or small notes.
4. Rainbow Woven Sunsets
Use a dark silhouette of a city or a forest. Behind the “windows” or gaps in the trees, weave strips of red, orange, and yellow to create a glowing evening sky.
5. Woven Paper Plate Bowls
Snip the edges of a paper plate and weave yarn or paper strips around the circumference. It transforms a flat plate into a sturdy, decorative bowl for keeping paperclips or jewelry.
6. Textured Turtle Shells
Just like our reptile friends, these paper turtles need a strong shell. Use shades of green and brown to weave a textured shell pattern before gluing on a head and flippers.
7. Woven Bookmarks
Thin strips of cardstock can be woven into beautiful, durable bookmarks. This is a great way to use up leftover scraps from other projects!
8. “City Grid” Weaving
Older kids can use varying widths of paper strips—some very thin, some very thick—to create a modern art piece that looks like a busy city map from above.
9. Woven Paper Lanterns
Weave a flat sheet first, then roll it into a cylinder and add a handle. These look beautiful hanging in a classroom or bedroom.
10. Gradient Color Study
Pick one color (like blue) and use strips in every shade from navy to baby blue. It’s a wonderful way to teach kids about “tints” and “shades.”
11. Seasonal Woven Trees
Weave a brown “trunk” and then use green strips of different textures (crinkled paper, shiny paper) to create the leafy canopy of a tree.
12. Woven Paper Houses
Weave the walls of a small 3D house. It’s a great challenge for kids to figure out how to fold their woven mat into a cube or rectangular prism.
13. Abstract “Mystery” Weaving
Instead of straight lines, try weaving through curved or wavy slits. The results are unpredictable and look like flowing water or wind.
14. Woven Butterfly Wings
Create two woven panels and attach them to a clothespin “body.” The woven texture looks just like the intricate patterns found on butterfly wings.
15. The Giant Collaborative Wall
Give every child a few strips and one large “base” on the wall. Over a week, the whole class can contribute to one massive, colorful woven tapestry.
A Tip for Success: “The Starter Cut”
For younger children, make the “slits” in the base paper quite wide (about 1 inch). As they get more confident, you can make the slits thinner and thinner, which increases the difficulty and the detail of the final artwork.
Conclusion
Paper weaving is a bridge between play and professional art. Whether it’s a simple bookmark or a complex 3D shape, this activity proves that you don’t need fancy gadgets to create something amazing—all you need is paper and a little bit of imagination.