
While indoor DIY toys focus on fine motor skills and quiet concentration, outdoor playthings demand a different set of engineering principles. Outdoor DIY projects must contend with the elements—rain, sun, and temperature shifts—while providing the “big body” movement that children crave for healthy physical development.
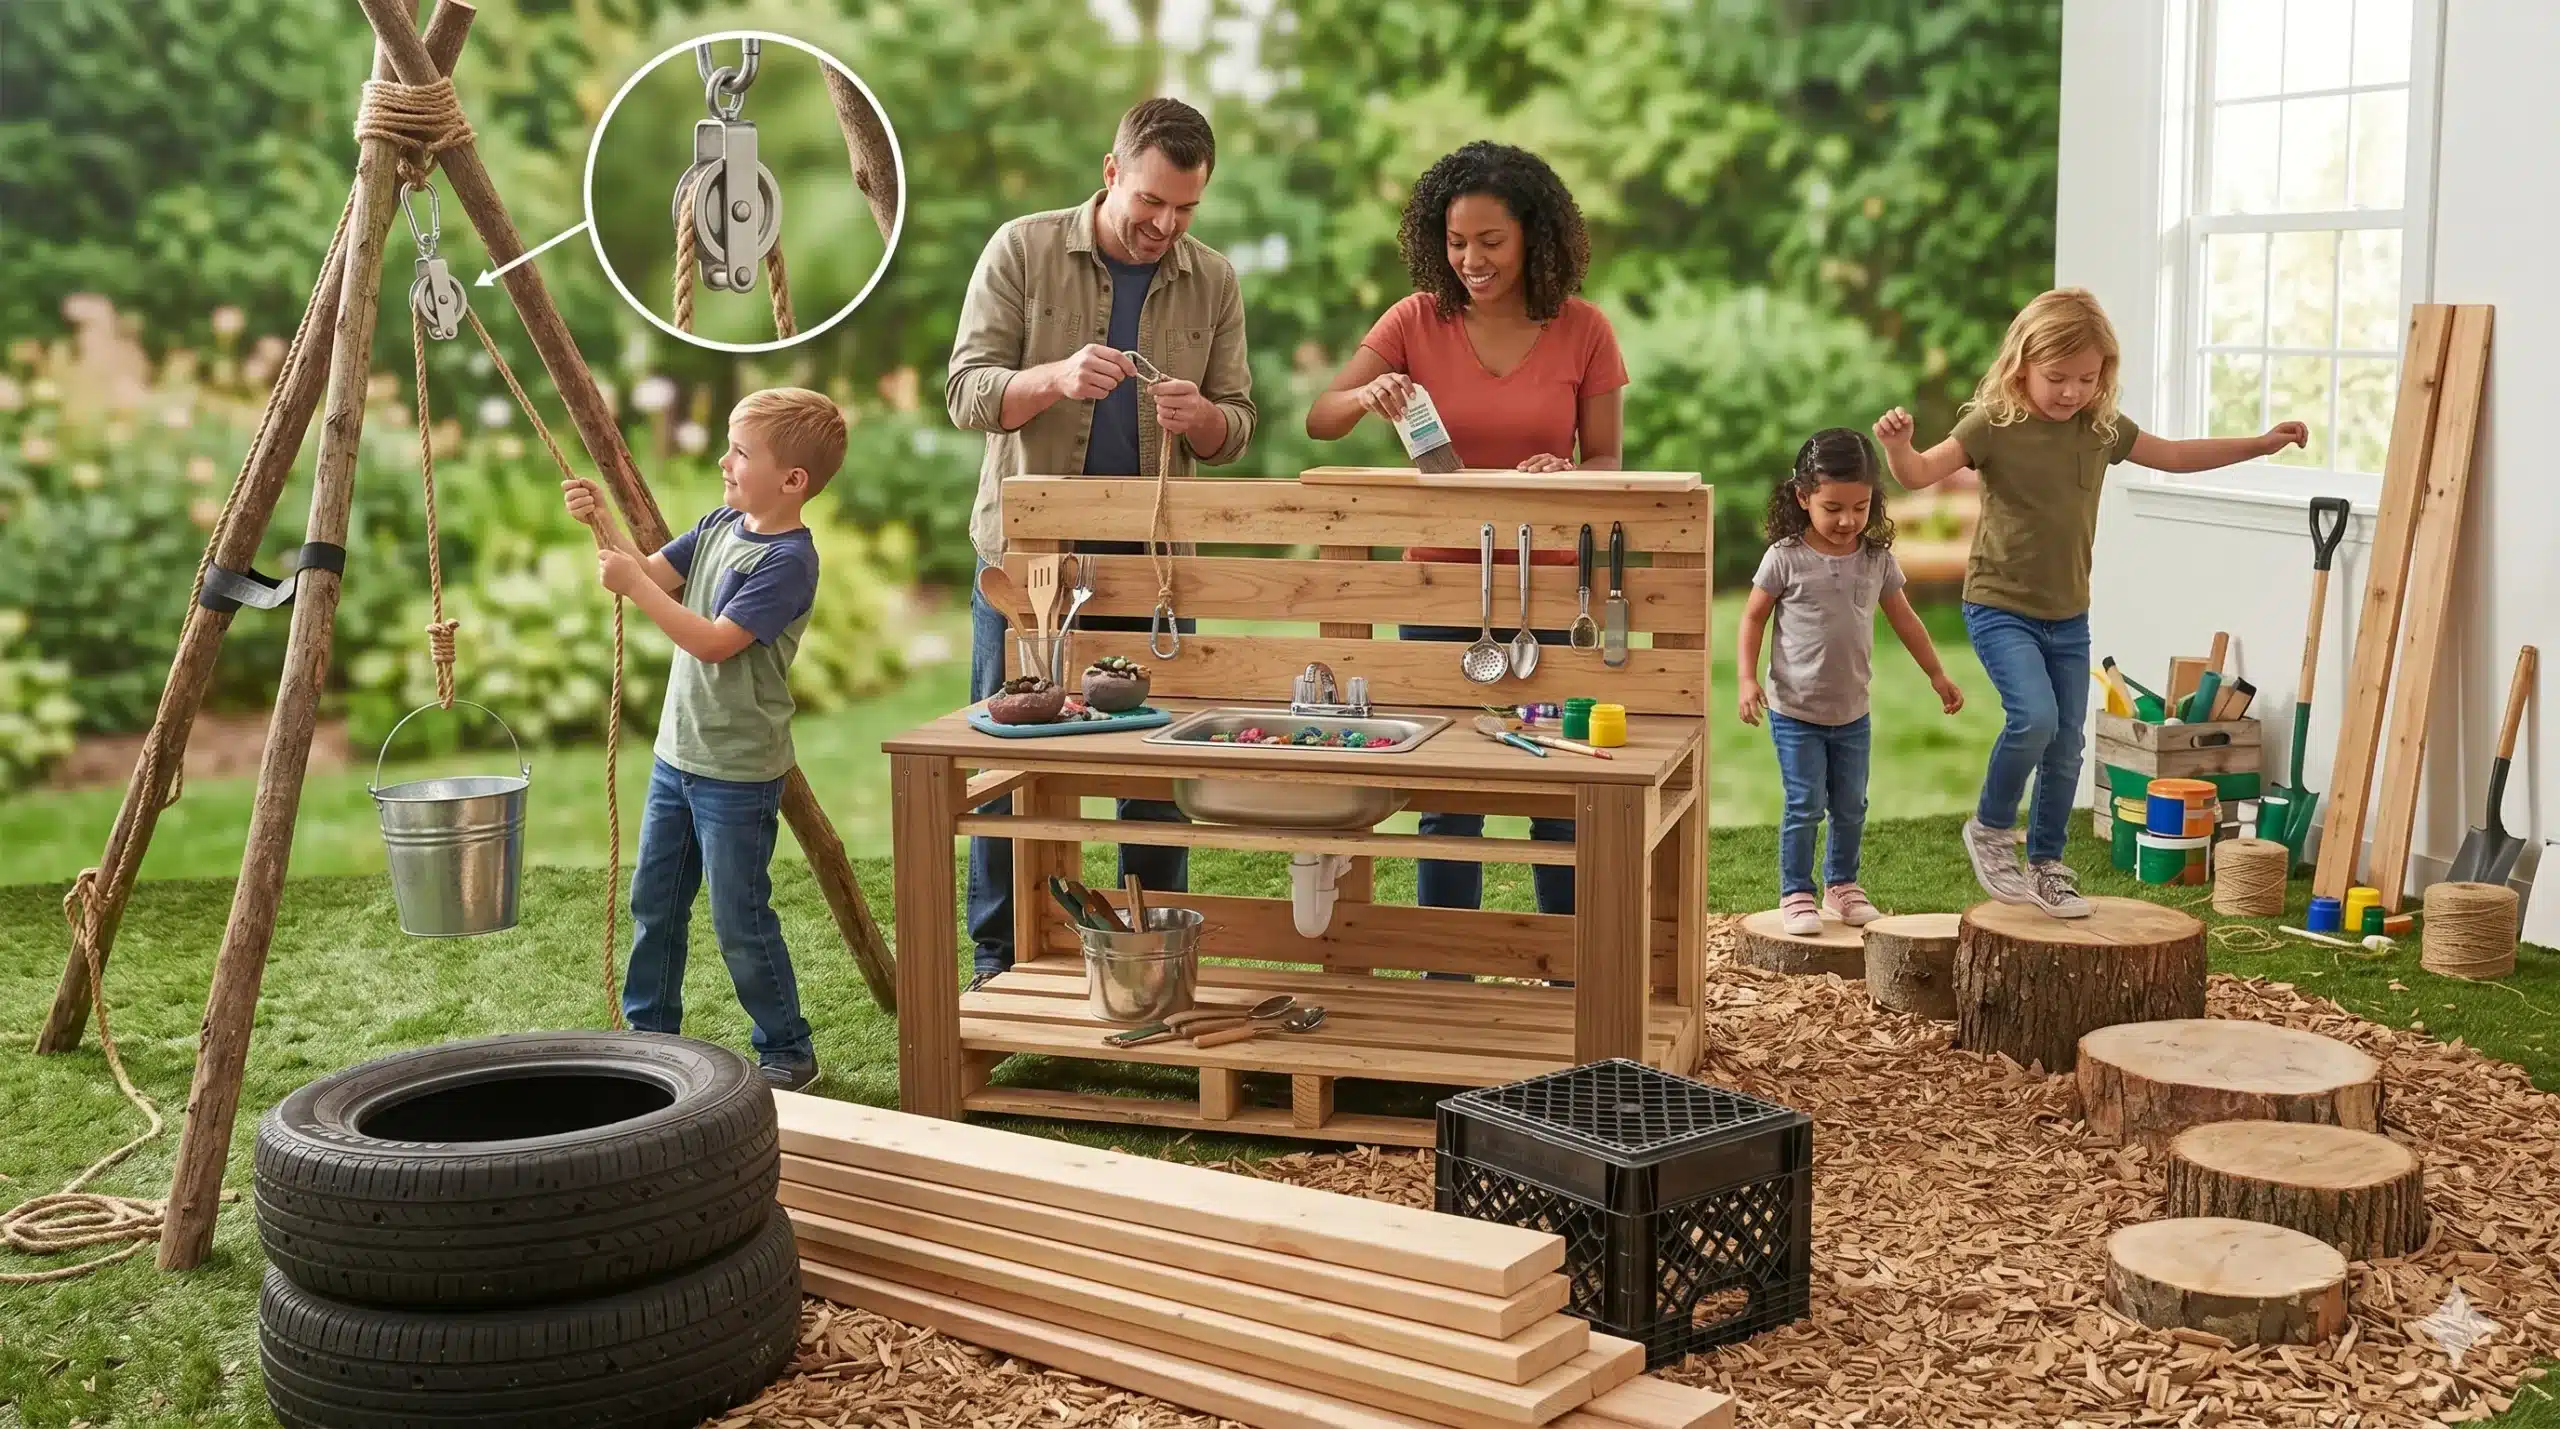
Creating outdoor play structures allows you to transform a standard backyard into a nature-based playground. By using raw materials like timber, rope, and recycled tires, you provide a sensory-rich environment that plastic, store-bought swing sets simply cannot replicate.
1. Project: The “Mud Kitchen” Bistro
Target Skills: Imaginative role-play, sensory exploration, and early chemistry.
A mud kitchen is essentially an outdoor workbench where “potions,” “soups,” and “pies” are made using dirt, water, and botanical elements.
Materials You’ll Need:
- Frame: Two old wooden pallets or a discarded potting bench.
- The Sink: A stainless steel mixing bowl or an old plastic dishpan.
- Surfaces: Exterior-grade plywood or salvaged decking boards.
- Utensils: Old ladles, whisks, and muffin tins from a thrift store.
The Build:
- Preparation: If using pallets, sand them aggressively. Pallets are often rough and can harbor splinters.
- The Cut-Out: Trace the rim of your “sink” bowl onto the countertop. Cut a hole slightly smaller than the rim so the bowl sits flush without falling through.
- The Plumbing: You don’t need real pipes. A simple water dispenser jug placed on a shelf above the sink provides enough “running water” to make the play feel authentic.
- Weatherproofing: Apply a coat of exterior-grade clear sealer. This prevents the wood from rotting after a season of heavy “cooking.”
2. Project: The Heavy-Duty Pulley System
Target Skills: Mechanical advantage, teamwork, and physics.
Nothing fascinates a child more than the ability to move heavy objects with minimal effort. A backyard pulley system is a functional tool that turns a treehouse or a play deck into a vertical transport hub.
Materials You’ll Need:
- Hardware: Two swivel-eye pulleys and a heavy-duty carabiner.
- Rope: 50 feet of 3/8-inch braided nylon rope (weather-resistant).
- The Bucket: A galvanized steel bucket or a reinforced plastic crate.
The Build:
- Anchor Point: Secure the first pulley to a sturdy branch or a wooden beam. Use a “tree-saver” strap to ensure you don’t damage the bark.
- The Loop: Thread the rope through the pulley and tie the ends to the bucket handle.
- The Mechanical Lesson: To teach the concept of Mechanical Advantage ($MA$), you can set up a double-pulley system. Explain that while they have to pull more rope, the effort required ($F$) is halved:
$$F_{effort} = \frac{Load}{MA}$$
3. Project: The Geometric “Stump” Walk
Target Skills: Vestibular balance, core strength, and risk assessment.
Instead of a traditional balance beam, a stump walk uses varying heights and distances to challenge a child’s coordination.
Materials You’ll Need:
- Stumps: Log rounds of varying heights (8″, 12″, and 16″) and diameters. Hardwoods like oak or maple last longer than pine.
- Base Material: A 4-inch layer of wood chips or mulch for “fall zone” protection.
- Leveling Tool: A standard spirit level.
The Build:
- Placement: Dig a shallow hole for each stump. This prevents them from tipping when a child leaps onto the edge.
- Spacing: Space the stumps so that the child has to stretch to reach the next one, but not so far that they lose confidence.
- Leveling: Use the spirit level to ensure the top surface is flat. A slanted stump is a slip hazard when wet.
4. The “Loose Parts” Construction Zone
Target Skills: Engineering, trial and error, and autonomy.
Sometimes the best DIY “toy” is actually a collection of curated materials. A designated corner of the yard filled with building supplies encourages “industrial” play.
The Kit List:
- Tires: Used tires (drilled with holes to prevent water collection/mosquitoes).
- Planks: 4-foot sections of 2×4 and 2×6 lumber, sanded smooth.
- Crates: Heavy-duty milk crates.
- Drain Pipes: Short sections of corrugated flexible drain pipe.
The Play Pattern:
The goal here isn’t for you to build something. It’s to provide the child with the tools to build their own bridges, obstacles, and shelters. This is known as “Anarchy Play”—not because it’s chaotic, but because the child is the sole ruler of the design process.
5. Maintenance and Seasonal Care
High-quality DIY outdoor toys require a “safety audit” every spring.
- Check for Corrosion: Inspect any metal hardware (carabiners, screws, latches) for rust. Replace immediately if the structural integrity is compromised.
- Fiber Integrity: Nylon ropes degrade in UV light over several years. If the rope feels “crunchy” or looks frayed, replace it.
- The “Insect Check”: Outdoor structures, especially those made of wood or tires, are attractive to wasps and spiders. Check the undersides of your structures weekly.
- Wood Care: Re-apply a non-toxic water sealant once a year to prevent the wood from becoming brittle and grey.
Why Outdoor DIY Matters
When we give children “ready-made” outdoor sets, we often dictate the path of play (up the ladder, down the slide). When we provide them with DIY pulleys, mud kitchens, and stumps, we invite them to interact with the actual physics of the earth. They learn that wood is heavy, that water makes dirt slippery, and that a pulley makes a bucket feel light.