
Growing up, one of my absolute favorite books was ‘The Secret Garden’. The idea of stumbling upon a hidden, magical sanctuary, into which no one had stepped for ten years, was simply too exciting for my young imagination! I used to dream of finding a rusty key that opened a door to a world of blooming roses and chirping robins.
Well, reality often looks a little different. Even if you live in a high-rise apartment or a home without a backyard, you can still enjoy the vibrant pleasures of a blooming landscape. How? Thanks to today’s Flower Garden Paper Quilling Wall Art project!
This craft is not just about gluing paper; it is about cultivating a piece of art that brings joy, color, and a touch of nature into your living space. Paper quilling, or paper filigree, is a timeless art form that transforms simple strips of paper into intricate, 3D masterpieces.
In this guide, we will walk you through creating your own secret garden, step-by-step. Whether you are a seasoned quiller or a complete beginner, this project is designed to be relaxing and rewarding.
Why Paper Quilling is the Perfect DIY for Home Decor
Before we dive into the supplies, let’s talk about why this specific craft is trending in the DIY home decor space.
- Budget-Friendly: Unlike oil painting or pottery, quilling requires very little investment. Paper strips and glue are incredibly affordable.
- Therapeutic: The repetitive motion of rolling the paper (coiling) is known to lower stress levels. It is a mindful activity that allows you to disconnect from screens.
- Customizable: You can match the flower colors to your living room curtains, your nursery theme, or your office aesthetic.
- Lightweight: Because it is made of paper, this art is easy to hang anywhere, even with temporary adhesive hooks in rental properties.
Supplies Required for Your Quilled Garden
To create a lush, professional-looking piece of wall art, you will need the following tools. Don’t worry if you don’t have a professional quilling kit; we have included household alternatives!
- Quilling Paper Strips: You will need a variety of colors.
- Greens: Dark, lime, and olive green for grass and stems.
- Florals: Pink, purple, yellow, red, and orange for the blooms.
- Width: Standard 5mm strips work best for beginners, but 3mm looks more delicate.
- Backing Material: A sturdy piece of white cardstock or a canvas board. Ideally, cut this to fit your intended frame (e.g., 8×10 inches).
- Slotted Quilling Tool: This makes rolling easier. (Alternative: A toothpick with a split top).
- Craft Glue: A clear-drying PVA glue or Tacky Glue. A fine-tip applicator bottle is highly recommended to avoid messes.
- Scissors: Small, sharp detail scissors (like embroidery scissors).
- Tweezers: Essential for placing tiny shapes without getting glue on your fingers.
- A Frame: Since quilling is 3D, a Shadow Box Frame is the best choice to protect the art without squashing the loops.
The Basics: Essential Quilling Shapes
To build our garden, we will use three fundamental shapes. Master these, and you can make almost anything!
- The Tight Coil: Roll the paper strip tightly and glue the end without letting it expand. (Used for flower centers).
- The Loose Coil: Roll the paper, place it on a flat surface, and let it expand to your desired size before gluing the end.
- The Teardrop: Make a loose coil, then pinch it sharply at one end. (Used for petals and leaves).
- The Marquise (Eye Shape): Make a loose coil, then pinch both ends simultaneously. (Used for leaves).
Step-by-Step Instructions: Planting Your Paper Garden
Step 1: Prepare the “Soil” and Grass
Every garden needs a foundation. We aren’t going to draw the ground; we are going to build it with paper to create depth.
- Take your green paper strips. You want to create a grassy texture at the bottom of your cardstock.
- Technique A (The Wild Look): Cut strips of green paper into various lengths (1 to 2 inches). Curl them slightly with your scissors (like curling ribbon). Glue them vertically along the bottom edge of your canvas, layering different shades of green to create a thicket.
- Technique B (The Rolling Hills): Take a long strip of green paper. Apply glue to the edge of the strip (not the flat side) and place it on the cardstock in a wavy line. This is called “On-Edge Quilling” or contouring. It outlines the ground level.
Step 2: Create the Flower Stems
Before we make the blooms, we need to know where they will stand.
- Cut strips of green paper. Fold them in half lengthwise to make them stiffer.
- Glue these strips vertically coming out of your grass base. Make some tall, some short, and some curved as if blowing in the wind. A natural garden is never perfectly straight!
Step 3: Quilling the Daisy-Style Flowers
These are the showstoppers of your wall art. Let’s make a few in pink and yellow.
- The Center: Take a yellow strip (cut it in half if it’s too long). Roll it into a Tight Coil and glue the end. This is the pollen center.
- The Petals: Take a pink strip. Roll it into a loose coil. Pinch one side to form a Teardrop. Repeat this 5 or 6 times to make enough petals for one flower.
- Assembly: Glue the yellow tight coil onto the top of a stem. Arrange the pink teardrops around the yellow center, with the pointy ends touching the center.
Step 4: Making Fringed Flowers (Dandelions/Hyacinths)
To add texture, we need flowers that look fluffy.
- Take a wider strip of paper (about 10mm or just glue two standard strips side-by-side).
- Use your scissors to make tiny cuts along the entire length of the strip. Do not cut all the way through! leave about 2mm uncut at the bottom. This creates a fringe.
- Roll the entire strip into a tight coil. Glue the end.
- Once the glue is dry, use your fingers to fan out the fringed cuts. It will look like a pom-pom.
- Glue these onto your stems. These look great in purple or bright orange.
Step 5: Adding Lush Greenery
A garden isn’t just flowers; it needs leaves to look healthy.
- Use the Marquise (Eye) Shape we discussed earlier.
- Use different shades of green than you used for the grass.
- Glue these shapes along the sides of the stems.
- Pro Tip: For a vine look, make small green loose coils (circles) and glue them trailing up a stem.
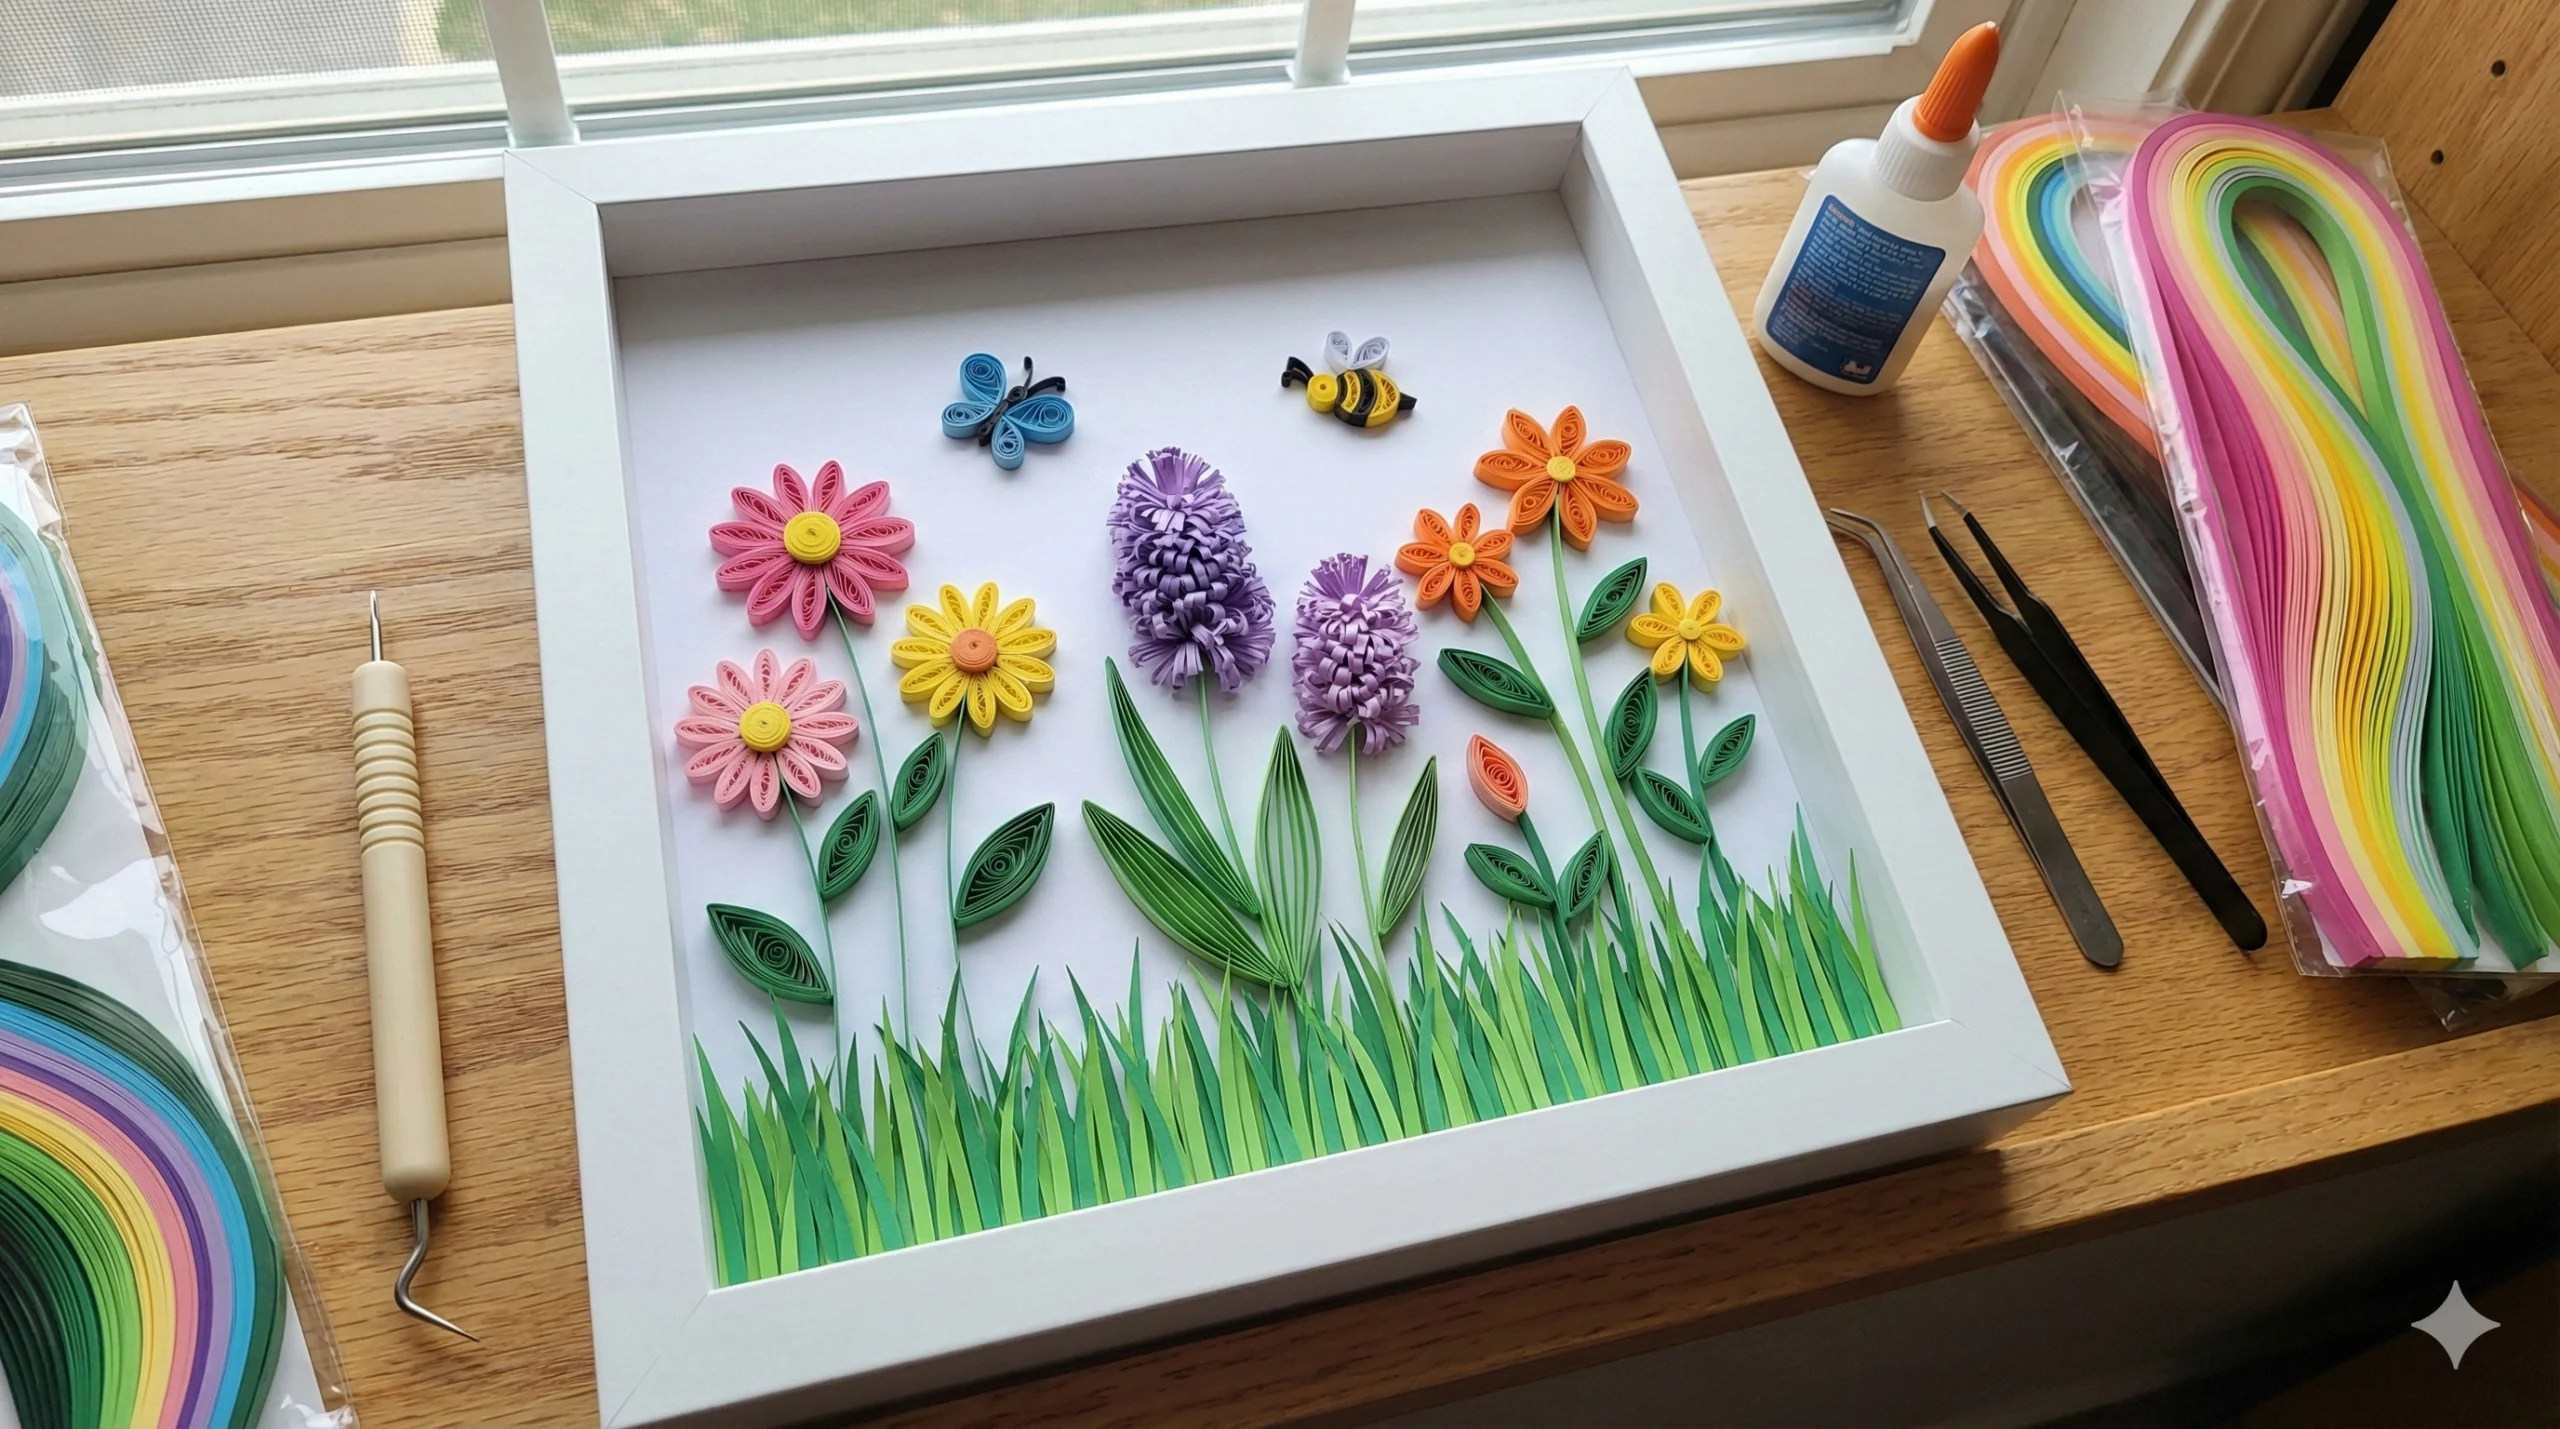
Step 6: The Finishing Touches (Butterflies and Bees)
To make your “Secret Garden” truly come alive, let’s add some life.
- The Butterfly: Make four teardrop shapes (two large purple, two small blue). Glue the points together to form wings. Add a small black tight coil for the head and a black strip for the body. Place it hovering over a flower.
- The Bumblebee: Make a tight coil using a strip that is half yellow and half black (glued together before rolling). This creates a striped body. Add two tiny white teardrops for wings.
Expert Tips for a Professional Finish
If you want your artwork to look like it came from a boutique, keep these tips in mind:
1. Less Glue is More: The biggest mistake beginners make is using too much glue. You only need a pinhead-sized amount. If you use too much, the paper will get soggy, or shiny glue spots will be visible on the background. Tip: Pour a puddle of glue on a scrap plastic lid and use a toothpick to apply it to the paper.
2. Symmetry is Overrated: Nature is organic. Do not try to make every flower perfectly symmetrical or every stem straight. The imperfections give the piece movement and life.
3. Play with Depth: You can glue some flowers directly onto the background, but for others, try gluing them on top of other leaves. This layering effect creates a 3D shadow that looks amazing in a frame.
How to Display Your Quilled Art
Once your masterpiece is fully dry (give it at least 24 hours), it’s time to display it.
The Shadow Box Method: Because quilling sticks out from the paper, you cannot use a standard photo frame with glass right against the image. A shadow box frame has a spacer between the glass and the backboard. This protects your art from dust while keeping the paper uncrushed.
The Open Canvas Method: If you used a canvas board, you can hang it as is! Just be aware that dust can gather in the coils over time. To clean it, use a can of compressed air (like you use for keyboards) and spray gently from a distance.
Conclusion
Creating this Flower Garden Paper Quilling Wall Art is more than just a craft project; it is a way to cultivate patience and creativity. Just like the characters in The Secret Garden found healing and joy in watching things grow, you can find a similar sense of peace in watching your paper garden come to life, strip by strip.
The result is a stunning, colorful piece of decor that brightens up any room—no watering required! So, grab your paper strips and let your imagination bloom.
Frequently Asked Questions (FAQs)
Q: Can I use regular construction paper for quilling? A: You can, but it is not recommended. Construction paper is often too soft and fades quickly. It is better to use cardstock cut into strips or buy pre-cut quilling paper, which is treated to hold its curl better.
Q: How do I fix a coil that unraveled too much? A: If a coil is too loose, you can simply re-roll it. If you have already glued it, you might need to make a new one. Quilling is forgiving—paper is cheap!
Q: Is this craft suitable for kids? A: Absolutely! While younger children (under 8) might struggle with the fine motor skills needed for tight coils, they can help with the “grass” and placing the shapes. It is a fantastic project for teens and adults.