
Have you ever heard the phrase “sweating like a pig”? It is a common saying used when someone is perspiring profusely after a workout or on a hot day. But here is a funny little fact to kick off our crafting session: pigs actually don’t sweat!
It is true! Pigs do not possess sweat glands. That iconic image of a pig rolling around in a muddy puddle isn’t just them being messy; it is their clever way of staying cool and protecting their skin from the sun. While we aren’t sure how the inaccurate saying came to be, we like to think pigs aren’t too offended by it—as long as they get their mud baths!
Speaking of our porcine friends, did you know that March 1st is National Pig Day? It is a day dedicated to according the pig its rightful, though generally unrecognized, place as one of the most intellectual and domesticated animals.
To celebrate these intelligent and cute creatures, we are diving into a fun, hands-on project. Today, we are sharing a tutorial on how to make an adorable clay pig. This craft is an excellent choice for beginners to clay modeling. The shapes are simple, the colors are vibrant, and the end result is a cute little desk buddy that will make you smile every time you look at it.
Let’s roll up our sleeves and get sculpting!
Why Choose Foam Clay?
For this tutorial, we recommend using air-dry foam clay. If you haven’t worked with it before, you are in for a treat. Unlike traditional polymer clay that requires baking, or heavy earth clay that can be messy, foam clay is:
- Lightweight: It feels like a marshmallow!
- Mess-Free: It doesn’t stick to your hands or tables.
- Air Drying: It dries at room temperature within 24–48 hours.
- Blendable: You can mix colors easily, just like paint.
It is the perfect medium for kids and beginners who want instant gratification without the hassle of kilns or ovens.
Materials You Will Need
Before we start, gather your supplies. You don’t need much, which makes this a budget-friendly activity.
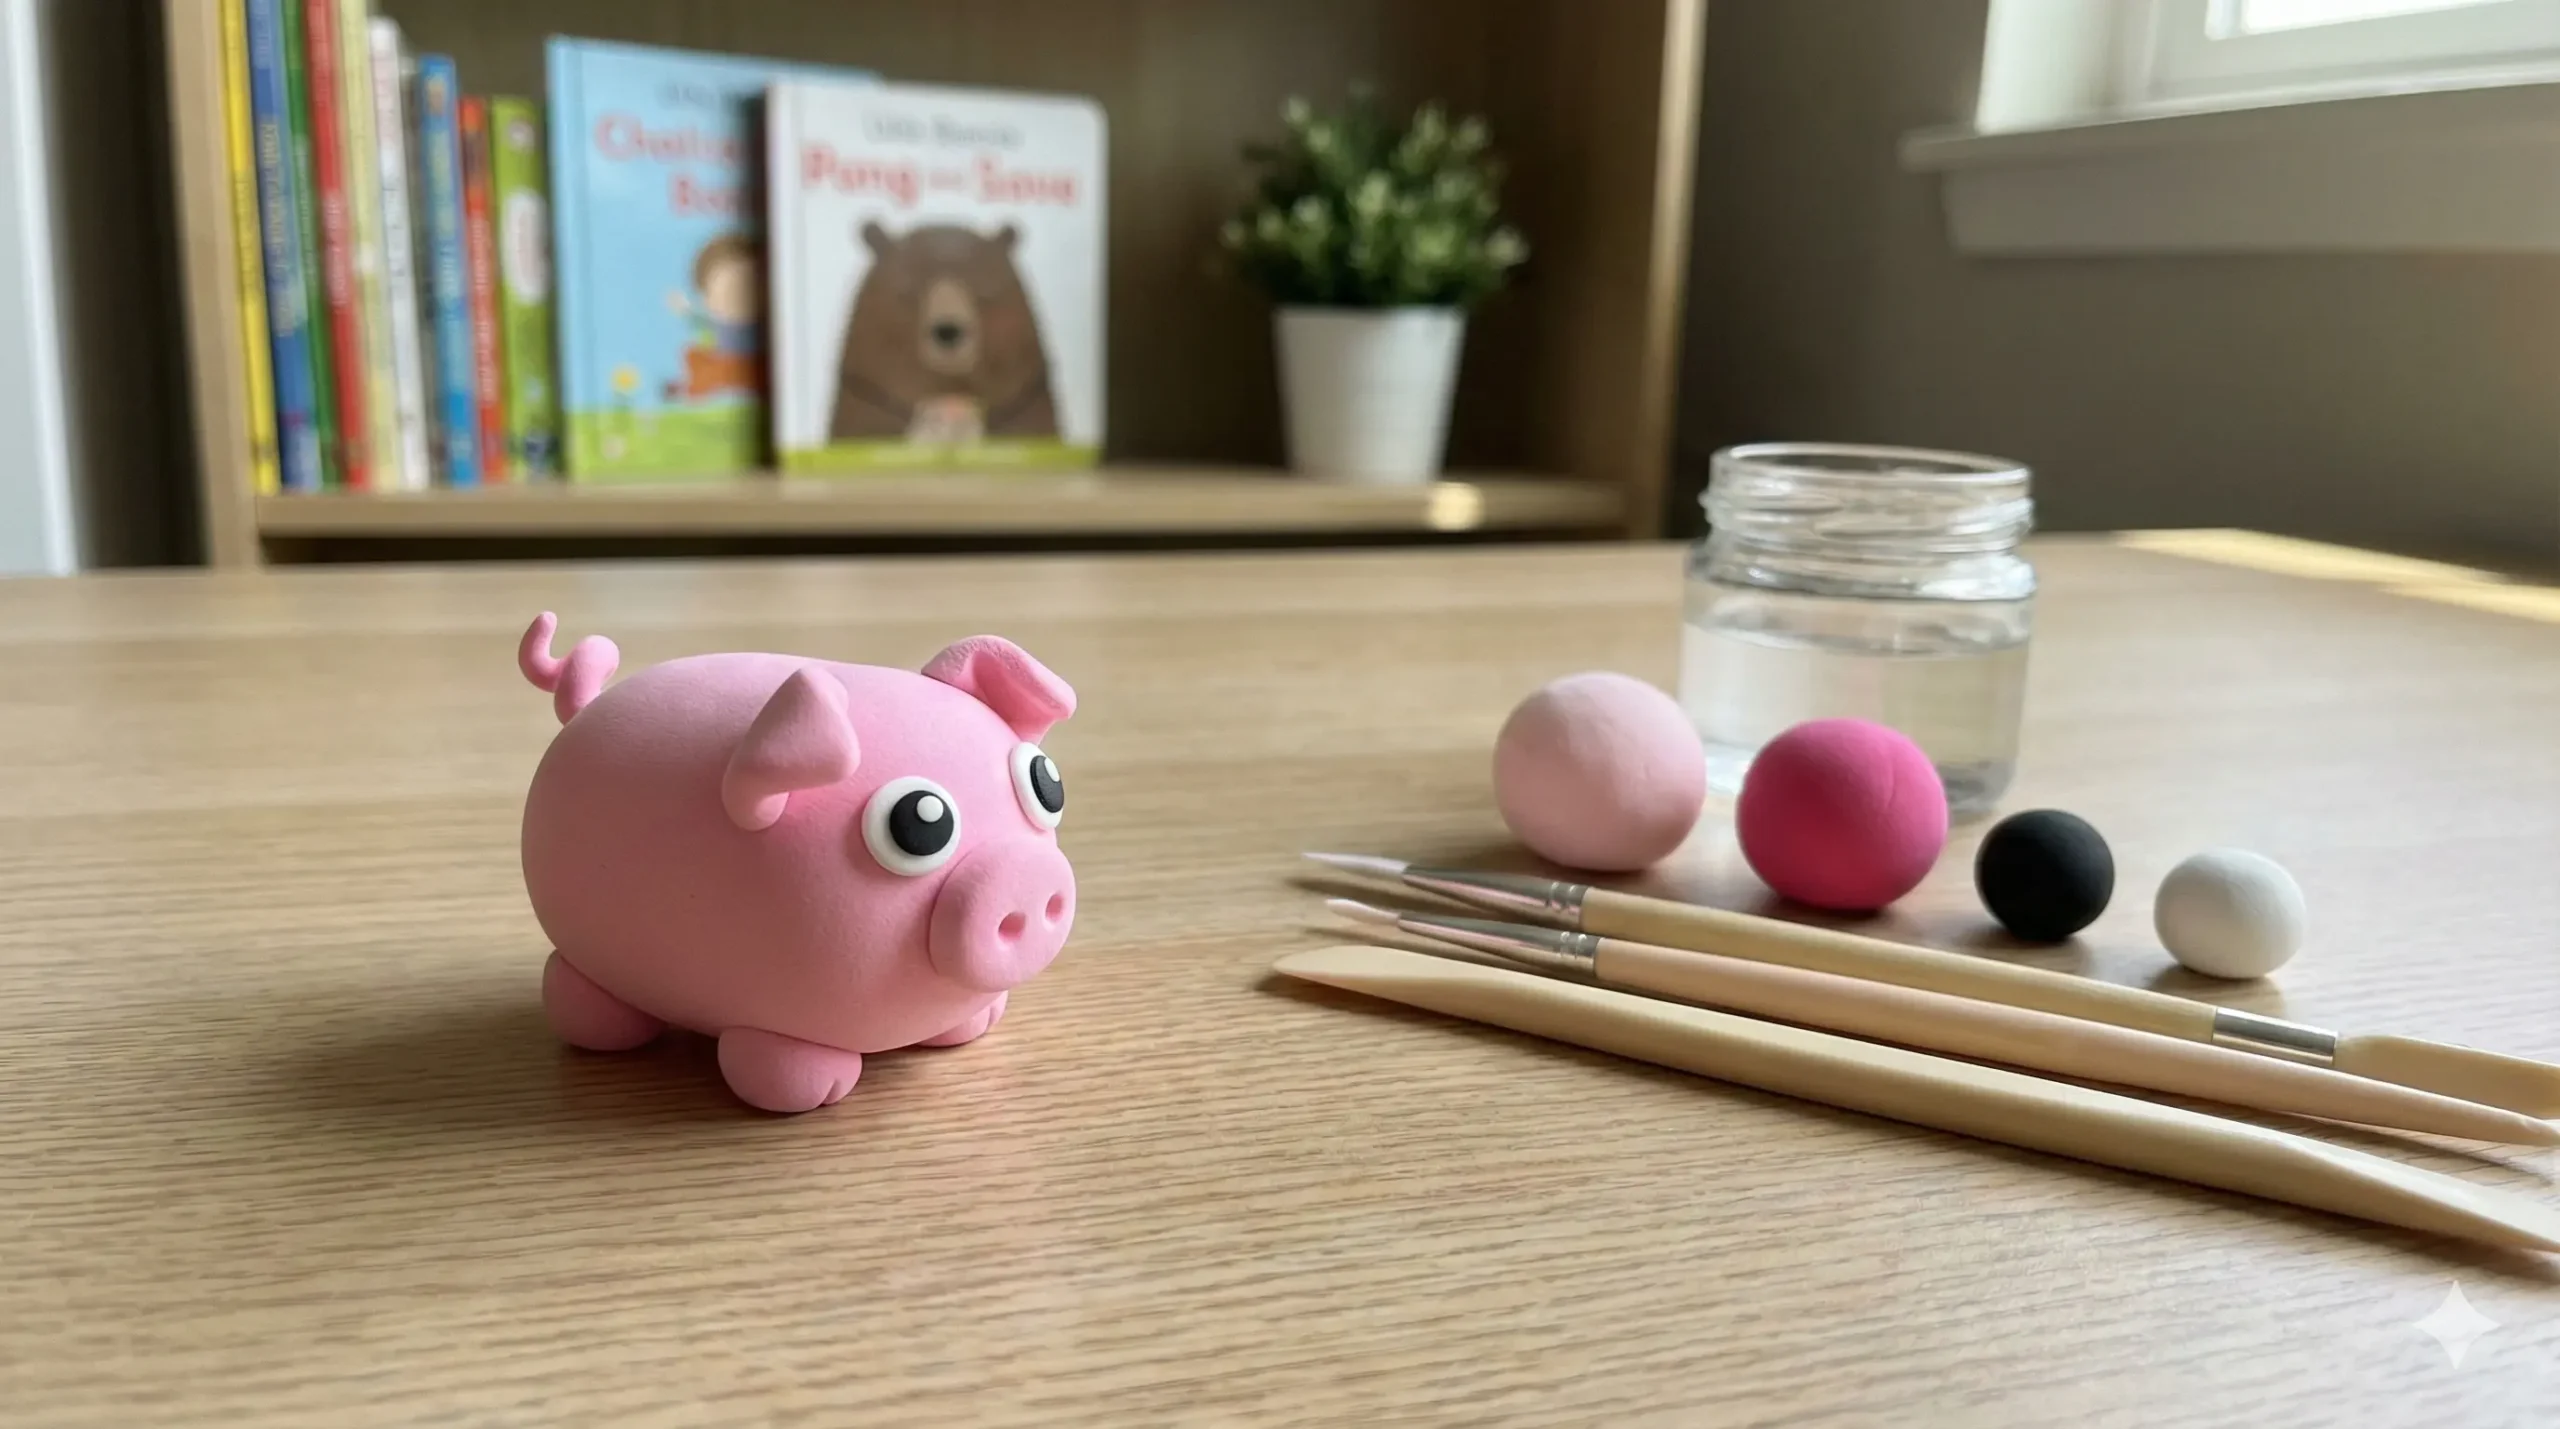
- Foam Clay: You will need two shades of pink (Light Pink and Dark Pink), plus small amounts of Black and White.
- Clay Sculpting Tools: A basic plastic knife tool or a toothpick will work wonders.
- A Clean Surface: A plastic placemat or a silicone craft mat prevents the clay from picking up dust.
- A Little Water: Useful for smoothing out cracks (though foam clay is usually sticky enough on its own).
Step-by-Step Instructions
Follow these simple steps to bring your piggy to life. Remember, there is no “perfect” pig—if yours looks a little wonky, it just adds to the charm!
Step 1: Prepare Your Colors
Let’s start with the base material of our craft—the clay! We begin by preparing our main colors.
- Light Pink: This will be used for the head, body, outer ears, and limbs. You will need a larger ball of this.
- Dark Pink: This will be used for the snout, inner ears, and the tail.
- Black & White: Tiny amounts for the eyes.
Tip: If you only have one shade of pink, mix a little white clay into half of it to create a lighter shade!
Step 2: Create the Body
We are going for a “chibi” style pig, which means a large head and a small, round body.
- Take a large chunk of Light Pink clay.
- Roll it between the palms of your hands. Apply gentle pressure and roll in a circular motion until you have a smooth, crack-free sphere.
- Press it down very slightly on your table so it has a flat bottom and won’t roll away. This sphere will serve as both the head and the body combined (a cute, round blob shape).
3. The Signature Snout
A pig isn’t a pig without its snout!
- Take a small amount of Dark Pink clay.
- Roll it into a small ball, then squish it slightly between your fingers to create an oval or a flat disk shape.
- Place this oval onto the center of your Light Pink body ball. Press it gently so it adheres.
- The Nostrils: Take your sculpting tool (or a toothpick) and poke two vertical holes into the dark pink snout. Voila! Your pig can now breathe.
4. Floppy Ears
Pigs have very expressive ears.
- Take two small balls of Light Pink clay and shape them into triangles.
- Take two even smaller balls of Dark Pink clay and shape them into smaller triangles.
- Press the dark pink triangles onto the center of the light pink triangles. These are the inner ears.
- The Fold: This is the secret to cuteness. Take the tip of the triangular ear and fold it downwards slightly, so the ear looks “floppy.”
- Attach the ears to the top of the head, spacing them out evenly.
5. Stubby Limbs
Now, let’s give our friend some legs.
- Roll four small, equal-sized balls of Light Pink clay.
- Roll them slightly into thick teardrop or cylinder shapes.
- The Hooves: Take your knife tool and make a small indentation or slit at the bottom of each cylinder to mimic a hoof.
- Attach two legs to the front of the body (under the snout) and two legs slightly to the side/bottom so the pig looks like it is sitting or standing on its belly.
6. The Curly Tail
This is the most fun part!
- Take a tiny piece of Dark Pink or Light Pink clay.
- Roll it into a very thin, long “snake” or noodle.
- Twist the noodle around a toothpick to create a spiral coil.
- Attach this curly-Q to the back of the pig.
7. The Eyes and Expression
Finally, let’s give him sight.
- Roll two tiny balls of White clay and flatten them onto the face above the snout.
- Roll two microscopic balls of Black clay and place them onto the white circles.
- Optional: Add tiny white dots inside the black pupils for a “sparkle” effect.
- Use a tool to press a small smiling mouth under the snout if you wish, or leave it blank for a stoic look.
Tips for Working with Cla
If you are new to sculpting, here are a few pro-tips to ensure your project is a success:
- Prevent Cracks: If you see cracks forming in your sphere, dip your finger in a tiny drop of water and smooth it over the clay.
- Mixing Colors: If you want a marble effect, twist two colors together but don’t fully blend them. This creates a cool texture for the pig’s skin.
- Drying: Let your pig sit undisturbed for at least 24 hours. If you touch it while it’s drying, you might leave fingerprints or dent the shape.
- Glazing: Once the clay is fully dry, you can paint a layer of clear nail polish or Mod Podge over the eyes and snout to make them look wet and shiny!
5 Fun Facts About Pigs for Kids
While you are crafting, keep the conversation going with these interesting facts about the animal you are building:
- They are super smart: Pigs are considered the fourth most intelligent animal (after chimps, dolphins, and elephants). They can play video games with joysticks and solve puzzles!
- They are clean: Despite the “dirty pig” reputation, pigs are actually very clean animals. They keep their toilet area far away from where they eat and sleep.
- Great memory: Pigs have excellent long-term memories and can remember where food is stored.
- Strong Snouts: A pig’s snout is incredibly powerful. They use it to dig up the ground to find food.
- Communication: Pigs communicate constantly with each other. More than 20 different vocalizations have been identified, from wooing a mate to saying “I’m hungry!”
Conclusion
And there you have it! You have successfully created a DIY Clay Pig to celebrate National Pig Day or simply to add a splash of cuteness to your home decor.
Modeling with clay is more than just a fun activity; it is a fantastic way to develop fine motor skills, patience, and spatial awareness in children. Plus, in a world dominated by screens, taking an hour to create something tactile with your hands is incredibly grounding.
Whether you make a whole army of pigs in different colors or build a little mud pen for your single piggy, we hope you enjoyed this tutorial.