
The weather outdoors may not always be bright and sunny, but that doesn’t mean you can’t bring the vibrant energy of spring indoors! There is something universally magical about butterflies. They symbolize transformation, beauty, and the arrival of warmer days.
If your children love these winged wonders as much as we do, this ultimate guide to the 20 Best Butterfly Crafts for Kids will have them asking for more.
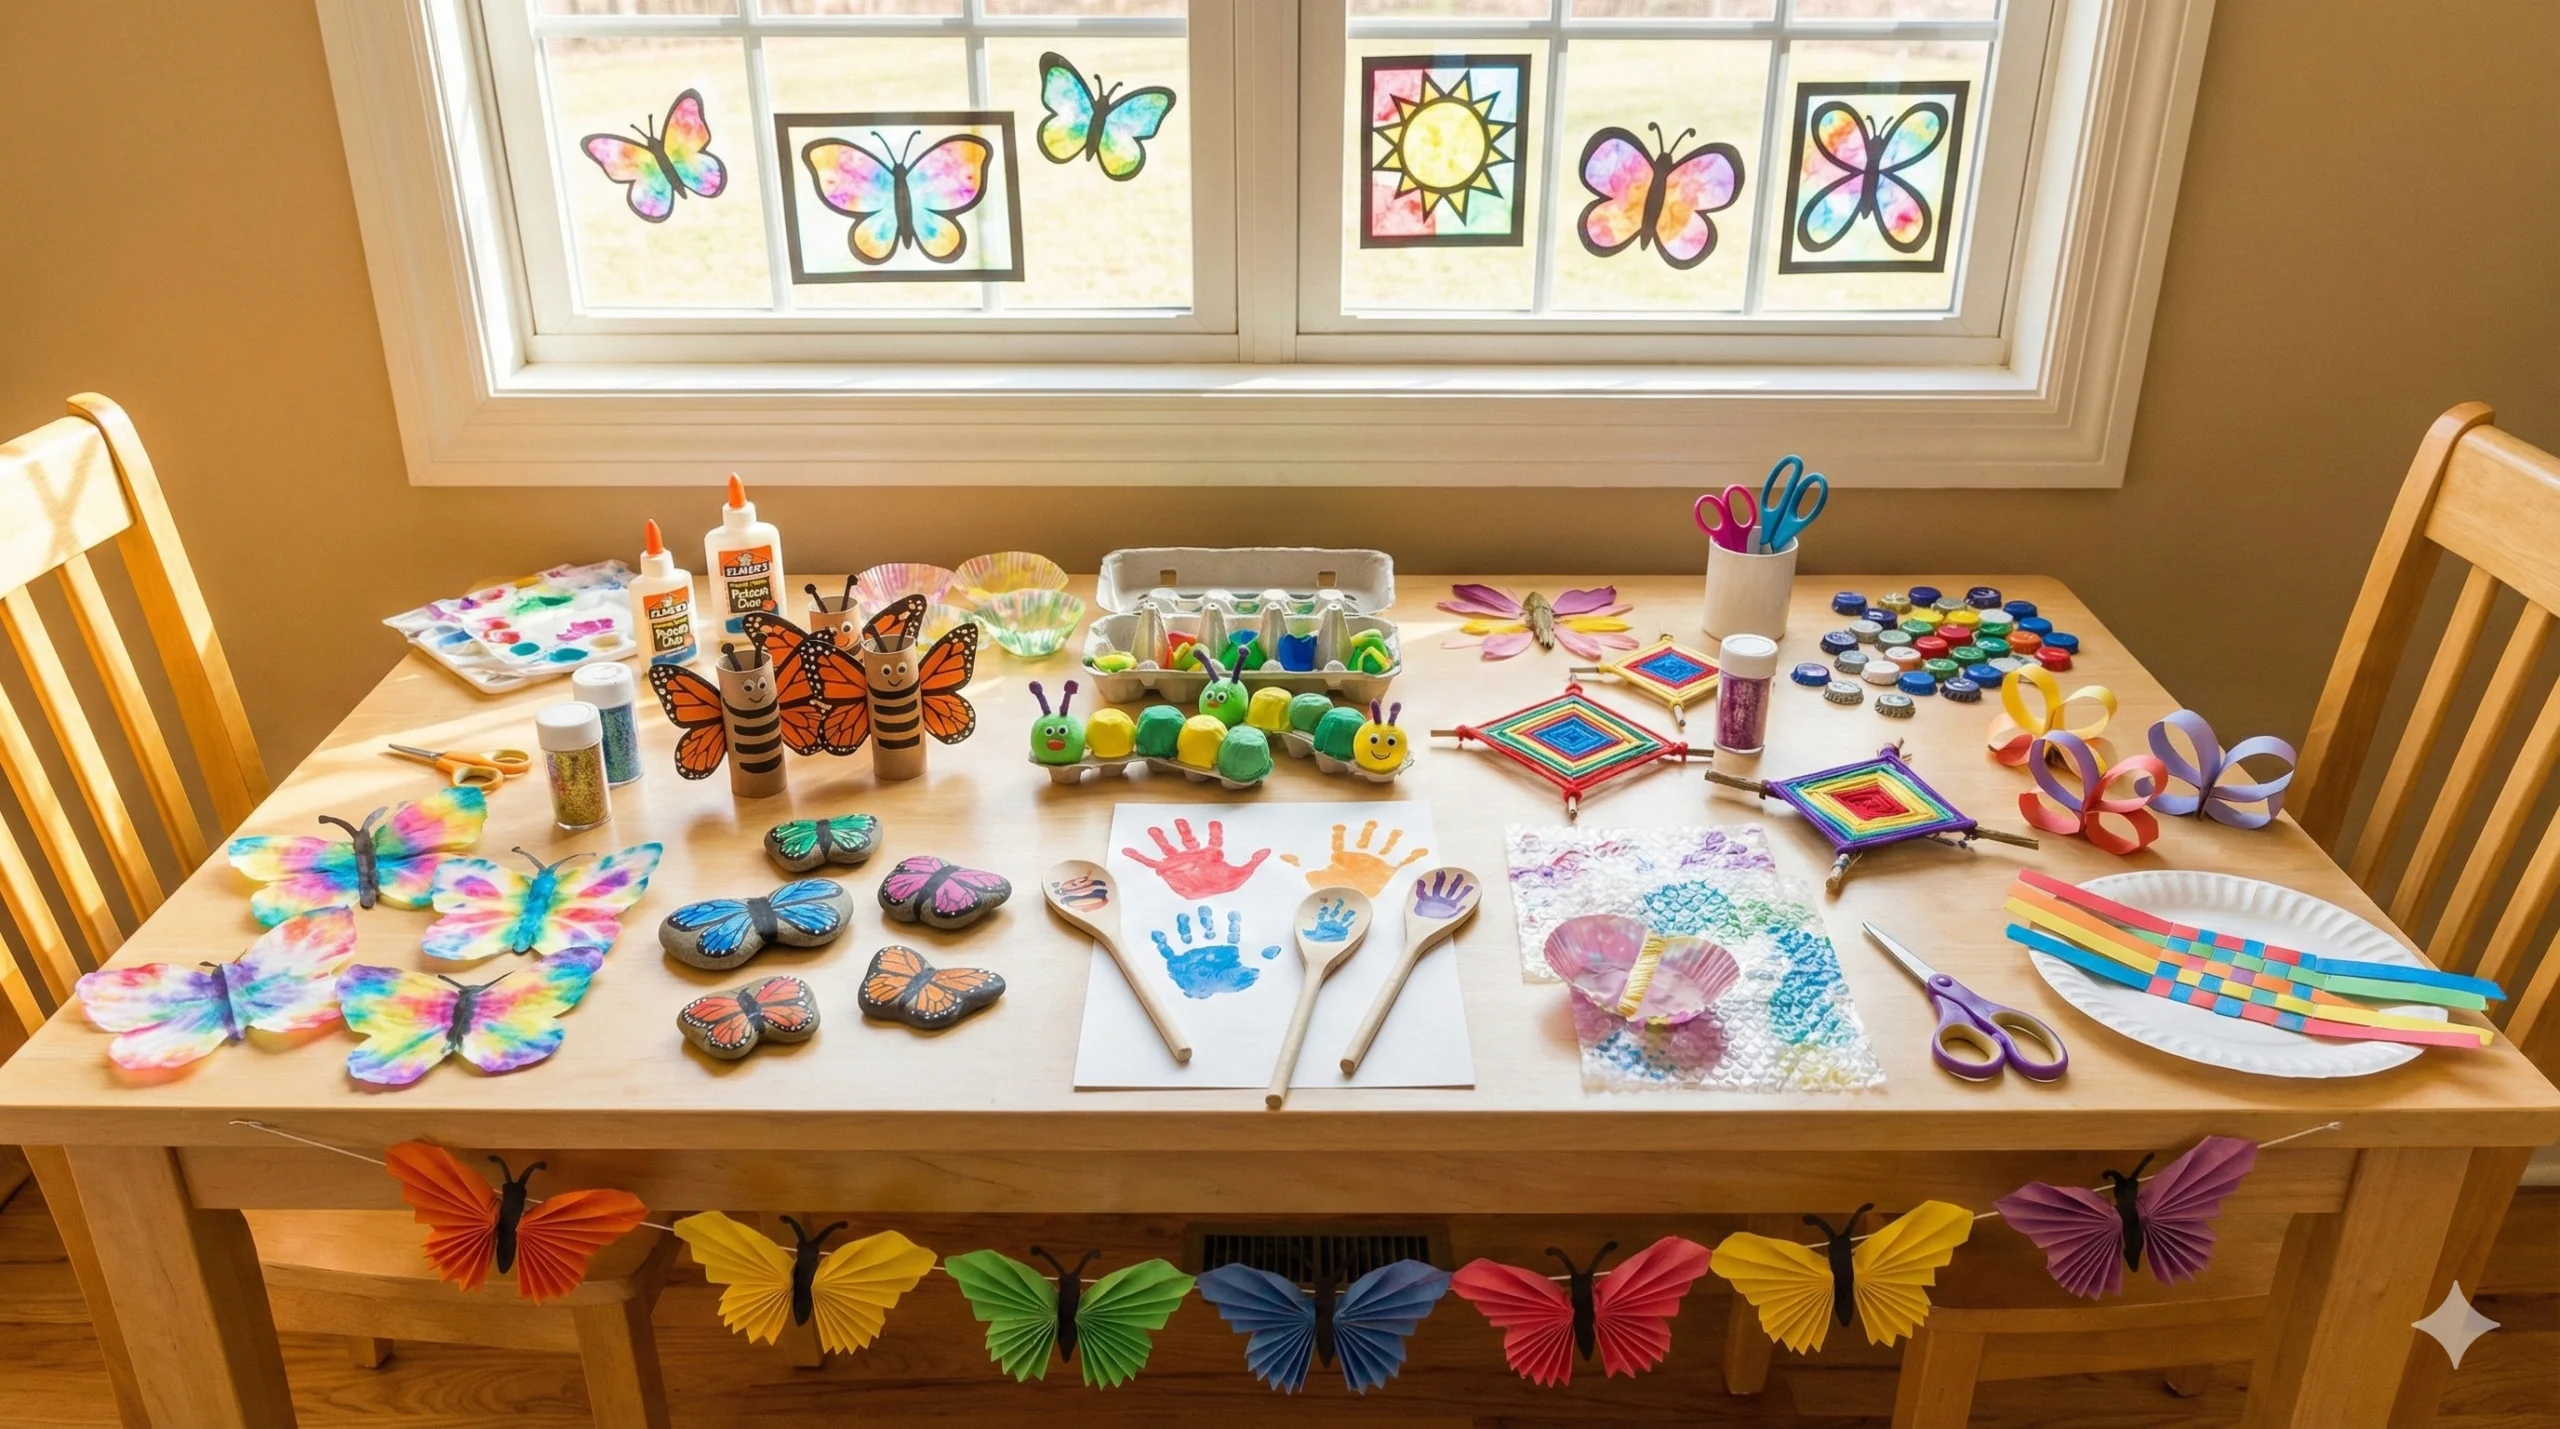
These projects are not just about gluing paper together; they are designed to be super fun, colorful, and educational. Crafting is a stealthy way to help little ones fine-tune their fine motor skills, learn about color symmetry, and explore different textures. Whether you are a teacher looking for a classroom theme or a parent needing a rainy-day activity, this list has something for every age group.
Let’s spread our wings and dive into the world of creativity!
Why Butterfly Crafts are Perfect for Development
Before we get to the glue and glitter, it’s worth noting why these specific crafts are so valuable.
- Symmetry Lessons: Butterflies are nature’s perfect example of symmetry. Painting one wing and folding it to print the other is a classic math lesson disguised as art.
- Fine Motor Practice: Scissor skills, threading beads, and pinching pipe cleaners all strengthen the small muscles in the hand.
- Upcycling: Many of these crafts use recycled materials, teaching kids that “trash” can become treasure.
Part 1: Nature & Outdoor Inspired Butterflies
Bring the beauty of the garden inside.
1. The Nature Walk Petal Butterfly
This is a two-part activity. First, take the kids on a nature walk. Collect fallen petals, interesting leaves, small twigs, and dandelions.
- How to make it: Draw a simple butterfly outline on a piece of cardstock. Instead of using crayons, have the kids glue their nature finds onto the wings. A long twig makes a perfect body, and colorful petals create a mosaic effect on the wings. It’s ephemeral art at its best.
2. Stick & Yarn “God’s Eye” Butterfly
Based on the classic camp craft (Ojo de Dios), this version uses sticks found in the yard.
- How to make it: Cross two sticks to form an ‘X’ and secure them with yarn. Weave colorful yarn around the center to create the body, then loop the yarn around the ends of the sticks to create diamond-shaped wings. This is excellent for coordination and concentration.
3. Pebble Art Butterflies
- How to make it: Find smooth, flat stones. Paint them in bright acrylic colors. Use a larger long stone for the body and four smaller, rounder stones for the wings. These look fantastic placed in potted plants or scattered in the garden.
Part 2: Upcycled Materials (Eco-Friendly Crafts)
Don’t throw it away—turn it into a butterfly!
4. Toilet Paper Roll Monarchs
The classic toilet paper roll craft never goes out of style.
- How to make it: Paint the cardboard tube black. Cut wing shapes out of orange construction paper and draw black veins on them to mimic a Monarch butterfly. Glue the wings to the back of the roll. Add pipe cleaner antennae and googly eyes.
5. Egg Carton Caterpillars-to-Butterflies
This craft tells a story.
- How to make it: Cut a strip of 3 or 4 cups from an egg carton. Paint them green to look like a caterpillar. Then, cut large wings from a cereal box, paint them, and glue them to the back of the “caterpillar.” It helps visualize the metamorphosis process.
6. Bottle Cap Mosaic Art
- How to make it: Save plastic bottle caps of different colors. On a piece of sturdy cardboard or wood, arrange the caps to form a butterfly shape. Glue them down. This adds a 3D element and is a great sensory experience for toddlers.
7. Bubble Wrap Prints
Don’t pop that bubble wrap just yet!
- How to make it: Cut a piece of bubble wrap into a wing shape. Paint the bubbly side with wet tempera paint. Press it onto a piece of paper like a stamp. The result is a textured, honeycomb-patterned butterfly that looks professionally done.
8. The Cupcake Liner Flutter
- How to make it: You need two patterned cupcake liners. Flatten them out and fold them in half. Glue them onto a popsicle stick (the body) so the rounded edges face out like wings. These are lightweight and look great stuck onto greeting cards.
Part 3: Paper & Paint Masterpieces
Classic classroom favorites.
9. Coffee Filter Tie-Dye
This is a science experiment and art project rolled into one.
- How to make it: Flatten a white coffee filter. Let kids draw on it with washable markers (not permanent!). Spray the filter with water. Watch the colors bleed and blend into a tie-dye effect. Once dry, pinch the center with a clothespin to create the butterfly body.
10. The “Squish” Painting (Symmetry Art)
A quintessential preschool activity.
- How to make it: Fold a piece of paper in half. Open it and put blobs of wet paint on only one side near the crease. Fold the paper closed and rub it gently. Open it up to reveal a perfectly symmetrical butterfly.
11. Handprint Keepsakes
Parents love these because they capture the size of their child’s hand.
- How to make it: Paint the child’s hands. Have them press their hands onto paper with their palms touching and fingers splayed out. The thumbs form the body, and the fingers form the wings. Once dry, draw on the antennae.
12. Accordion Paper Garland
This will surely bring the outdoors into your home.
- How to make it: Take square pieces of colored paper. Fold them accordion-style (back and forth). Pinch the middle and wrap a pipe cleaner around it. Fluff out the sides to make wings. String several together to make a festive garland for a party.
13. Tissue Paper Suncatchers
- How to make it: Cut a butterfly frame out of black construction paper. Stick it onto clear contact paper (sticky side up). Have kids stick small squares of colored tissue paper onto the sticky part. Seal it with another layer of contact paper and cut it out. Hang it in the window to catch the light.
14. 3D Construction Paper Loops
- How to make it: Cut strips of colorful paper. Loop them into circles and glue the ends. Glue these loops onto a paper butterfly outline to fill in the wings. This creates a beautiful 3D relief effect that pops off the page.
15. Paper Plate Weaver
- How to make it: Cut a paper plate into a butterfly shape. Punch holes around the edges of the wings. Give the child a piece of yarn and let them “sew” through the holes. It’s a great introduction to sewing and weaving.
Part 4: Wearable & Playful Butterflies
Crafts that double as toys.
16. Wooden Spoon Puppets
Turn ordinary kitchen utensils into one-of-a-kind beauties!
- How to make it: Use a wooden spoon as the body. Paint a face on the curved part. Glue paper or foam wings to the handle. These are great for an afternoon of puppet play or storytelling.
17. Clothespin Snack Clips
- How to make it: Paint a wooden clothespin. Fill a snack bag (ziplock) with grapes on one side and goldfish crackers on the other. Clip the clothespin in the middle of the bag. The snacks form the colorful wings! A perfect party favor.
18. Felt Finger Puppets
- How to make it: Cut a simple butterfly shape out of stiff felt. Cut two small slits in the center (body). The child slides their finger through the slits to become the body of the butterfly.
19. Pasta Bow Tie (Farfalle) Art
- How to make it: Use dry Farfalle pasta (bow ties). They are already shaped like butterflies! Paint them with acrylics and glue them onto a painted canvas or a picture frame.
20. The Magic Flying Butterfly (Balloon)
- How to make it: Inflate a balloon (this is the body). Tape large, lightweight paper wings to the sides. When you bat the balloon into the air, the wings flutter, making it look like a giant flying butterfly.
Educational Bonus: Fun Butterfly Facts
While you are crafting, keep the conversation going with these fun facts to make the activity educational:
- Taste with their feet: Butterflies have taste sensors on their feet to help them find food.
- Transparent wings: Their wings are actually made of transparent layers of chitin, covered in thousands of tiny scales that reflect light in different colors.
- No chewing: Butterflies don’t have teeth. They drink nectar through a long tube called a proboscis, which works like a straw.
Final Thoughts
Crafting with kids is about the process, not just the result. It is about the sticky fingers, the mismatched colors, and the pride they feel when they hold up their creation.
These 20 butterfly crafts offer a variety of ways to engage children of all ages. Whether you are using coffee filters, toilet rolls, or nature itself, you are building memories and skills that last a lifetime. So, clear off the kitchen table, grab your supplies, and let your creativity take flight this season!