
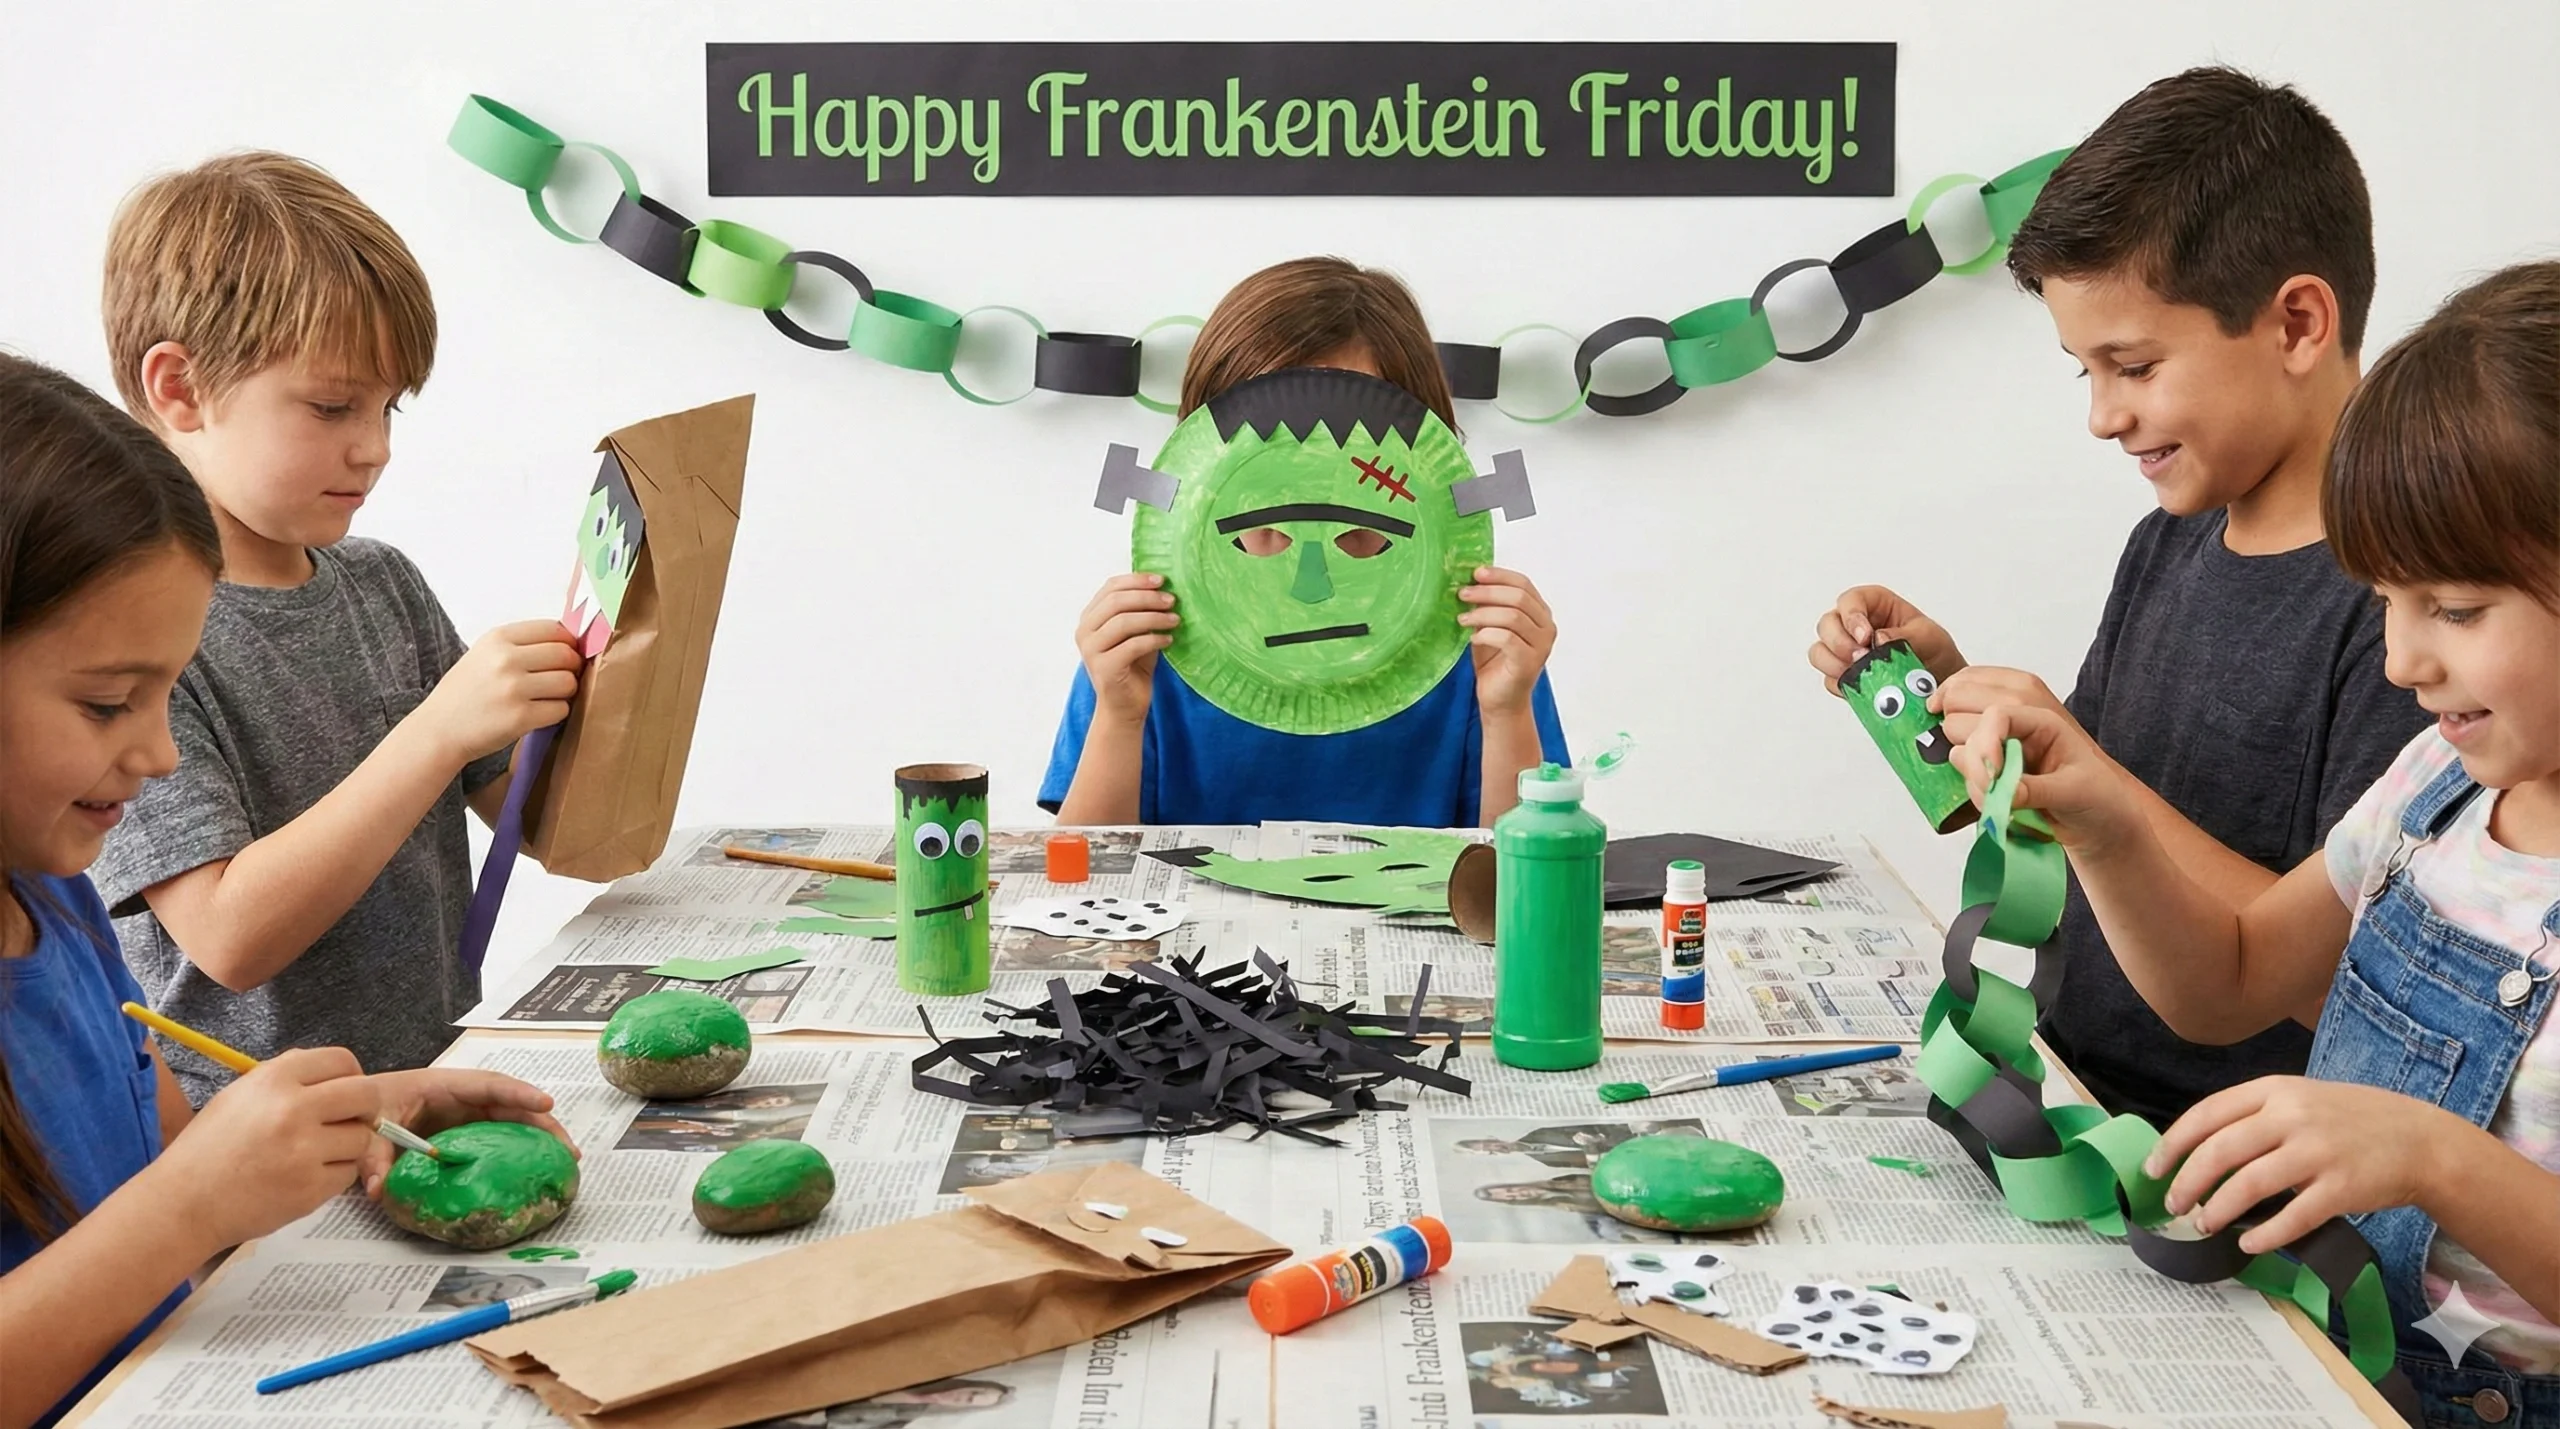
Celebrate Frankenstein Friday or Frankenstein Day with these electrifyingly fun Frankenstein crafts for kids! Whether you have paper plates, craft sticks, or recycled cardboard, get ready to raid your craft stash for everything green and black to unleash your creativity.
Why is Frankenstein Celebrating in August?
You might be wondering, “What is Frankenstein doing here more than a month before Halloween?” While we usually associate the big green monster with October 31st, he actually has his own special day in the summer!
August 30th is officially Frankenstein Day. This date wasn’t chosen at random; it is the birthday of Mary Shelley, the brilliant author who wrote the original novel, Frankenstein. Additionally, there is a second celebration known as Frankenstein Friday, which falls on the last Friday of October, kicking off the Halloween weekend.
So, whether you are beating the summer heat in August or getting spooky in October, it is always the perfect time for some monster-themed crafting.
The Fascinating History Behind the Monster
Before we dive into the glue and glitter, let’s turn this into a learning moment. The story of how Frankenstein came to be is almost as dramatic as the book itself!
In 1815, a massive volcano named Mount Tambora erupted in Indonesia. It was so powerful that it changed the global climate, leading to the “Year Without a Summer” in Europe. It was cold, rainy, and gloomy.
During this dreary time, an 18-year-old Mary Shelley was on holiday in Switzerland with her future husband and their friend, the famous poet Lord Byron. Trapped indoors by the rain, the group was bored. Lord Byron proposed a challenge: A Ghost Story Writing Contest.
Mary struggled at first with writer’s block. However, late one night, she had a waking dream—a nightmare, really—about a scientist kneeling beside a creature he had pieced together, waiting for a spark of life to animate it. That terrifying dream became the plot for her entry. Mary won the contest, and in 1818, Frankenstein; or, The Modern Prometheus was published.
Now, let’s honor Mary Shelley’s imagination by sparking some creativity of our own!
The Ultimate List: 20 Frankenstein Crafts for Kids
We have categorized these crafts to help you find exactly what you need, from simple paper projects to recycled treasures and sensory play.
Category 1: Paper & Cardboard Creations
Perfect for classrooms and quick afternoon activities.
1. The Classic Paper Plate Frankenstein The paper plate is the humble hero of kid’s crafts. Paint a standard paper plate bright lime green. Once dry, cut jagged black paper for the hair (the iconic flat top!) and glue it to the top. Use a black marker to draw stitches across the “forehead” and add two large googly eyes. Tip: Punch holes in the sides and tie a string to make it a mask!
2. Toilet Roll Monster Don’t throw away those cardboard tubes! Wrap a toilet paper roll in green construction paper. Draw a grumpy or silly face with markers. Glue two bolts (made of aluminum foil balls or grey paper) to the sides of the neck. These stand up on their own, making them great for pretend play.
3. Origami Frankenstein Bookmark Encourage reading with a spooky corner bookmark. Using square green paper, follow standard corner bookmark folding instructions. Once you have the basic pocket shape, decorate the top triangle to look like Frankenstein’s monster. When you slide it onto the page, it looks like the monster is taking a bite out of your book!
4. Tissue Box Candy Eater Take an empty tissue box and paint it green. The opening of the box will be the mouth. Glue white paper teeth around the inside of the opening. Add big eyes and hair to the top. This can be used to hold Halloween candy or as a “tattle monster” where kids write down worries and feed them to Frank.
5. Paper Bag Puppet Using a standard brown lunch bag, paint the flap and the body green. The flap serves as the face, which moves when the child puts their hand inside. This is excellent for storytelling and puppet shows after the crafting is done.
Category 2: Recycled & Upcycled Crafts
Teach sustainability while being spooky.
6. Tin Can Pencil Holder Save a clean soup can (ensure no sharp edges). Have the kids wrap it in green felt or paint it with acrylics. Glue on button eyes and draw a stitched mouth. This creates a functional piece of desk decor that can hold pencils, markers, or paintbrushes all year round.
7. Milk Jug Luminaries Save your gallon milk jugs! Wash them out and draw a Frankenstein face on the side opposite the handle. Cut a small hole in the back and insert a battery-operated tea light or a glow stick. When the lights go out, these glow an eerie green!
8. Egg Carton Eyebrows The shape of an egg carton cup is perfect for the monster’s heavy brow ridge. Cut a section of two cups, paint them green, and glue them onto a cardboard base or a mask. It adds a fantastic 3D element to any flat craft.
9. Plastic Bottle Bowling Pins Take 6 to 10 empty plastic water bottles. Pour a little green paint inside, put the cap on, and shake until the inside is coated. Once dry, decorate the outside with Sharpies to look like monsters. Set them up and use a small pumpkin or ball to go bowling!
10. CD Suncatcher Do you have old, scratched CDs? They make great bases. Cover the shiny side with green tissue paper squares (use watered-down glue). The light will shine through the tissue paper, while the CD provides a sturdy frame. Add paper features on top.
Category 3: Sticks, Stones, and Sensory Play
- engaging the senses and fine motor skills.*
11. Popsicle Stick Puzzle Line up 8-10 jumbo craft sticks side-by-side. Tape them together on the back. Turn them over and paint a large Frankenstein face across the entire surface. Once dry, remove the tape and mix up the sticks. Challenge your child to put the face back together!
12. Green Slime Science You can’t have a mad scientist theme without slime! Make a standard batch of slime using clear glue, baking soda, and contact solution. Add plenty of neon green food coloring and some black glitter. It’s gross, gooey, and perfectly on theme.
13. Frankenstein Rock Painting Find smooth, oval-shaped rocks in the garden. Wash and dry them, then paint them green. These are perfect because the rock shape mimics the monster’s blocky head. Use black paint for the hair and bolts. These make great paperweights or garden decorations.
14. Handprint Keepsake Paint your child’s palm and fingers green, but paint the tips of the fingers black (for hair). Press the hand onto a white canvas. The palm becomes the face, and the fingers are the hair. Once dry, paint on the eyes and bolts.
15. Felt Plushie (Intro to Sewing) For older kids, cut two rectangles of green felt. Punch holes around the edges and let them use a plastic needle and yarn to whip-stitch the sides. Stuff with cotton, sew shut, and decorate with felt glue. It’s a great introduction to sewing skills.
Category 4: Edible “Crafts”
Kitchen creativity is just as important!
16. Frankenstein Pudding Cups Use clear plastic cups. Draw a monster face on the outside with a Sharpie. Fill the cup with vanilla pudding dyed green. Top with crushed Oreo cookies to represent the hair.
17. Marshmallow Pops Place large marshmallows on lollipop sticks. Dip them in green candy melts. Before the candy hardens, add candy eyes and sprinkle chocolate jimmies on top for hair. Use an edible marker to draw the mouth.
18. Square Kiwi Monsters For a healthy option, peel a kiwi. Since kiwis are naturally green, you just need to slice the top flat (for the flat head). Use pretzels for the neck bolts and dried blueberries/raisins for eyes.
Category 5: Party Decor & Wearables
19. Frankenstein Sun Visor Using green foam sheets, cut out a visor shape. This is a great party favor. Kids can decorate their own hats with foam stickers, adding scars, bolts, and crazy hair.
20. Paper Chain Garland Cut strips of green and black construction paper. On the green strips, draw faces. Loop them together, alternating green and black, to create a long garland to hang across the mantle or classroom door.
The Benefits of Crafting with “Monsters”
Crafting characters like Frankenstein offers more than just entertainment; it provides a safe way for children to explore concepts that might otherwise be scary.
- Overcoming Fear: By making a monster out of paper and glue, children take control of the image. The monster becomes silly, not scary.
- Fine Motor Skills: Cutting jagged hair, gluing small googly eyes, and painting within lines all help strengthen hand muscles.
- Literary Appreciation: For older kids, this is a gateway to discussing literature. You can talk about Mary Shelley and how stories are created.
Conclusion
Whether you are celebrating Mary Shelley’s birthday on August 30th or preparing for a spooktacular Halloween party in October, these 20 Frankenstein crafts offer something for every age and skill level.
Remember, the beauty of Frankenstein’s monster was that he was pieced together from different parts. Similarly, these crafts encourage kids to take different materials—trash, paper, glue, and paint—and piece them together to create something brand new and alive with personality.
So, gather your little “mad scientists,” spread out the newspapers, and get ready to spark some creativity. It’s alive!
Frequently Asked Questions (FAQs)
Q: Is Frankenstein the monster or the doctor? A: Technically, Victor Frankenstein is the scientist (the doctor). The creature is nameless in the book, often referred to as “The Monster” or “The Creature.” However, in pop culture, the name Frankenstein is often used to describe the monster, and for kids’ crafts, we usually just say “Frankenstein.”
Q: Are these crafts suitable for toddlers? A: Yes! The Paper Plate Frankenstein, Handprint Keepsake, and Green Slime are excellent for toddlers. Just ensure adult supervision, especially with small parts like googly eyes to prevent choking.
Q: How can I make these crafts eco-friendly? A: Focus on the “Recycled & Upcycled” category. Use biodegradable glitter, avoid plastic googly eyes (draw them on instead), and use recycled cardboard from your home recycling bin.