
In a world saturated with high-frequency digital noise and “single-use” plastic toys, we are witnessing a quiet return to the workbench. The movement toward DIY (Do-It-Yourself) toys isn’t merely a nostalgic trip to the past or a way to save money; it is a fundamental shift in how we view child development and environmental stewardship.
When a child plays with a store-bought, battery-operated gadget, they are often a passive observer of the toy’s pre-programmed actions. However, when a child engages with a DIY plaything, they become an active participant in a narrative they helped create. This article explores the philosophy of “purposeful play” and provides detailed blueprints for high-quality, durable, and developmentally significant DIY toys.
1. The Philosophy of Open-Ended Play
Before picking up a hammer or a glue gun, it is essential to understand the “Open-Ended” concept. Open-ended toys are those that can be used in multiple ways depending on the child’s imagination. A wooden block can be a phone, a car, a piece of cake, or part of a castle.
By making toys at home, you bypass the “one-hit-wonder” nature of modern toys and focus on Loose Parts Theory. This theory suggests that the more variables a play environment has, the more creativity it fosters.
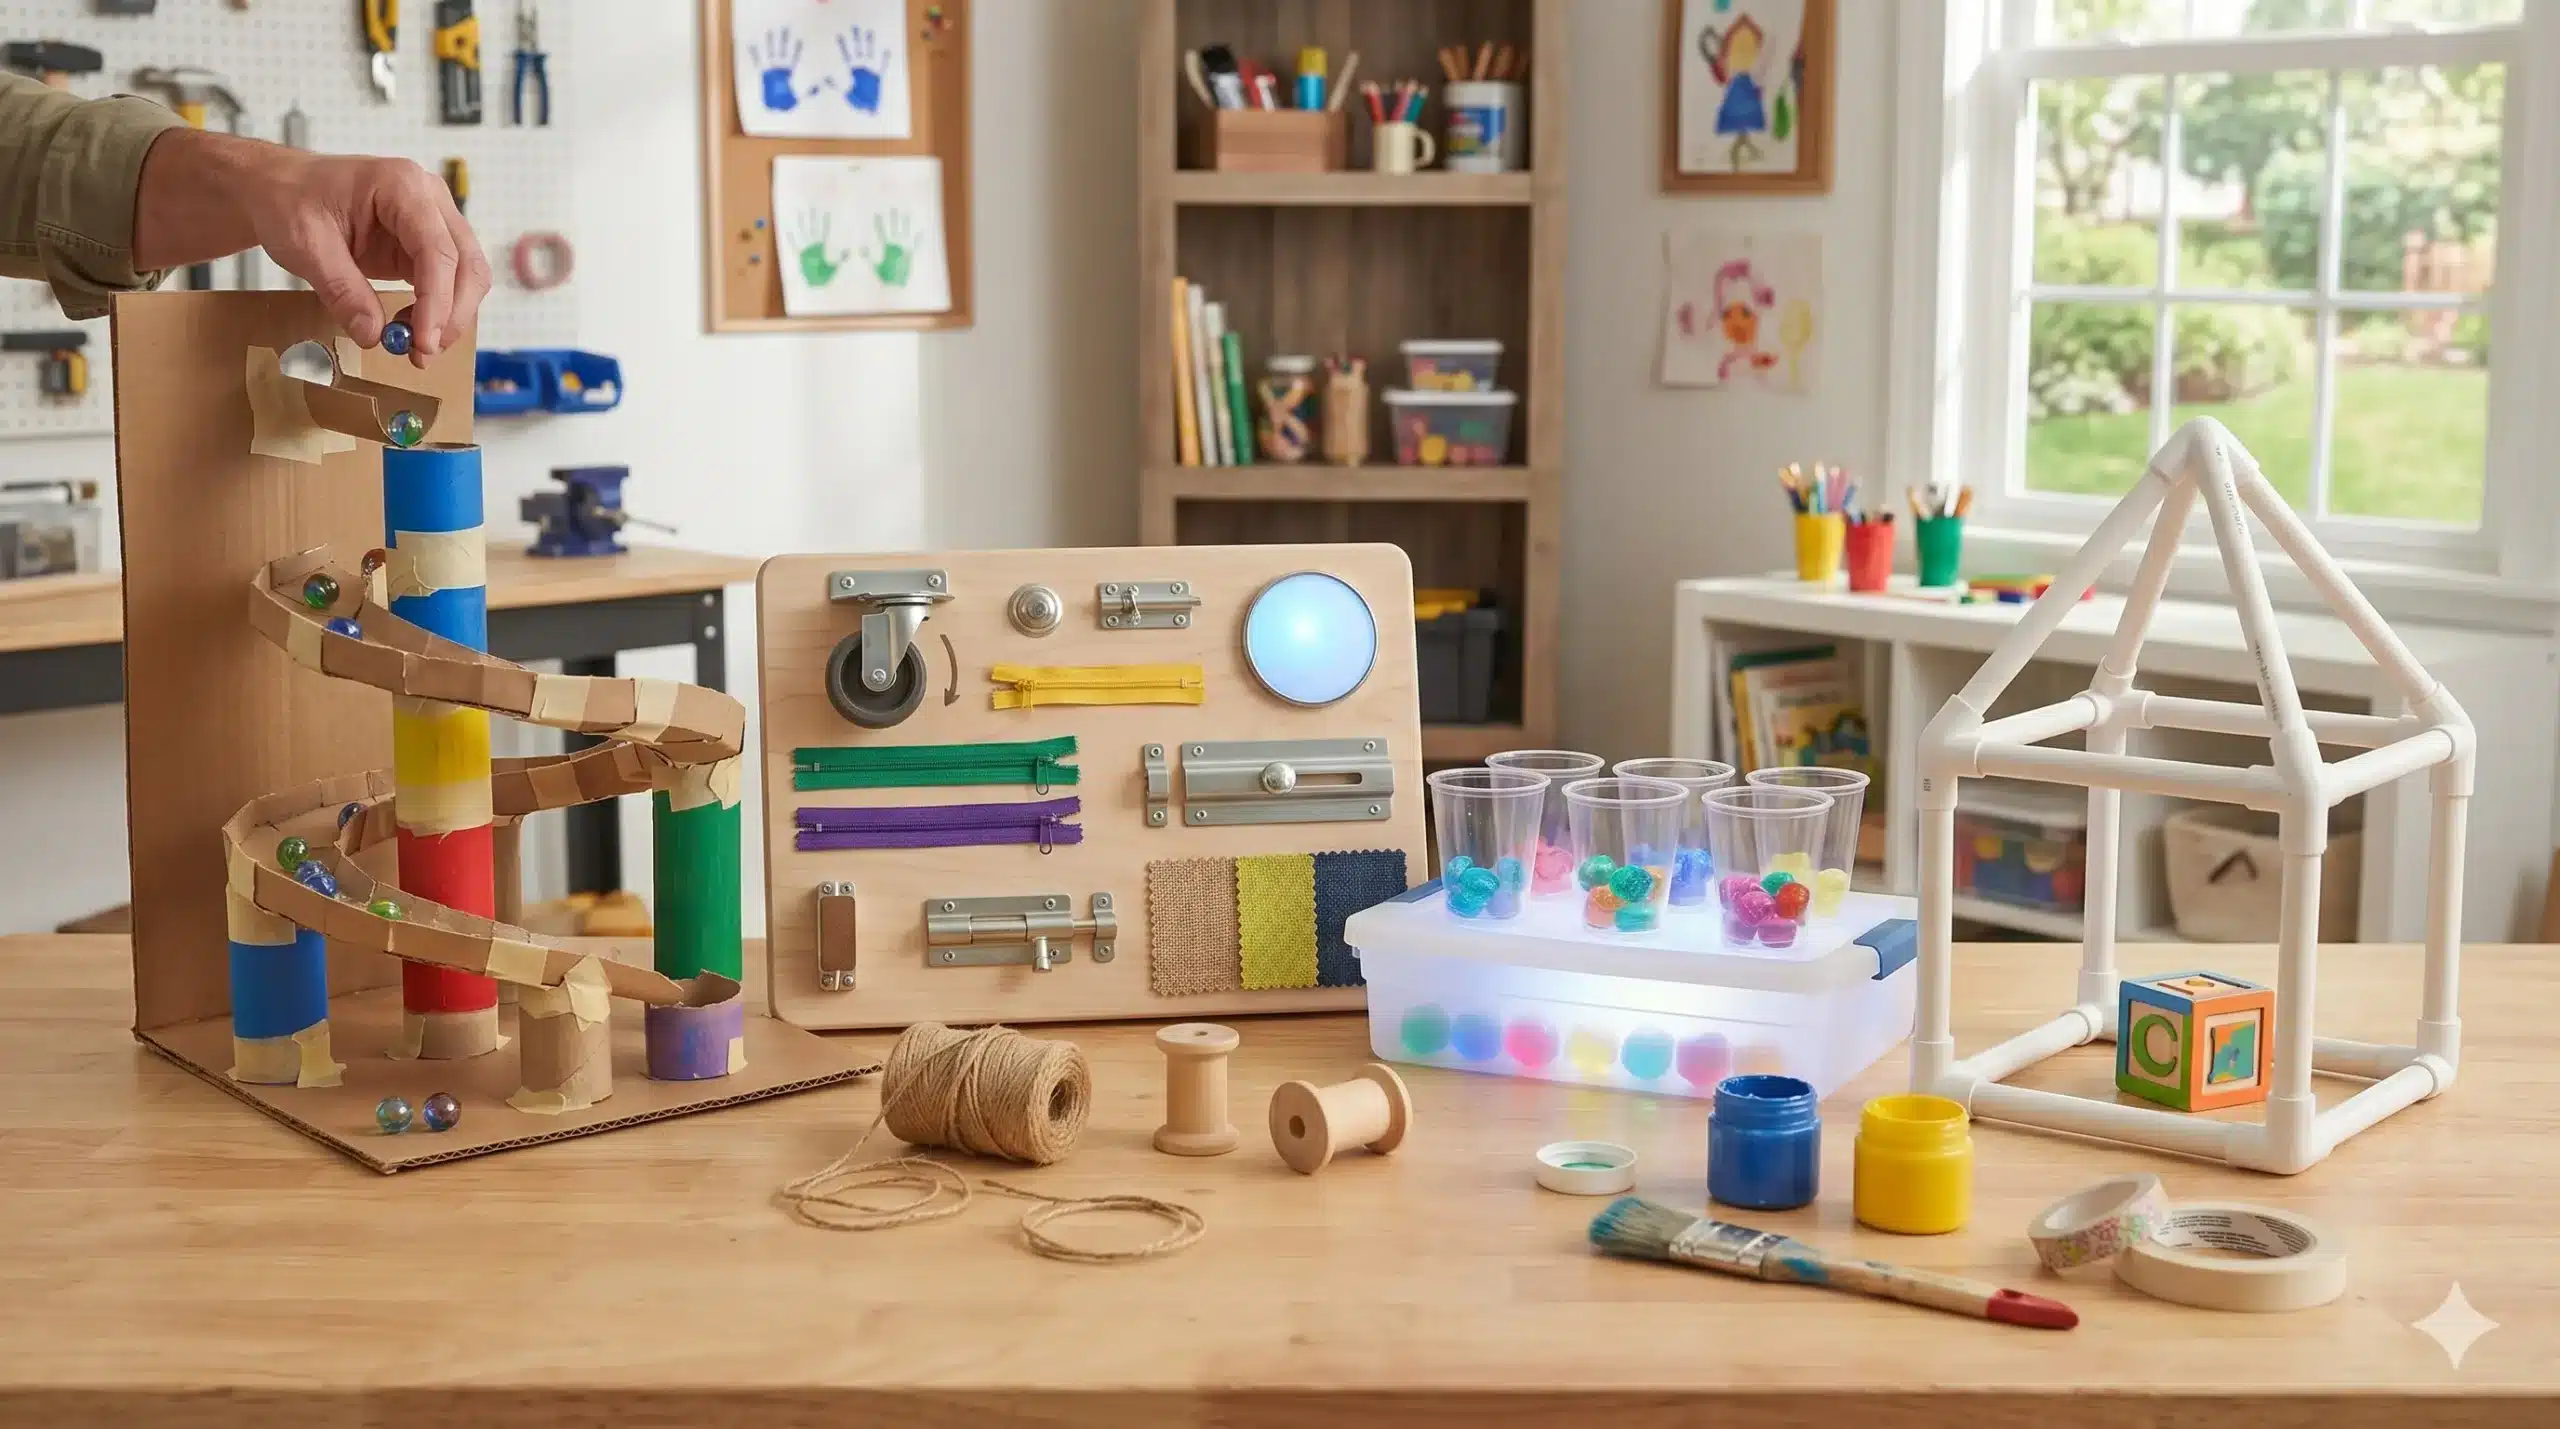
2. Project: The Ultimate Vertical Marble Run
Target Skills: Gravity physics, spatial reasoning, and persistence.
A marble run is a classic, but the “vertical” DIY version turns a wall or a refrigerator into a dynamic laboratory. Unlike plastic sets that break easily, this version is infinitely customizable.
Materials:
- Cardboard Tubes: Collected from paper towels and shipping rolls.
- Adhesive: High-quality painter’s tape (leaves no residue) or Velcro strips for a permanent “play wall.”
- The Track: Plastic guttering scraps or split PVC pipes work wonders for long-term durability.
- A “Catch” Basin: An old plastic container or a felt-lined wooden box.
Instructions:
- Preparation: Cut several tubes in half lengthwise to create “open tracks” where the marble is visible. Leave others whole to create “tunnels.”
- The Inclination: Teach your child about the Angle of Repose. If the track is too flat, the marble stops; if it’s too steep, it flies off.
- The Build: Start from the bottom and work up. This allows you to test each segment as you go. Use “junctions” where two tracks lead into one tube to introduce the concept of merging traffic.
3. Project: The Montessori-Inspired Sensory Latch Board
Target Skills: Fine motor control, hand-eye coordination, and problem-solving.
This is often called a “Busy Board.” For a toddler, the world is full of forbidden “adult” objects like locks and switches. This project gives them a safe space to master these mechanical challenges.
Materials:
- Base: A 2ft x 2ft piece of sanded birch plywood (at least 1/2 inch thick).
- Hardware: Sash locks, slide bolts, barrel bolts, a door chain, and a swivel caster wheel.
- Sensory Elements: A bicycle bell, a touch-light (battery operated), and different fabric textures (velvet, burlap, silk) glued to wooden squares.
Instructions:
- Safety First: Sand the plywood until the edges are buttery smooth. Round the corners using a jigsaw or heavy-grit sandpaper.
- Layout: Arrange the hardware so there is enough “swing room” for latches to open without hitting other components.
- Installation: Use short wood screws that will not pierce through the back of the board. If the board is to be wall-mounted, ensure it is anchored into a stud.
4. Project: The Light Table Laboratory
Target Skills: Color theory, transparency, and artistic composition.
Light tables are staple features in Reggio Emilia classrooms. They transform ordinary objects into glowing treasures, encouraging children to sit and focus for extended periods.
Materials:
- Housing: A shallow, clear plastic storage bin with a frosted or white lid.
- Light Source: A strand of battery-operated LED “fairy lights” or a flat LED puck light.
- Diffuser: If the lid isn’t opaque enough, line the inside with white tissue paper or vellum.
Instructions:
- Placement: Spread the LED lights evenly across the bottom of the bin. Use clear tape to keep them from bunching in one corner.
- Assembly: Snap the lid on. The light should be a soft, even glow across the surface rather than a single bright “hot spot.”
- Play: Provide translucent “manipulatives”—colored plastic cups, dried leaves, glass pebbles (for older children), or X-ray film.
5. Engineering with PVC: The “Fort Framework”
Target Skills: Structural engineering, teamwork, and gross motor skills.
Forget flimsy blankets draped over chairs. A PVC fort kit allows children to build actual skeletons for their secret hideouts.
Materials:
- Pipes: 1/2-inch PVC pipes cut into 2-foot and 4-foot sections.
- Connectors: A mix of 3-way elbows, T-junctions, and 4-way crosses.
- Covering: Old bedsheets and heavy-duty binder clips to secure the “walls.”
Instructions:
- Deburring: After cutting the PVC, use sandpaper to remove the “burrs” (rough plastic bits) from the ends so they slide into the connectors easily.
- The Blueprint: Start by showing the child how to make a square base. Then, introduce the Triangle, explaining that it is the strongest shape in architecture.
- Storage: The beauty of this toy is that it can be disassembled and stored in a small mesh bag when not in use.
6. Crucial Safety and Quality Standards
When making DIY toys, you are the Quality Control department. Follow these non-negotiable rules:
- The “Choke Tube” Test: Any toy small enough to fit inside a toilet paper roll is a choking hazard for children under age 3.
- Non-Toxic Finishes: If painting or staining wood, use “milk paint” or food-grade mineral oil. Avoid traditional solvent-based varnishes.
- Weight Ratios: Ensure that large items (like the sensory board) are either wall-mounted or have a wide enough base that they cannot tip over on a crawling child.
- The “Force” Test: If a part is glued on, pull on it with significant force. If you can pull it off, a determined toddler certainly can.
7. The Evolution of the Toy
One of the greatest advantages of DIY playthings is their ability to grow with the child.
- Age 2: The marble run uses large pom-poms.
- Age 5: The marble run uses standard glass marbles and includes “loops.”
- Age 8: The child uses the marble run to calculate velocity and time using a stopwatch.
By creating these items ourselves, we teach children that they are not just consumers in a world of finished products. They are makers. They are fixers. They are the architects of their own joy.
In a world saturated with high-frequency digital noise and “single-use” plastic toys, we are witnessing a quiet return to the workbench. The movement toward DIY (Do-It-Yourself) toys isn’t merely a nostalgic trip to the past or a way to save money; it is a fundamental shift in how we view child development and environmental stewardship.
When a child plays with a store-bought, battery-operated gadget, they are often a passive observer of the toy’s pre-programmed actions. However, when a child engages with a DIY plaything, they become an active participant in a narrative they helped create. This article explores the philosophy of “purposeful play” and provides detailed blueprints for high-quality, durable, and developmentally significant DIY toys.
1. The Philosophy of Open-Ended Play
Before picking up a hammer or a glue gun, it is essential to understand the “Open-Ended” concept. Open-ended toys are those that can be used in multiple ways depending on the child’s imagination. A wooden block can be a phone, a car, a piece of cake, or part of a castle.
By making toys at home, you bypass the “one-hit-wonder” nature of modern toys and focus on Loose Parts Theory. This theory suggests that the more variables a play environment has, the more creativity it fosters.
2. Project: The Ultimate Vertical Marble Run
Target Skills: Gravity physics, spatial reasoning, and persistence.
A marble run is a classic, but the “vertical” DIY version turns a wall or a refrigerator into a dynamic laboratory. Unlike plastic sets that break easily, this version is infinitely customizable.
Materials:
- Cardboard Tubes: Collected from paper towels and shipping rolls.
- Adhesive: High-quality painter’s tape (leaves no residue) or Velcro strips for a permanent “play wall.”
- The Track: Plastic guttering scraps or split PVC pipes work wonders for long-term durability.
- A “Catch” Basin: An old plastic container or a felt-lined wooden box.
Instructions:
- Preparation: Cut several tubes in half lengthwise to create “open tracks” where the marble is visible. Leave others whole to create “tunnels.”
- The Inclination: Teach your child about the Angle of Repose. If the track is too flat, the marble stops; if it’s too steep, it flies off.
- The Build: Start from the bottom and work up. This allows you to test each segment as you go. Use “junctions” where two tracks lead into one tube to introduce the concept of merging traffic.
3. Project: The Montessori-Inspired Sensory Latch Board
Target Skills: Fine motor control, hand-eye coordination, and problem-solving.
This is often called a “Busy Board.” For a toddler, the world is full of forbidden “adult” objects like locks and switches. This project gives them a safe space to master these mechanical challenges.
Materials:
- Base: A 2ft x 2ft piece of sanded birch plywood (at least 1/2 inch thick).
- Hardware: Sash locks, slide bolts, barrel bolts, a door chain, and a swivel caster wheel.
- Sensory Elements: A bicycle bell, a touch-light (battery operated), and different fabric textures (velvet, burlap, silk) glued to wooden squares.
Instructions:
- Safety First: Sand the plywood until the edges are buttery smooth. Round the corners using a jigsaw or heavy-grit sandpaper.
- Layout: Arrange the hardware so there is enough “swing room” for latches to open without hitting other components.
- Installation: Use short wood screws that will not pierce through the back of the board. If the board is to be wall-mounted, ensure it is anchored into a stud.
4. Project: The Light Table Laboratory
Target Skills: Color theory, transparency, and artistic composition.
Light tables are staple features in Reggio Emilia classrooms. They transform ordinary objects into glowing treasures, encouraging children to sit and focus for extended periods.
Materials:
- Housing: A shallow, clear plastic storage bin with a frosted or white lid.
- Light Source: A strand of battery-operated LED “fairy lights” or a flat LED puck light.
- Diffuser: If the lid isn’t opaque enough, line the inside with white tissue paper or vellum.
Instructions:
- Placement: Spread the LED lights evenly across the bottom of the bin. Use clear tape to keep them from bunching in one corner.
- Assembly: Snap the lid on. The light should be a soft, even glow across the surface rather than a single bright “hot spot.”
- Play: Provide translucent “manipulatives”—colored plastic cups, dried leaves, glass pebbles (for older children), or X-ray film.
5. Engineering with PVC: The “Fort Framework”
Target Skills: Structural engineering, teamwork, and gross motor skills.
Forget flimsy blankets draped over chairs. A PVC fort kit allows children to build actual skeletons for their secret hideouts.
Materials:
- Pipes: 1/2-inch PVC pipes cut into 2-foot and 4-foot sections.
- Connectors: A mix of 3-way elbows, T-junctions, and 4-way crosses.
- Covering: Old bedsheets and heavy-duty binder clips to secure the “walls.”
Instructions:
- Deburring: After cutting the PVC, use sandpaper to remove the “burrs” (rough plastic bits) from the ends so they slide into the connectors easily.
- The Blueprint: Start by showing the child how to make a square base. Then, introduce the Triangle, explaining that it is the strongest shape in architecture.
- Storage: The beauty of this toy is that it can be disassembled and stored in a small mesh bag when not in use.
6. Crucial Safety and Quality Standards
When making DIY toys, you are the Quality Control department. Follow these non-negotiable rules:
- The “Choke Tube” Test: Any toy small enough to fit inside a toilet paper roll is a choking hazard for children under age 3.
- Non-Toxic Finishes: If painting or staining wood, use “milk paint” or food-grade mineral oil. Avoid traditional solvent-based varnishes.
- Weight Ratios: Ensure that large items (like the sensory board) are either wall-mounted or have a wide enough base that they cannot tip over on a crawling child.
- The “Force” Test: If a part is glued on, pull on it with significant force. If you can pull it off, a determined toddler certainly can.
7. The Evolution of the Toy
One of the greatest advantages of DIY playthings is their ability to grow with the child.
- Age 2: The marble run uses large pom-poms.
- Age 5: The marble run uses standard glass marbles and includes “loops.”
- Age 8: The child uses the marble run to calculate velocity and time using a stopwatch.
By creating these items ourselves, we teach children that they are not just consumers in a world of finished products. They are makers. They are fixers. They are the architects of their own joy.