
In an era dominated by flashing screens and plastic gadgets that arrive at our doorsteps with a single click, there is a quiet, profound revolution happening on kitchen tables and workshop floors. We are rediscovering the DIY toy.
But this isn’t about saving a few dollars or recycling an old milk carton—though those are excellent perks. Making playable things for children is an act of intentional parenting and educational design. When a child sees a pile of “loose parts” transform into a functional plaything, their understanding of the world shifts from passive consumption to active creation.
Why DIY? The Psychology of “Homemade”
Before we dive into the how, we must understand the why. A store-bought toy is often “closed.” It has one purpose, one sound, and one way to play. DIY toys are inherently “open-ended.”
- Agency: Children who help build their toys develop a sense of mastery over their environment.
- Sustainability: It teaches the vital lesson that we don’t always need to “buy” a solution; often, we can “build” it.
- Customization: You can tailor the complexity of the toy to the specific developmental stage of your child.
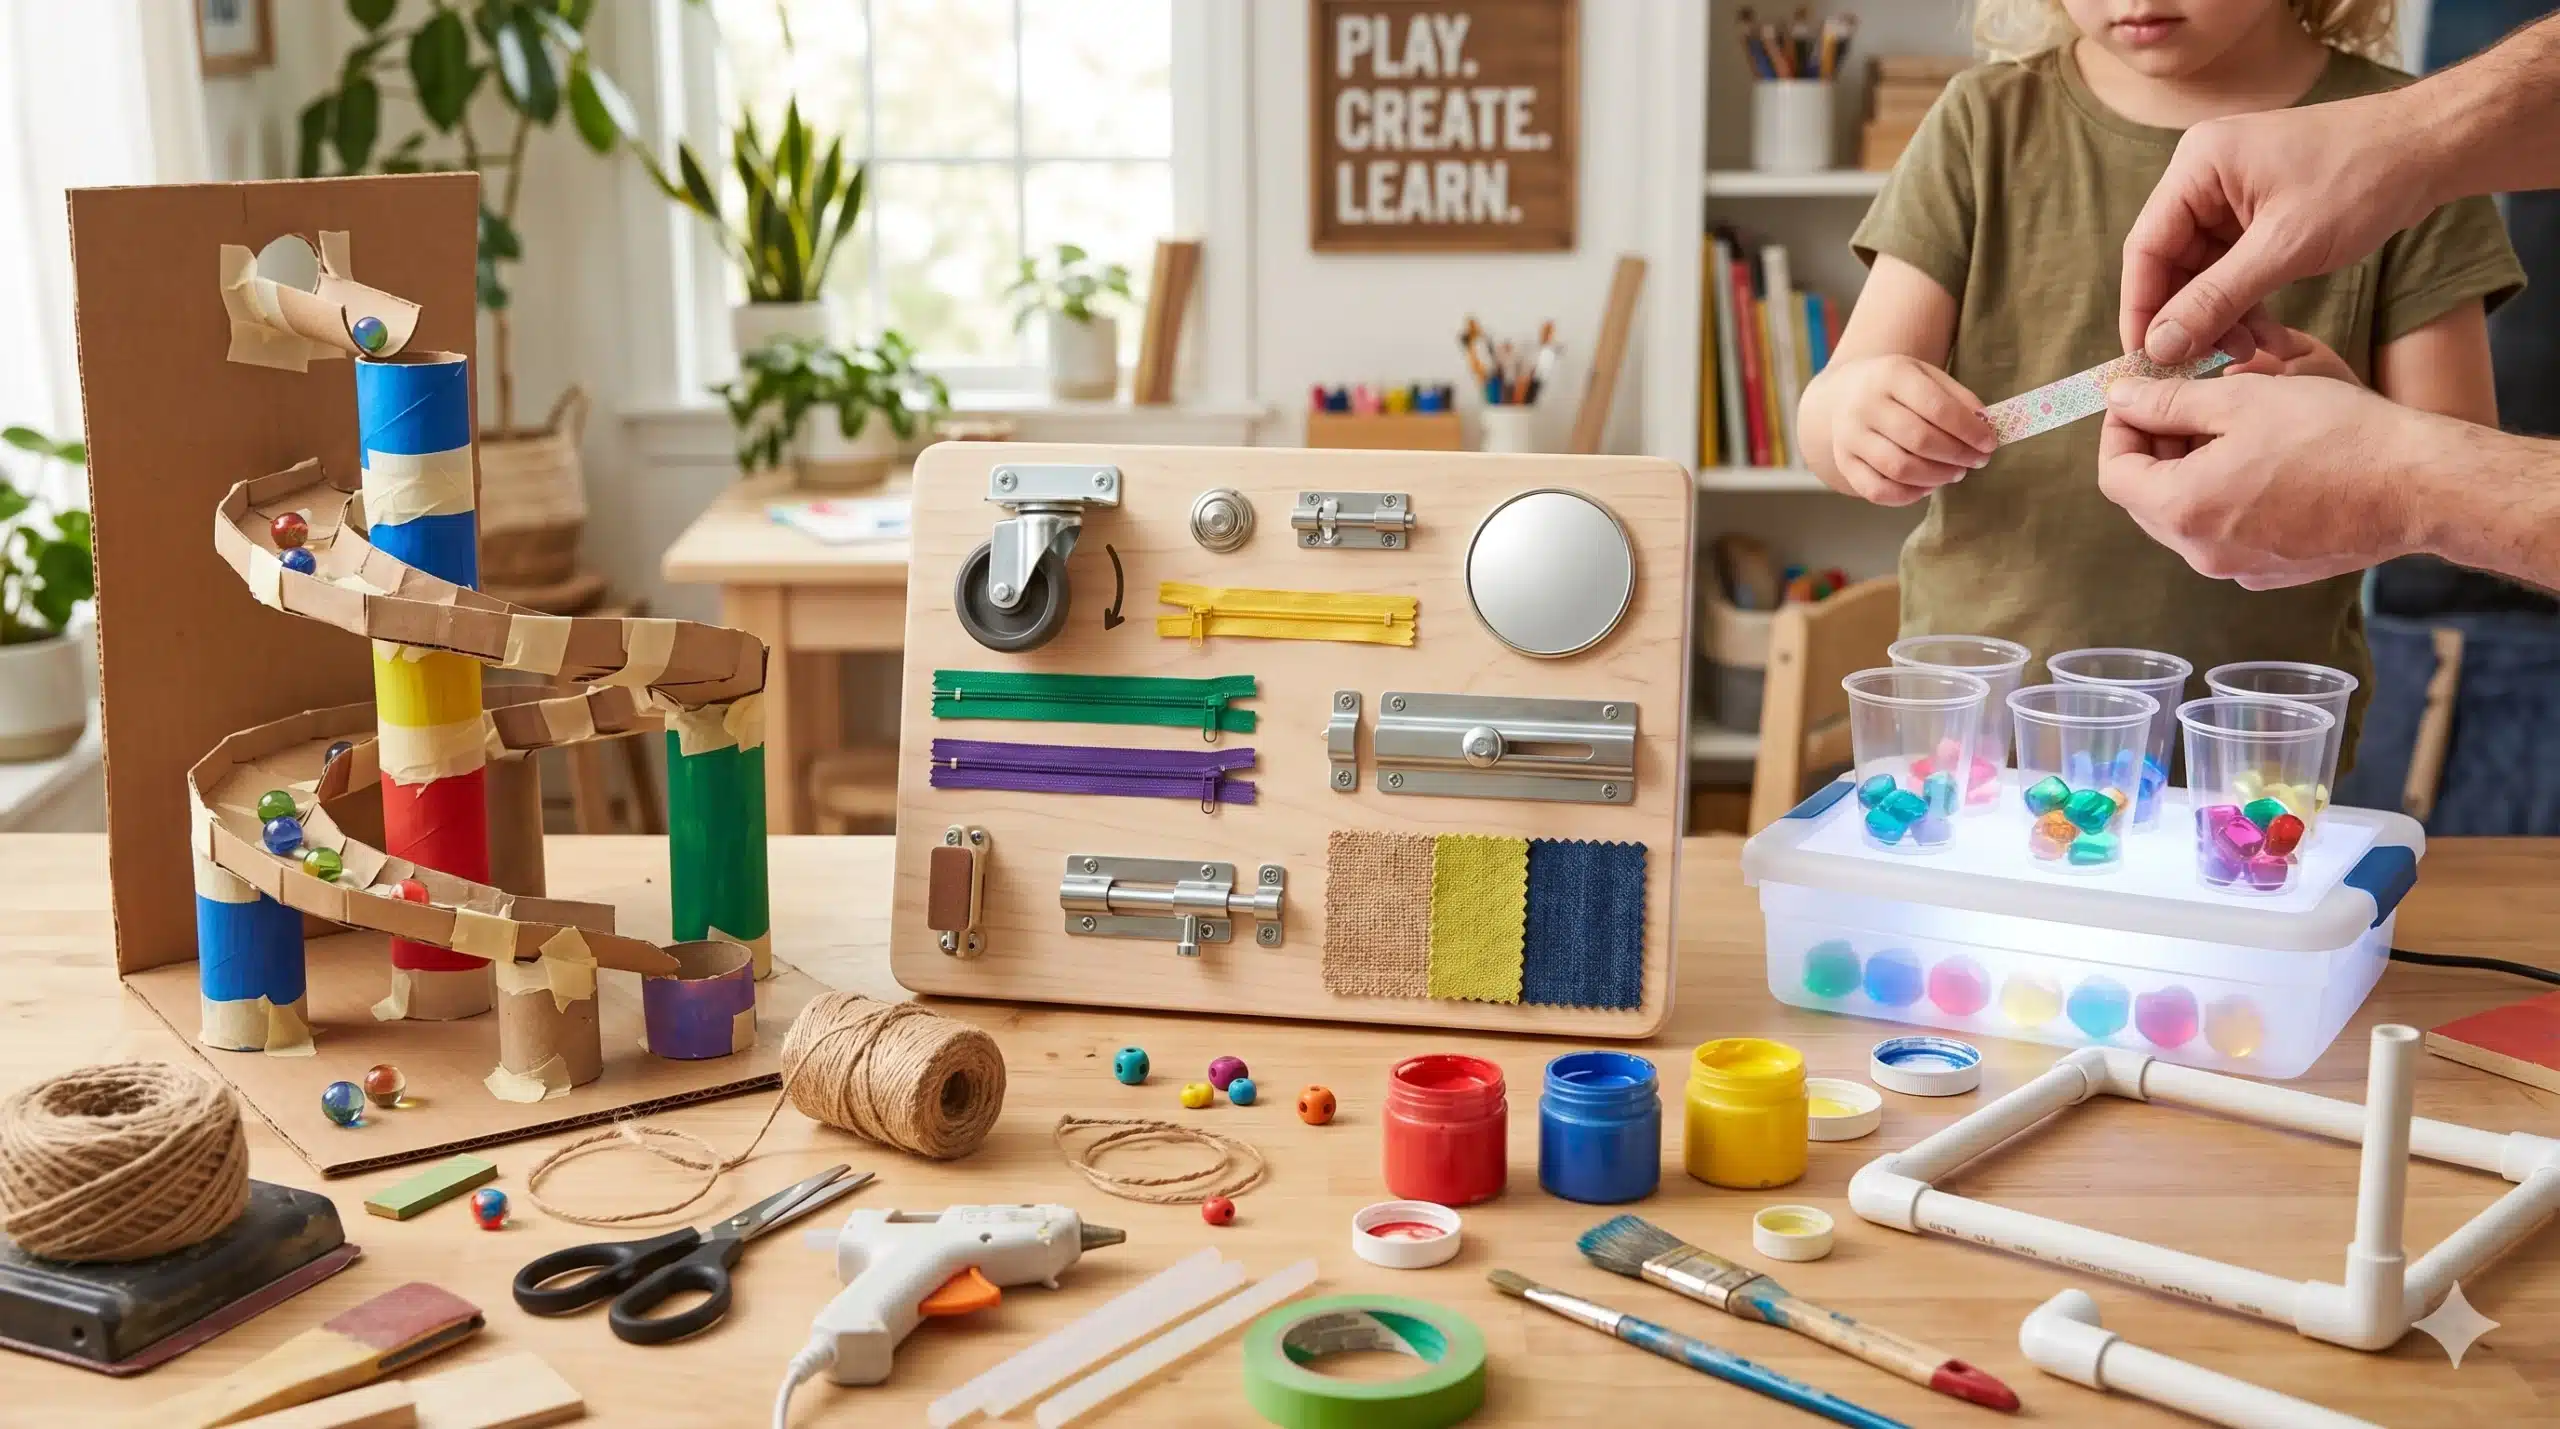
Project 1: The “Ever-Changing” Sensory Board
Best for: Toddlers (Ages 1–3)
Sensory boards (or “busy boards”) are legendary in the Montessori world. They focus on fine motor skills and the tactile exploration of cause and effect.
Materials You’ll Need:
- A sturdy piece of plywood (sanded smooth).
- Hardware store odds and ends: Slide bolts, touch lights, zippers, old calculators, and caster wheels.
- Strong adhesive or short screws.
The Build:
- Layout: Arrange your items on the board. Group them by “difficulty.” Put simple touch lights at the bottom and complex latches at the top.
- Safety First: Ensure no screw tips are poking through the back. Use a heavy-duty sander to round every corner of the wooden base.
- The Secret Sauce: Don’t finish the board entirely. Leave a 4×4 inch square empty with Velcro strips. This allows you to swap out “mystery items”—a piece of silk, a sponge, or a mirror—to keep the toy fresh.
Project 2: The Cardboard Engineering Marvel (The Marble Run)
Best for: Preschool to Early Elementary (Ages 4–7)
Gravity is the first physics teacher. A DIY marble run is a masterclass in spatial reasoning and persistence.
Materials You’ll Need:
- Empty paper towel and toilet paper rolls.
- A large vertical surface (the side of a refrigerator or a large cardboard box).
- Masking tape or painter’s tape (easier to reposition).
- Marbles or pom-poms (for younger children).
The Build:
Instead of building a fixed structure, give the child the “pipes” and the tape.
- The Challenge: Ask them to get the marble from the top of the fridge to a bowl on the floor using at least five “turns.”
- The Lesson: They will inevitably deal with the marble flying off the track. This is where you introduce the concept of centripetal force and banked turns.
- Formula for Velocity: If you want to get technical with older kids, you can discuss how height affects speed using the formula for potential energy:
$$PE = mgh$$
(Where $m$ is mass, $g$ is gravity, and $h$ is height. The higher the start, the faster the finish!)
Project 3: The “Kitchen Laboratory” Light Box
Best for: All Ages
Light boxes are used in high-end preschools to explore transparency, color mixing, and anatomy (X-rays). You can make one for under $20.
Materials You’ll Need:
- A clear plastic storage bin with a flat lid.
- White tissue paper or frosted window film.
- Battery-operated LED Christmas lights or “puck” lights.
The Build:
- Diffusing the Light: Line the inside of the lid with white tissue paper or spray it with frosted glass paint. This ensures the light is soft and even, rather than blinding.
- Illumination: Place the LED lights inside the bin, facing upward.
- Play Patterns: Give your child translucent items like colorful plastic cups, dried leaves, or “X-rays” printed on transparency film. This setup transforms ordinary objects into glowing artifacts.
Project 4: The PVC Pipe “Fort Framework”
Best for: School-Aged Children (Ages 5–10)
Fort building is a universal childhood rite of passage. While blankets and chairs work, a PVC framework introduces architectural thinking.
Materials You’ll Need:
- 1/2 inch PVC pipe (cut into various lengths: 2ft, 3ft, 4ft).
- An assortment of PVC connectors (T-joints, Elbows, 4-way crosses).
- Old bedsheets and binder clips.
The Build:
This is a “Life-Sized LEGO” set.
- Phase 1: Let the child build a cube. They will quickly realize they need “bracing” to keep it from wobbling.
- Phase 2: Introduce the triangle. Explain why the triangle is the strongest shape in construction.
- Storage: The beauty of this DIY toy is that it breaks down into a small mesh bag, making it the perfect “rainy day” kit.
The Golden Rules of DIY Toy Making
To ensure your homemade toys are high-quality and lasting, follow these three principles:
- Overbuild for Durability: Children play hard. If you are using glue, use E6000 or hot glue reinforced with wood glue. If you are using cardboard, double-wall it.
- The “80/20” Rule: Aim to have the toy be 20% finished by you and 80% “finish-able” by the child. A DIY dollhouse is better if the child gets to wallpaper the rooms with scrap paper.
- Safety is Non-Negotiable: * The Choke Tube Test: If an object fits inside a toilet paper roll, it’s a choking hazard for children under 3.
- Non-Toxic Finishes: Use food-grade mineral oil or beeswax instead of chemical varnishes for wooden toys.
Conclusion: The Value of the “Imperfection”
A store-bought toy is perfect, which means it is intimidating. When a toy is handmade, it carries the “scars” of its creation—a stray glue drip here, a slightly crooked line there. This teaches a child that creation is a process, not a destination. When you sit down to build a marble run or a sensory board, you aren’t just making a “thing.” You are modeling curiosity. You are showing them that the world is something to be manipulated, understood, and improved upon.