
This project is the perfect way to upcycle those empty cardboard tubes you have lying around. It’s colorful, engaging, and serves as a wonderful “prop” for storytelling. Imagine the adventures your little astronauts can have once their very own rocket is sitting on the launchpad!
The Science of “Blast Off”: How Do Real Rockets Work?
Before we start building, it’s fun to share a little “rocket science” with the kids. After all, every great engineer needs to know how their vehicle operates!
Rockets move according to Newton’s Third Law of Motion, which states: “For every action, there is an equal and opposite reaction.” * The Action: Inside a rocket engine, fuel burns and creates hot gases that shoot out of the bottom with incredible force.
- The Reaction: That downward force pushes the rocket upward into the sky.
Think of it like a balloon: if you blow up a balloon and let it go without tying it, the air rushes out one way, and the balloon zooms off in the opposite direction. That is exactly how a rocket works, just on a much bigger (and louder!) scale.
Why Space Exploration Matters for Kids
Encouraging an interest in space isn’t just about fun and games; it fuels a lifelong love for STEM (Science, Technology, Engineering, and Mathematics). When children build a rocket, they are practicing:
- Structural Engineering: They learn how to make a stable base and a pointed nose cone to help the rocket “slice” through the air.
- Creativity: Choosing colors and patterns allows for artistic expression.
- Problem Solving: Figuring out how to attach the fins so the rocket stands upright is a great mental exercise.
Beyond the skills, space inspires kids to dream big. Reading books like Bizzy Bear: Space Rocket or Edward Built a Rocket Ship reinforces the idea that with a little imagination and hard work, anything—even traveling to the stars—is possible.
Supplies Required
Gather your mission-critical components before you head to the “launchpad”:
- Empty Toilet Paper Roll or Cardboard Tube: (Standard size or a longer kitchen roll for a “heavy-lift” rocket).
- Craft Paper in Assorted Colors: Bright neons or shiny metallics work great!
- Pencil & Ruler: For precise measurements.
- Scissors: (Safety scissors for younger explorers).
- Glue Stick or Liquid Glue.
- Sharpies or Markers: To draw portholes, control panels, or astronaut faces.
- Paints (Optional): Acrylics or poster paints if you want a fully coated finish.
Step-by-Step Instructions: Building Your Rocket
Follow these steps to ensure a successful mission!
Step 1: Prepare the Fuselage (The Body)
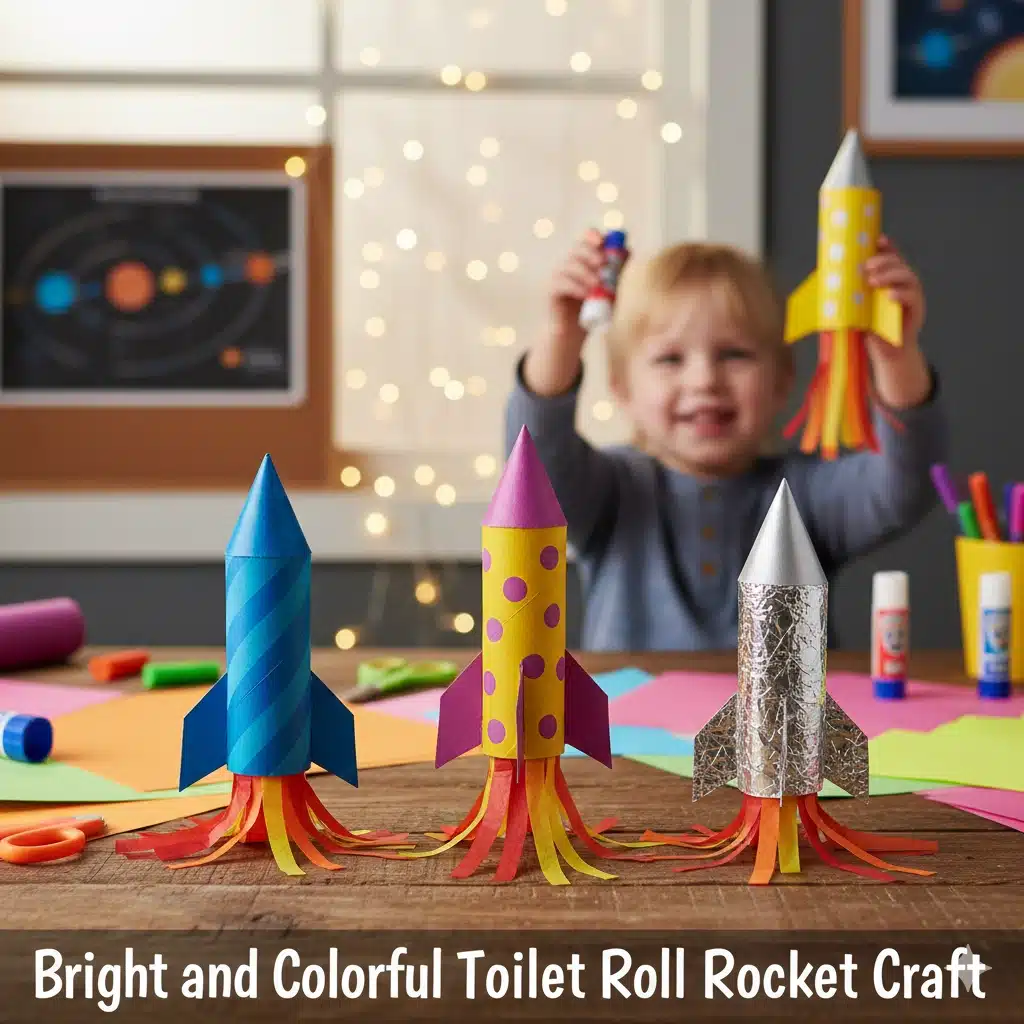
The main body of your rocket is the toilet paper roll.
- Measure and Cut: Use your ruler to measure the height and circumference of the roll. Cut a piece of craft paper to match these dimensions.
- Wrap and Glue: Apply glue to the roll and wrap your paper around it. This is your rocket’s “skin.”
- Paint Option: If you prefer painting, give the roll a base coat of white first so your colors look extra bright.
Step 2: The Nose Cone
Every rocket needs a pointed top to be aerodynamic.
- The Circle Method: Cut a circle (about 4 inches wide) out of a different colored piece of paper.
- The Slit: Cut a single straight line from the edge of the circle to the exact center.
- The Twist: Slide one side of the cut over the other to form a cone shape. Tape or glue it in place.
- Attachment: Run a line of glue along the top rim of your paper roll and set the nose cone on top.
Step 3: Engineering the Fins
Fins are what keep a rocket stable as it flies.
- Cut three or four small triangles out of sturdy cardstock.
- Fold a small “tab” (about 1/4 inch) along one side of each triangle.
- Glue these tabs onto the bottom of the paper roll, spaced out evenly. These will allow your rocket to stand upright on its own.
Step 4: Adding the Details (Portholes and Windows)
What’s a rocket without a view?
- Cut out small white circles to serve as portholes.
- Glue them down the side of the rocket.
- Use your markers to draw an astronaut waving from the window, or add little “rivet” dots around the windows to make it look like a high-tech metal machine.
Step 5: The “Fire” Exhaust
To make it look like your rocket is actually blasting off:
- Cut thin strips of red, orange, and yellow tissue paper (or construction paper).
- Glue them to the inside of the bottom of the roll so they hang down like flames.
Fueling the Imagination: Rocket Books to Read Together
To keep the theme going, why not pair this craft with a story? Here are some fantastic picks:
- Roaring Rockets (Amazing Machines) by Tony Mitton: Perfect for explaining the different parts of a rocket in a rhythmic, fun way.
- Tiny Little Rocket by Richard Collingridge: A visually stunning book that captures the scale and excitement of a space journey.
- Pine & Boof: Blast Off! by Ross Burach: A hilarious story about friendship and building a dream from scratch.
Playtime Ideas
Once the glue is dry, the real fun begins!
- The Countdown: Practice counting backward from 10… 9… 8… all the way to “Blast Off!” and have the kids “fly” their rockets around the room.
- Space Station Home: Use a large cardboard box to create a “Space Station” where the toilet paper roll rockets can dock for refueling.
- Alien Encounters: Use leftover paper scraps to make tiny aliens that your rocket crew can visit on far-off planets.