
In the final installment of our series on purposeful DIY play, we transition from the visual and kinetic to the auditory. Music is one of the few activities that engages almost every area of the brain simultaneously. However, you don’t need an expensive piano or a professional drum kit to introduce a child to the wonders of rhythm and melody.
Building DIY musical instruments is a journey into acoustics, vibration, and frequency. When a child constructs their own instrument, they learn that sound isn’t just something we hear—it is a physical force caused by movement. This article provides blueprints for high-quality, “tuneable” instruments that move beyond simple noise-makers into the realm of genuine musical tools.
1. Project: The Cigar-Box “Slide” Guitar
Target Skills: Tension physics, vibration, and pitch control.
A stringed instrument is the perfect way to demonstrate how the length and tightness of a string change its sound.
Materials You’ll Need:
- The Body: A sturdy wooden cigar box or a heavy-duty cardboard shoe box.
- The Neck: A 2-foot section of a 1×2-inch hardwood (poplar or oak).
- The Strings: High-test nylon fishing line or actual guitar strings.
- The Bridge: Two large bolts or a thick wooden dowel.
The Build:
- Notching the Box: Cut a notch in each end of the box so the “neck” can slide through. Secure it with wood glue.
- Sound Hole: Cut a circular hole (approx. 2 inches wide) in the center of the box lid to allow the sound to resonate.
- Tension: Drill holes at the top of the neck for “tuning pegs” (you can use eye-bolts). Tighten the bolts to increase the pitch.
- The Science of Pitch: Explain that the frequency ($f$) of a vibrating string is determined by its length ($L$), tension ($T$), and mass ($mu$):
$$f = \frac{1}{2L} \sqrt{\frac{T}{\mu}}$$
(The shorter or tighter the string, the higher the note!)
2. Project: The PVC Pipe “Pan Flute”
Target Skills: Aerodynamics, measurement, and scale.
This project demonstrates how the volume of air inside a tube dictates the note produced.
Materials You’ll Need:
- Tubing: 1/2-inch PVC pipe (about 5 feet total).
- Sealant: Modeling clay or PVC end-caps.
- Binding: Heavy-duty duct tape or decorative twine.
The Build:
- The Mathematical Cut: To create a standard C-Major scale, the pipes must be specific lengths.
- Note C: 15.5 cm
- Note D: 13.8 cm
- Note E: 12.3 cm
- Sealing the Bottom: Use a plug of modeling clay to seal one end of each pipe completely. If there is even a tiny air leak, the note will not play.
- Assembly: Align the open ends of the pipes in a row and wrap them tightly with tape.
- Playing: Teach the child to blow across the top of the pipe, not into it, much like blowing across a soda bottle.
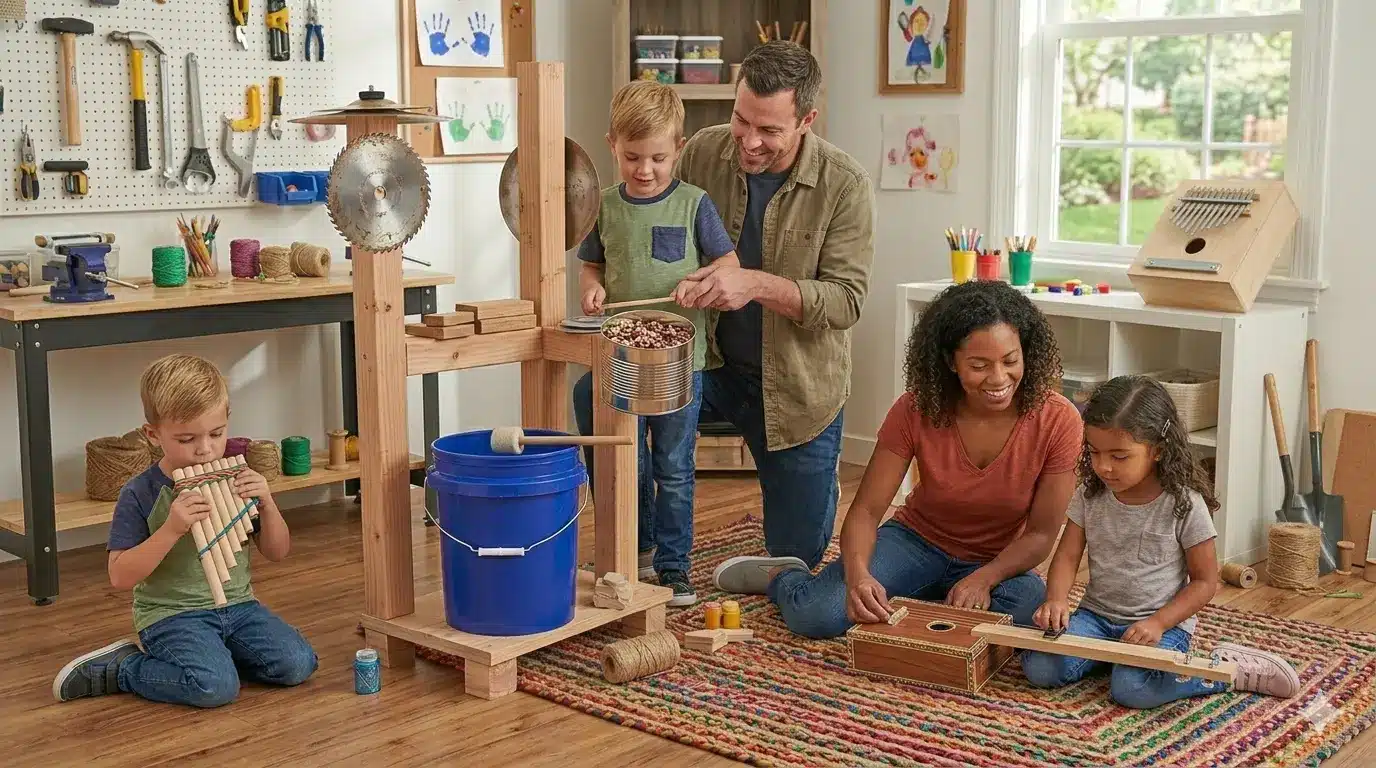
3. Project: The “Upcycled” Percussion Station
Target Skills: Rhythm, tempo, and material density.
Percussion is the heartbeat of music. A high-quality DIY kit uses materials of different densities to create a “sound palette.”
The Components:
- Bass Drum: A 5-gallon plastic bucket (played with a felt-covered mallet).
- Snare: A metal popcorn tin with a few handfuls of dried beans inside.
- Cymbals: Discarded circular saw blades (filed dull for safety) or stainless steel pot lids.
- Tone Blocks: Scraps of hardwood (Oak) versus softwood (Pine).
The Build:
Mount these items to a simple wooden frame or a “music tree” made of 4×4 lumber. The goal is to allow the child to stand and move between the “instruments.” Use the tone blocks to explain timbre—why a wooden block sounds “warm” while a metal lid sounds “bright.”
4. Project: The “Thumb Piano” (Kalimba)
Target Skills: Resonace and fine motor dexterity.
The Kalimba is an ancient African instrument that uses vibrating metal tines to create a bell-like sound.
Materials You’ll Need:
- Sound Board: A thick block of wood or a hollow wooden box.
- The Tines: Flattened metal rake tines or heavy-duty bobby pins.
- The Bridge: Two thin strips of wood and a metal pressure bar (a flat piece of scrap metal).
The Build:
- Placement: Sandwich the metal tines between the two wooden strips.
- Tuning: Slide the tines further forward to create a lower note, or push them back for a higher note.
- Playing: The child uses their thumbs to “pluck” the ends of the metal. Because the tines are short, the vibrations are fast, creating a clear, melodic tone.
5. The “Acoustic Audit”: Ensuring Musical Quality
A DIY instrument shouldn’t just make noise; it should produce a pleasing sound. Perform these checks:
- Eliminate “Buzz”: If the guitar strings buzz, the “nut” or “bridge” isn’t high enough. Add a small shim of wood to lift the string.
- Smooth the Edges: Music requires a lot of hand contact. Ensure every surface is sanded and every metal edge is filed.
- Tuning Stability: Check that your tuning pegs (bolts) aren’t slipping. If they are, add a rubber washer for extra friction.
6. The Psychological Impact of Making Music
Building an instrument shifts a child’s relationship with sound. They go from being a “listener” to a “composer.”
- Emotional Regulation: Many children find the repetitive nature of percussion or the soothing tones of a Kalimba to be highly grounding.
- Mathematical Literacy: Music is essentially math in motion. By counting beats and measuring pipe lengths, they are practicing fractions and ratios without realizing it.
Conclusion: The Grand Symphony of DIY
Over the course of this series, we have built worlds, mastered gravity, engineered vehicles, and finally, captured the air to make music. The true “high quality” of these DIY toys doesn’t come from the materials—it comes from the shared time spent in the workshop and the confidence a child gains when they realize they can build the world they want to play in.