
There is an old saying that “dogs have owners, but cats have staff.” If you live with a feline, you know this to be true! Whether they are knocking pens off your desk or purring loudly during your favorite movie, cats have a way of becoming the center of our world. It is no wonder that the internet is practically built on a foundation of funny cat videos and adorable kitten photos.
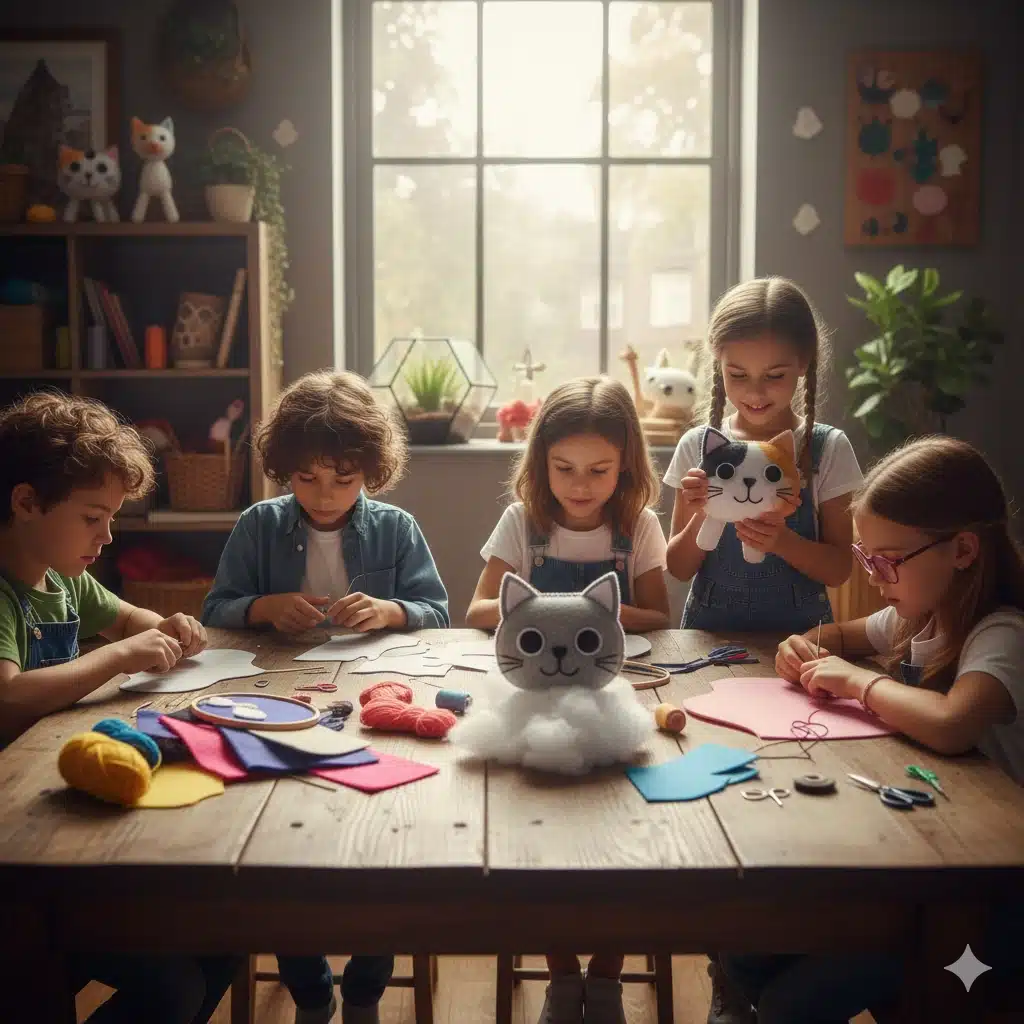
To celebrate our favorite four-legged companions, we are sharing a project that is as charming as a real kitty: a DIY Felt Cat Plushie. This project was inspired by the spirit of the “Happy Mew Year for Cats Day,” an unofficial holiday created by US couple Thomas and Ruth Roy. They wanted their beloved cats to have their own little celebration, and what better way to celebrate than by crafting a handmade tribute to them?
This felt cat is the perfect project for kids and adults alike. It can be used as a pocket pal, a Christmas tree ornament, a backpack charm, or a heartfelt gift for the “cat person” in your life. Grab your felt scraps, and let’s get started!
Why Felt is the Perfect Crafting Medium
If you are new to sewing, felt is your best friend. Unlike cotton or silk, felt is a non-woven fabric. This means it does not fray when you cut it. You don’t have to worry about complicated hems or finished edges. It is sturdy, soft to the touch, and comes in every color of the rainbow. For kids, it provides a wonderful tactile experience that is much easier to handle than slippery synthetic fabrics.
Supplies You Will Need
Before we begin, gather your materials. You likely already have most of these in your sewing kit:
- Felt Fabric: Choose your cat’s main color (grey, orange, black, or white) and a few accent colors for the ears and belly.
- Needle and Thread: Black thread for the facial features and matching thread for the body.
- Cotton or Poly-fill: For stuffing your kitty to make it plump and huggable.
- Fabric Scissors: Sharp enough to cut through felt layers.
- Pencil or Fabric Marker: To trace your template.
- The Free Downloadable Template: Make sure to print this out before you start!
Step-by-Step Instructions: Bringing Your Kitty to Life
1. Trace and Cut Your Patterns
Download and print the Free Cat Plushie Template. The template includes the head, body, ears, tail, and tiny facial features.
Note for Parents: This template contains several small pieces (like the nose and eye circles). Younger children may need help tracing and cutting these precisely to ensure the kitty looks its best.
Once the patterns are ready, lay them on your selected felt fabric. Trace carefully and cut out all the pieces. You should have two head pieces and two body pieces to ensure the plushie is 3D.
2. Crafting the Cat’s Face
We always start with the face because it’s the most delicate part!
- The Eyes: Take one of the head pieces and stitch on the black eye circles. To make the cat look “alive,” stitch a tiny white “twinkle” or “glint” onto each eye using white thread.
- The Mouth: Using black thread and a simple backstitch, sew a small “W” shape for the mouth.
- The Nose: Position the tiny pink or black nose piece and secure it with a few small stitches or a dab of fabric glue.
- The Ears: Attach the inner ear accents to the larger ear pieces. Then, stitch the ears to the top of the face.
3. Adding Detail to the Body
Before sewing the front and back of the cat together, we need to add the character details:
- The Tail: Take one of the tail patterns and stitch the “tail end” accent piece to the tip. This gives your cat a cute “dipped in paint” look!
- The Fur/Belly Piece: Take the front body piece and stitch the contrast “fur” patch onto the chest/belly area. This is a great place to use a fuzzy or sparkly felt for extra flair.
4. Assembling the Head
Place the decorated face piece on top of the plain back-head piece. Stitch around the edges using a running stitch or a blanket stitch. Leave a small 1-inch gap at the bottom. Lightly stuff the head with cotton or poly-fill through this gap, then stitch it closed.
5. Assembling the Body and Tail
Repeat the process for the body. Sandwich the tail between the two body pieces so it sticks out to the side. Stitch around the perimeter, leaving a gap at the neck. Stuff the body until it is firm but squishy, then sew it shut.
6. The Final Connection
Now, simply stitch the head onto the neck of the body. Ensure your stitches are tight and secure so the head doesn’t wobble. Your DIY Felt Cat Plushie is now complete!
Fun Facts for Young Cat Lovers
While the kids are busy sewing, keep them entertained with these “purr-fect” feline facts:
| Cat Fact | The Science Behind It |
| Glow in the Dark | Cats have a layer behind their retina called the tapetum lucidum that reflects light, helping them see in the dark. |
| The “Slow Blink” | When a cat blinks slowly at you, it is essentially a “kitty kiss.” It means they trust you completely! |
| Unique Noses | Just like human fingerprints, every cat has a unique nose-print pattern. |
| Purr Power | A cat’s purr vibrates at a frequency that has been shown to improve bone density and promote healing. |
Customizing Your Cat Plushie
The best part of a DIY project is making it your own! Here are a few ideas to customize your felt cat:
- The Calico Look: Instead of a solid color, sew small irregular patches of orange and black onto a white cat.
- The Ornament: Loop a piece of ribbon through the top of the head before sewing it shut to turn your plushie into a hanging ornament.
- The Scented Kitty: Add a pinch of dried lavender or catnip inside the stuffing to make a soothing sache or a toy for your real cat!
- The Collar: Tie a thin piece of embroidery floss or ribbon around the neck and add a small bead to act as a bell.
Conclusion
Handmade toys carry a special kind of magic. They aren’t just “things”; they are creations filled with time, effort, and love. Whether you made this felt cat to resemble your own pet or as a gift for a friend, it is a wonderful way to celebrate the joy that animals bring into our lives.
The next time you find yourself scrolling through cat videos, remember that you could be making a tiny felt friend of your own! Happy crafting!