
We have mapped the ground beneath our feet, but the final frontier of high-quality DIY play lies upward. Celestial engineering—the act of building tools to observe and understand the stars—is the ultimate bridge between physical construction and abstract mathematics. When a child builds their own astronomical tools, they aren’t just looking at the sky; they are interacting with the scale of the universe.
This guide focuses on “Sky-Play”: building durable, precise instruments to track the moon, planets, and constellations using simple geometry and optics.
1. The “Galilean” Refractor: A Lesson in Light
A high-quality telescope doesn’t require complex electronics. By building a basic refracting telescope, children learn how lenses bend (refract) light to bring distant objects into focus.
The Build:
- The Body: Two nesting cardboard mailing tubes (one slightly smaller to allow for “sliding focus”).
- The Optics: A large, weak “Objective” lens (convex) at the front and a small, strong “Eyepiece” lens (concave or convex) at the back.
- The Science: The objective lens gathers light and brings it to a point; the eyepiece acts like a magnifying glass for that point.
Mastery Tip: Use a bit of black felt to line the inside of the tubes. This absorbs “stray light,” significantly increasing the contrast and quality of the image—a technique used in professional observatories.
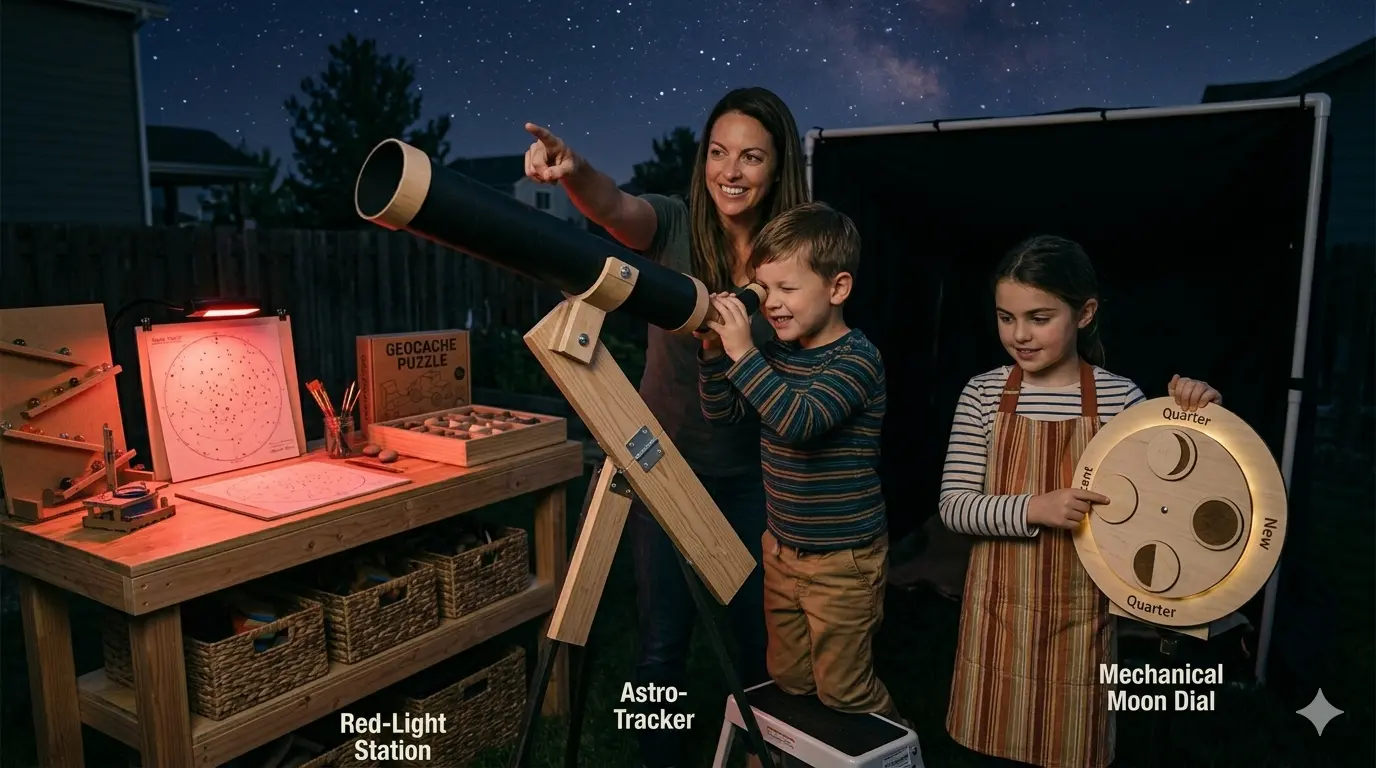
2. The “Astro-Tracker” (Equatorial Mount)
The Earth rotates, causing stars to “drift” across the sky. To observe them for long periods, we need a tracking mount.
Engineering the Angle:
- The Base: Two wooden boards joined by a heavy-duty hinge.
- The Alignment: The hinge must point exactly toward Polaris (the North Star). This is the Earth’s axis.
- The Drive: Use a long carriage bolt with a wing nut. By slowly turning the nut at a constant rate (e.g., one turn per minute), the child manually “cancels out” the Earth’s rotation.
This introduces spherical geometry. The child realizes that the sky moves in an arc, not a straight line.
3. The “Lunar Phase” Calendar: Mechanical Tracking
Understanding the moon requires consistent observation over 29.5 days. A high-quality Mechanical Moon Dial makes this data tactile.
The Project: Rotating Phase Wheel
- The Structure: Two circular wooden disks pinned in the center.
- The Display: The top disk has a “viewing window.” The bottom disk features the 8 phases of the moon (New, Crescent, Quarter, etc.).
- The Interaction: Every night, the child observes the moon and rotates their dial to match.
Shutterstock
Explore
This teaches temporal sequencing. The child learns to predict the future based on the patterns of the past.
4. The “Light-Pollution” Shield: Community Observation
In urban areas, the “glow” of city lights hides the stars. Engineering a Portable Star-Nook can create a dark-sky environment anywhere.
The Setup:
- The Frame: A PVC or wooden “A-frame” that can be easily folded.
- The Shield: Heavy, black blackout fabric draped over the frame to block streetlights.
- The Floor: A comfortable mat with a “Red-Light Station.”
- The Logic: Why red light? Red light doesn’t trigger “pupil constriction,” allowing the child’s eyes to stay “dark-adapted” for the telescope
5. The “Sun-Clock” (Gnomon)
Astronomy isn’t just for the night. A high-precision Sundial teaches the relationship between the sun’s position and the time of day.
The Geometry:
- The Gnomon: A vertical triangular blade. Its angle must match the child’s latitude (which they found during the Cartography project!).
- The Face: A flat wooden board.
- The Calibration: Every hour on the hour, the child marks where the shadow falls.
The Insight: This project connects the celestial to the practical. The sun isn’t just a light; it is a giant, consistent clock.
Astronomy Standards and Ethic
- Eye Safety: Never, under any circumstances, look at the sun through a DIY telescope or with the naked eye. Use “Projection Mapping” (casting the sun’s image onto a card) instead.
- Dark Sky Etiquette: Teach children to use minimal light when observing. The darker the environment, the more “data” the eye can collect.
- Patience as a Tool: Unlike mechanical toys, the sky moves on its own schedule. Waiting for a cloud to pass is a core part of the “scientific temperament.”
Summary of Celestial Concepts
| Project | Scientific Focus | Mathematical Skill | Focus |
| Galilean Telescope | Optics / Refraction | Focal Lengths | Light Physics |
| Astro-Tracker | Earth’s Rotation | Spherical Geometry | Engineering |
| Moon Dial | Lunar Cycles | Patterns / Time | Prediction |
| Star-Nook | Pupil Dilation | Light Contrast | Biology / Observation |
| Sundial | Solar Position | Trigonometry / Latitude | Navigation |
Final Thoughts: Looking Up
The series ends where human curiosity began: looking at the stars and wondering how it all works. High-quality DIY play has taken us from the kitchen table to the edge of the visible universe. By building their own astronomical tools, children learn the greatest lesson of all: that no matter how small we seem, we have the tools to understand the infinite.