
Origami often carries a reputation for being a complex, highly disciplined art form reserved for experts with years of training. For many of us, the first time we heard the word “Origami,” we imagined intricate cranes with a thousand folds or geometric shapes that seemed to defy the laws of physics.
However, the truth is much simpler and far more accessible. If you ever made a paper airplane, a “cootie catcher” fortune teller, or a basic paper boat during your school days, you have already practiced Origami!
In Japanese, “Oru” means to fold, and “Kami” means paper. Together, they create Origami, the beautiful and meditative art of paper folding. Today, we are diving into a project that is perfect for young beginners and those new to the craft: the Easy Origami Fish.
Why Origami is Great for Kids
Beyond being a fun afternoon activity, Origami serves as a powerful educational tool. It bridges the gap between play and geometry, offering several developmental benefits:
- Fine Motor Development: Precise folding requires the use of small finger muscles, improving dexterity and hand-eye coordination.
- Sequential Learning: Following step-by-step instructions teaches children the importance of order and patience.
- Spatial Awareness: Understanding how a flat, 2D square transforms into a 3D object helps develop mathematical and spatial reasoning.
- Focus and Patience: In a world of instant gratification, the slow, deliberate process of folding paper encourages mindfulness.
Popular Origami Shapes for Beginners
While we are focusing on the fish today, it is helpful to know the “classics” that most people start with. These shapes form the foundation of most paper-folding journeys:
- Fortune Tellers (Cootie Catchers): The playground classic used for “predicting the future.”
- Paper Boats: A simple fold that actually floats!
- Hats: Perfect for imaginative play and costume making.
- Cranes: The most iconic Origami shape, symbolizing peace and longevity.
- Jumping Frogs: An interactive craft that uses the tension of the paper to “hop.”
- Hearts: A popular choice for Valentine’s Day or friendship tokens.
Supplies You Will Need
One of the best things about Origami is its simplicity. You don’t need glue, scissors (usually), or expensive kits.
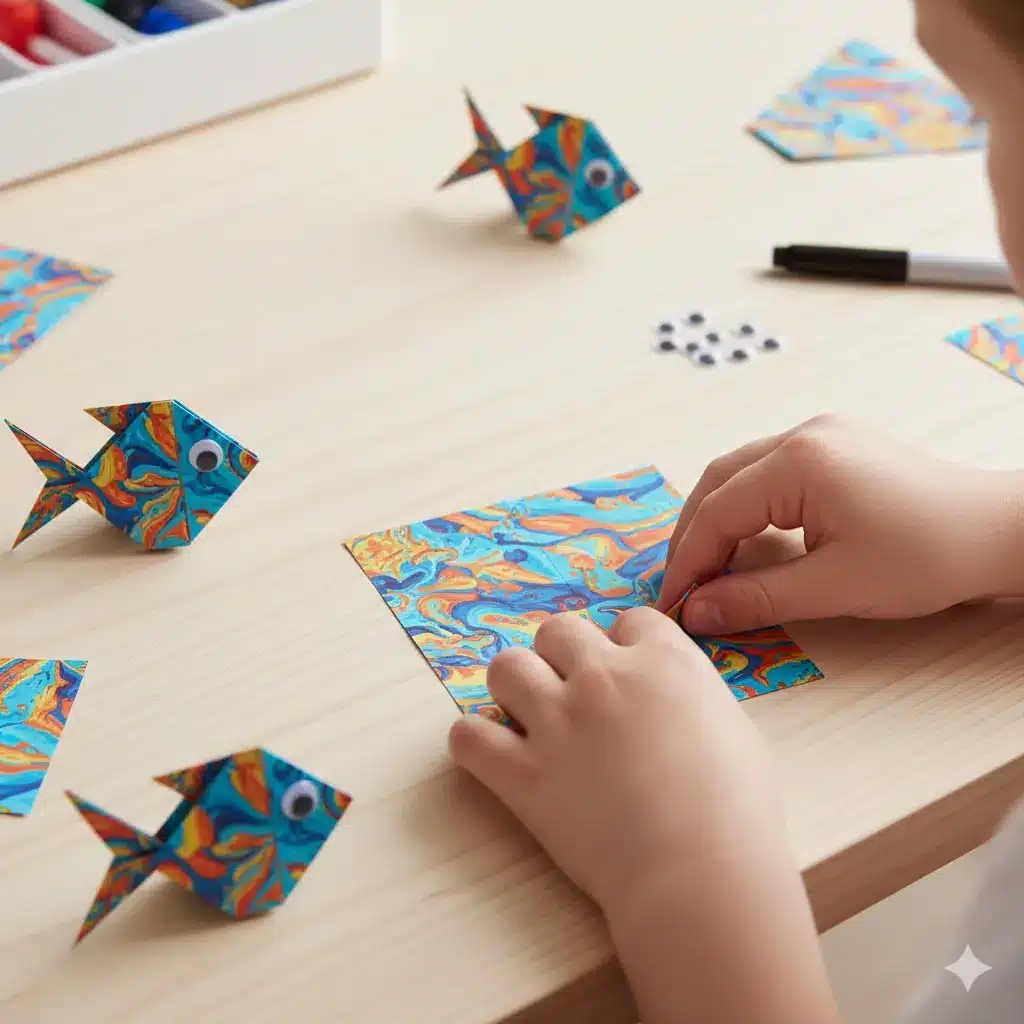
- Origami Paper: Standard $15cm \times 15cm$ square paper is best. You can use plain colors or fun patterns like scales or waves.
- A Flat Surface: A table or desk is essential for making crisp, sharp creases.
- Markers or Googly Eyes: To give your fish some personality once the folding is done!
Step-by-Step Instructions: Folding Your Origami Fish
Follow these steps carefully. Remember: the secret to great Origami is making sure every fold is sharp. Use your fingernail to run over each crease!
Step 1: The Initial Diagonal Fold
Place your square paper on the table so it looks like a diamond. Fold the top corner down to meet the bottom corner, creating a large triangle. Crease it well and then unfold it back to a square. You should now have a horizontal line running across the center.
Step 2: Create a Cross Crease
Rotate the paper and repeat the fold with the other two corners. Unfold again. Your paper should now be a square with an “X” crease pattern in the middle.
Step 3: The Midpoint Fold
Fold the paper in half by bringing the top edge down to the bottom edge to create a rectangle. Unfold. Now, bring the left edge over to the right edge and unfold. You now have a square with creases that look like a starburst.
Step 4: Forming the Waterbomb Base
This is the “magic” step in Origami. Using the creases you just made, push the left and right sides inward toward the center. The top layer will naturally collapse down, forming a triangle with multiple flaps. This is known as the Waterbomb Base and is the starting point for many Origami animals.
Step 5: Creating the Tail
Position your triangle so the “point” is facing away from you. Take the right flap of the top layer and fold it over the center line toward the left. Now, take the left flap and fold it over the right flap. These overlapping triangles create the tail fin of your fish!
Step 6: The Flip and Finish
Flip your paper over. You will see a smooth, diamond-like body with a tail sticking out the back. Your fish is officially “born”!
Decorating Your Origami Fish
Now that the structural work is done, it’s time for the creative part. This is where kids can really let their imaginations run wild.
- The Eye: Use a black marker to draw a large, bubbly eye, or glue on a plastic googly eye for a funny 3D effect.
- The Scales: Use metallic markers to draw “U” shaped scales across the body.
- The Habitat: Glue your finished fish onto a piece of blue cardstock. Draw some green seaweed, some brown sand at the bottom, and little blue bubbles rising to the top.
Tips for Origami Success
- Start Large: If $15cm$ paper feels too fiddly for little hands, start with a larger square of construction paper or even a square cut from a colorful magazine page.
- Crease is King: A loose fold makes the final shape look messy. Always use a hard surface and press down firmly.
- Patterned Paper: Using paper that is a different color on each side (e.g., blue on one side, white on the other) helps beginners see exactly where the “inside” and “outside” of the craft are.
Summary of Benefits
| Feature | Benefit |
| Material Cost | Extremely low (just paper!). |
| Clean Up | Zero mess (no glue or paint required). |
| Skill Level | Accessible for ages 5 and up. |
| Portability | Can be done anywhere—in a car, a plane, or a doctor’s waiting room. |