
This project is a fantastic way to practice “slow crafting.” It’s perfect for older kids and teens who want to create something high-quality and display-worthy.
1. Shape the Primary Wings
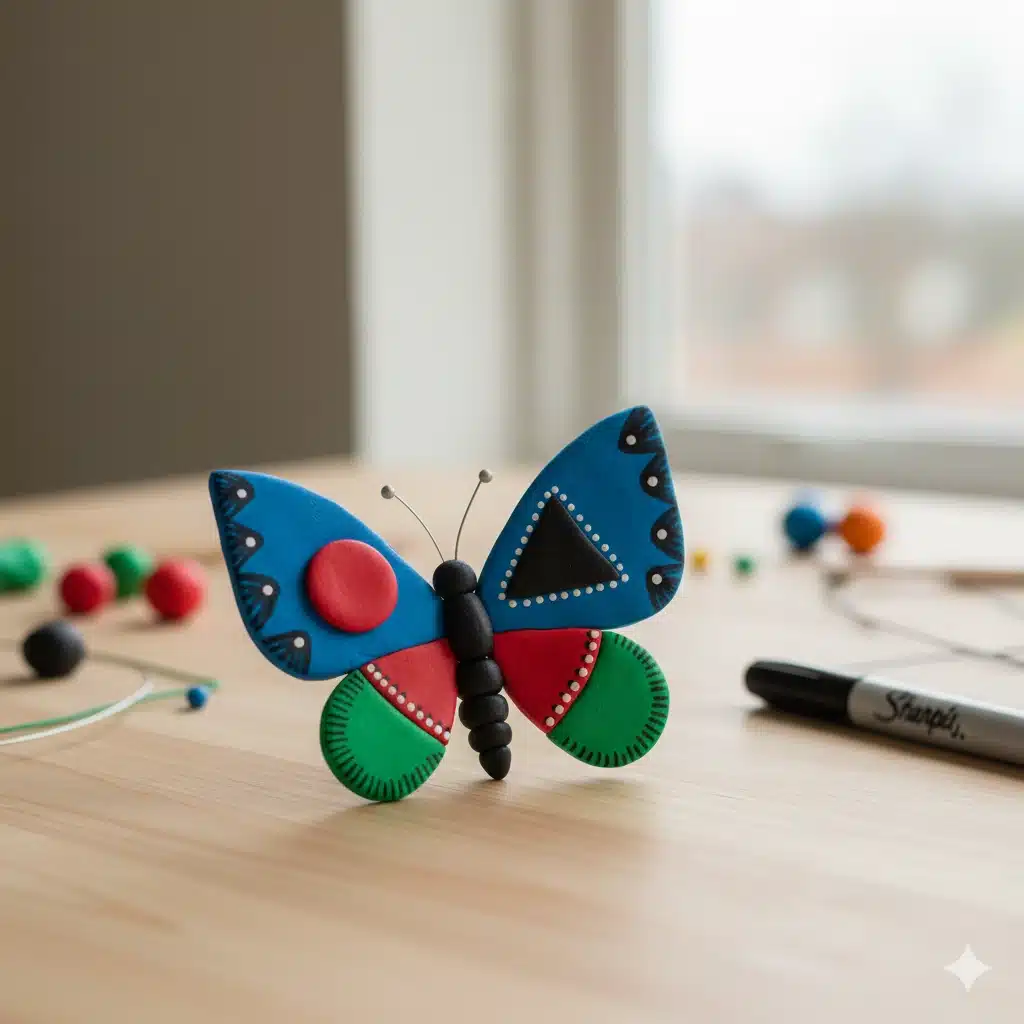
Start by rolling your blue air-drying clay into four smooth balls—two large and two slightly smaller. Flatten each ball and pinch one end to create a teardrop shape. This provides the “canvas” for your wing patterns.
2. Layering the Patterns
For the top wings, place a small disc of red clay near the wider edge. Below it, add a small triangle of black clay. For the bottom wings, create a smaller teardrop out of green clay and press it directly onto the blue base. This layering technique gives the butterfly a 3D, professional look.
3. Creating the Body and Antennae
Roll a long, thin cylinder of black clay to serve as the body.
- The Head: Add a small round ball to one end.
- The Antennae: Cut two short pieces of wire. If you want a more finished look, you can coat the wire in a thin layer of black clay or use a Sharpie to color it. Insert these into the head while the clay is still wet.
4. Assembling the Butterfly
Carefully press the narrow ends of your four wing sections into the sides of the black body.
- Pro Tip: Use a clay tool or a toothpick to gently blend the clay where the wings meet the body. This ensures that as the air-drying clay shrinks slightly during the drying process, the wings won’t fall off!
5. Final Details and Drying
Use your Sharpies to add tiny dots or intricate “vein” patterns to the wings once the clay has set for about 30 minutes. Let your masterpiece sit in a cool, dry place for 24 hours. Because this is air-drying clay, you don’t need a kiln or an oven—patience is your only requirement!