
As we look toward the next generation of DIY creation, the focus shifts from merely “making” to making responsibly. We have mastered cardboard, wood, and electronics; now, we enter the frontier of Material Science. High-quality DIY play in the modern era involves understanding the lifecycle of the materials we choose and even creating our own biodegradable substances from household ingredients.
This project-based exploration moves children from being builders to being eco-engineers, teaching them that the physical composition of a toy is just as important as its function.
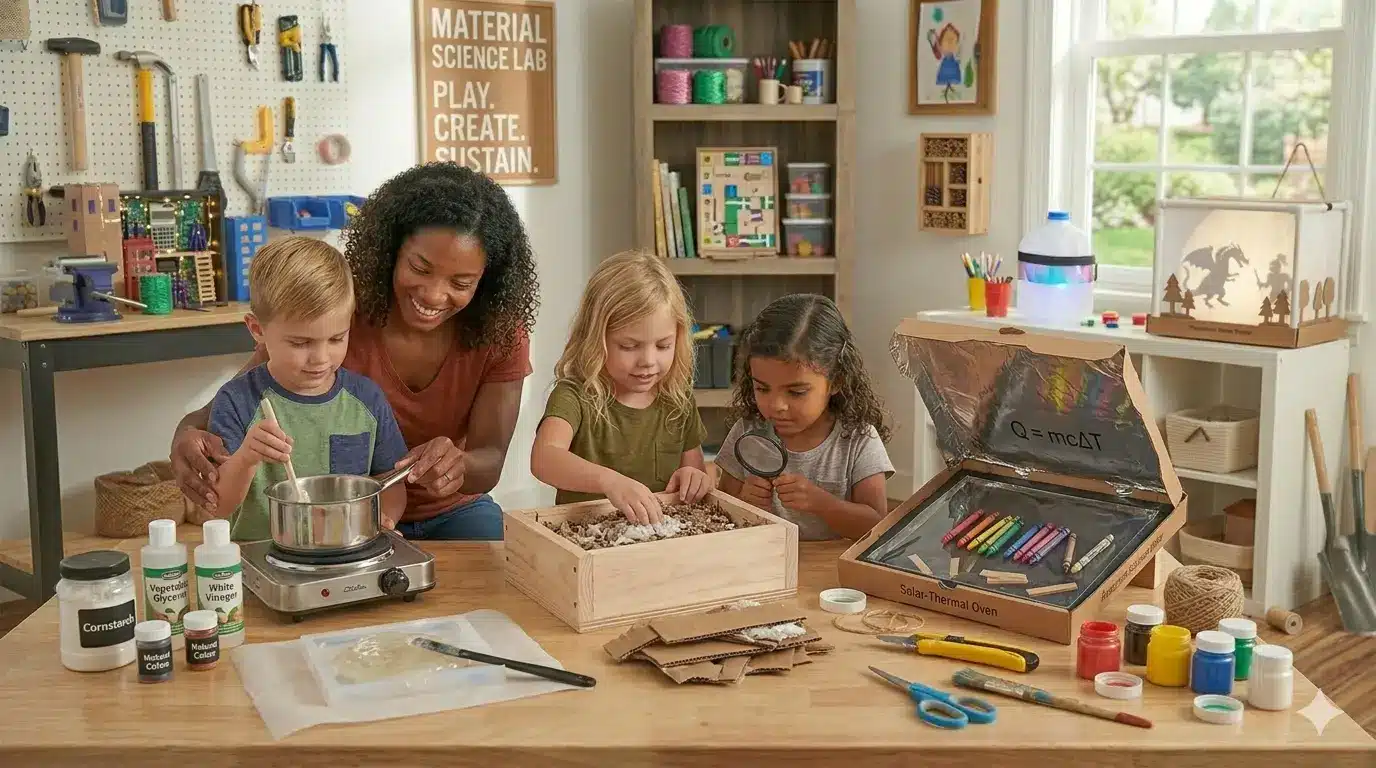
1. Project: The Homemade “Cornstarch” Bioplastic
Target Skills: Chemistry, phase changes, and material durability.
Instead of buying petroleum-based plastic, you can cook a functional, biodegradable plastic in your kitchen. This is perfect for creating custom game pieces, handles, or decorative elements for any of the projects we’ve previously built.
Materials You’ll Need:
- Base: 1 tablespoon cornstarch.
- Plasticizer: 1 teaspoon vegetable glycerin (available at pharmacies).
- Solvent: 1 tablespoon water and 1 teaspoon white vinegar.
- Heat Source: A small saucepan and a stovetop.
The Build:
- The Mix: Combine all ingredients in the pan while cold. It will look like milk.
- The Change: Heat over medium, stirring constantly. The mixture will turn from a liquid to a translucent, sticky “glob.”
- The Cure: Spread the glob into a silicone mold or onto parchment paper. Let it dry for 24–48 hours.
- The Science: Explain that the vinegar breaks down the starch chains (amylopectin), while the glycerin acts as a “lubricant” between the chains, making the final product flexible rather than brittle.
2. Project: The “Mycelium” Structural Block
Target Skills: Mycology, organic structure, and recycling.
Mycelium (the root structure of mushrooms) is the “brick” of the future. It is incredibly strong, fire-resistant, and entirely compostable.
Materials You’ll Need:
- The Inoculant: A “Grow Your Own” mushroom kit (Oyster mushrooms work best).
- The Substrate: Cardboard scraps, coffee grounds, or wood shavings.
- The Mold: A plastic container or a DIY wooden frame.
The Build:
- The Substrate Prep: Soak your cardboard scraps in boiling water to sterilize them, then squeeze out the excess moisture.
- The Inoculation: Mix the mushroom spores/spawn into the damp cardboard.
- The Growth: Pack the mixture into your mold. Keep it in a dark, warm place for 5–7 days. The white “fuzz” (mycelium) will grow through the cardboard, binding it into a solid, lightweight block.
- The Bake: Once the block is solid, bake it in a low oven (150°F) for an hour to stop the growth. You now have a custom-shaped, organic structural part for your DIY toys.
3. Project: The Solar-Thermal “Oven” Toy
Target Skills: Thermodynamics, reflection, and renewable energy.
This project uses the principles of Optics from our Shadow Theater article to harness the power of the sun to create heat.
Materials You’ll Need:
- Housing: A pizza box or a small insulated chest.
- The Reflector: Aluminum foil or an old emergency space blanket.
- The Glazing: A sheet of clear plastic or glass.
- Insulation: Black construction paper (to absorb heat).
The Build:
- The Angle: Create a flap in the lid of the box and line it with the reflector. The angle of the flap should bounce sunlight directly into the box.
- Absorption: Line the bottom of the box with black paper. Explain that black absorbs all wavelengths of light and converts them to heat.
- The Greenhouse Effect: Seal the top of the box with clear plastic. This allows light in but traps the infrared heat (long-wave radiation) inside.
- The Test: Can you melt a crayon? Can you dry out a piece of damp wood for your next project?
$$Q = mc\Delta T$$
(Explain that the heat ($Q$) gained is proportional to the mass ($m$) of the object and the change in temperature ($\Delta T$)).
4. The Sustainability Audit: Choosing “Right” Materials
To ensure your DIY workshop is high-quality and eco-conscious, apply these filters to every new project:
- The Cradle-to-Cradle Test: When the child is finished with this toy, can it be recycled, composted, or repurposed? If the answer is “landfill,” look for an alternative material.
- Avoid “Forever” Adhesives: Whenever possible, use mechanical fasteners (screws, dowels, twine) or water-based glues rather than solvent-based epoxies.
- Natural Pigments: Instead of synthetic paints, experiment with “Living Colors”—turmeric for yellow, beet juice for red, and red cabbage for purple/blue.
5. Why the “Material” is the Message
When we teach children about the materials they use, we are teaching them Systemic Responsibility. A child who understands how to cook their own bioplastic or grow a mycelium block sees the world as a series of renewable cycles rather than a conveyor belt of waste.
DIY play is no longer just about the “Playable Thing” itself; it is about the health of the world in which the play happens. We are raising a generation of makers who don’t just build for themselves, but build in harmony with their environment.
Conclusion: The Infinite Workshop
We have explored the physical, the digital, the acoustic, and now the biological. The workshop you have built with your child is now a complete ecosystem. You have moved from simple “scrap” content to sophisticated material engineering.