
Art is one of the best ways to transport ourselves to different places without ever leaving our seats. Today, we are heading to the open ocean! Whether you are a teacher looking for a “Lesson 10” art project or a parent wanting a creative weekend activity, this Mixed Media Sailing Regatta is the perfect choice.
This project isn’t just about pasting paper; it is a masterclass in texture, perspective, and upcycling. By combining painting, tearing, and collage techniques, we will create a dynamic seascape that looks professional and artistic.
In this guide, we will walk you through the materials, the step-by-step process, and the artistic theory behind why this project works so well. Let’s set sail!
Why Mixed Media Art is Important for Development
Before we dive into the glue and paint, it is valuable to understand why this specific craft is so beneficial. This project is classified as “Mixed Media” because it uses more than one medium (paint, paper, plastic, and cardboard).
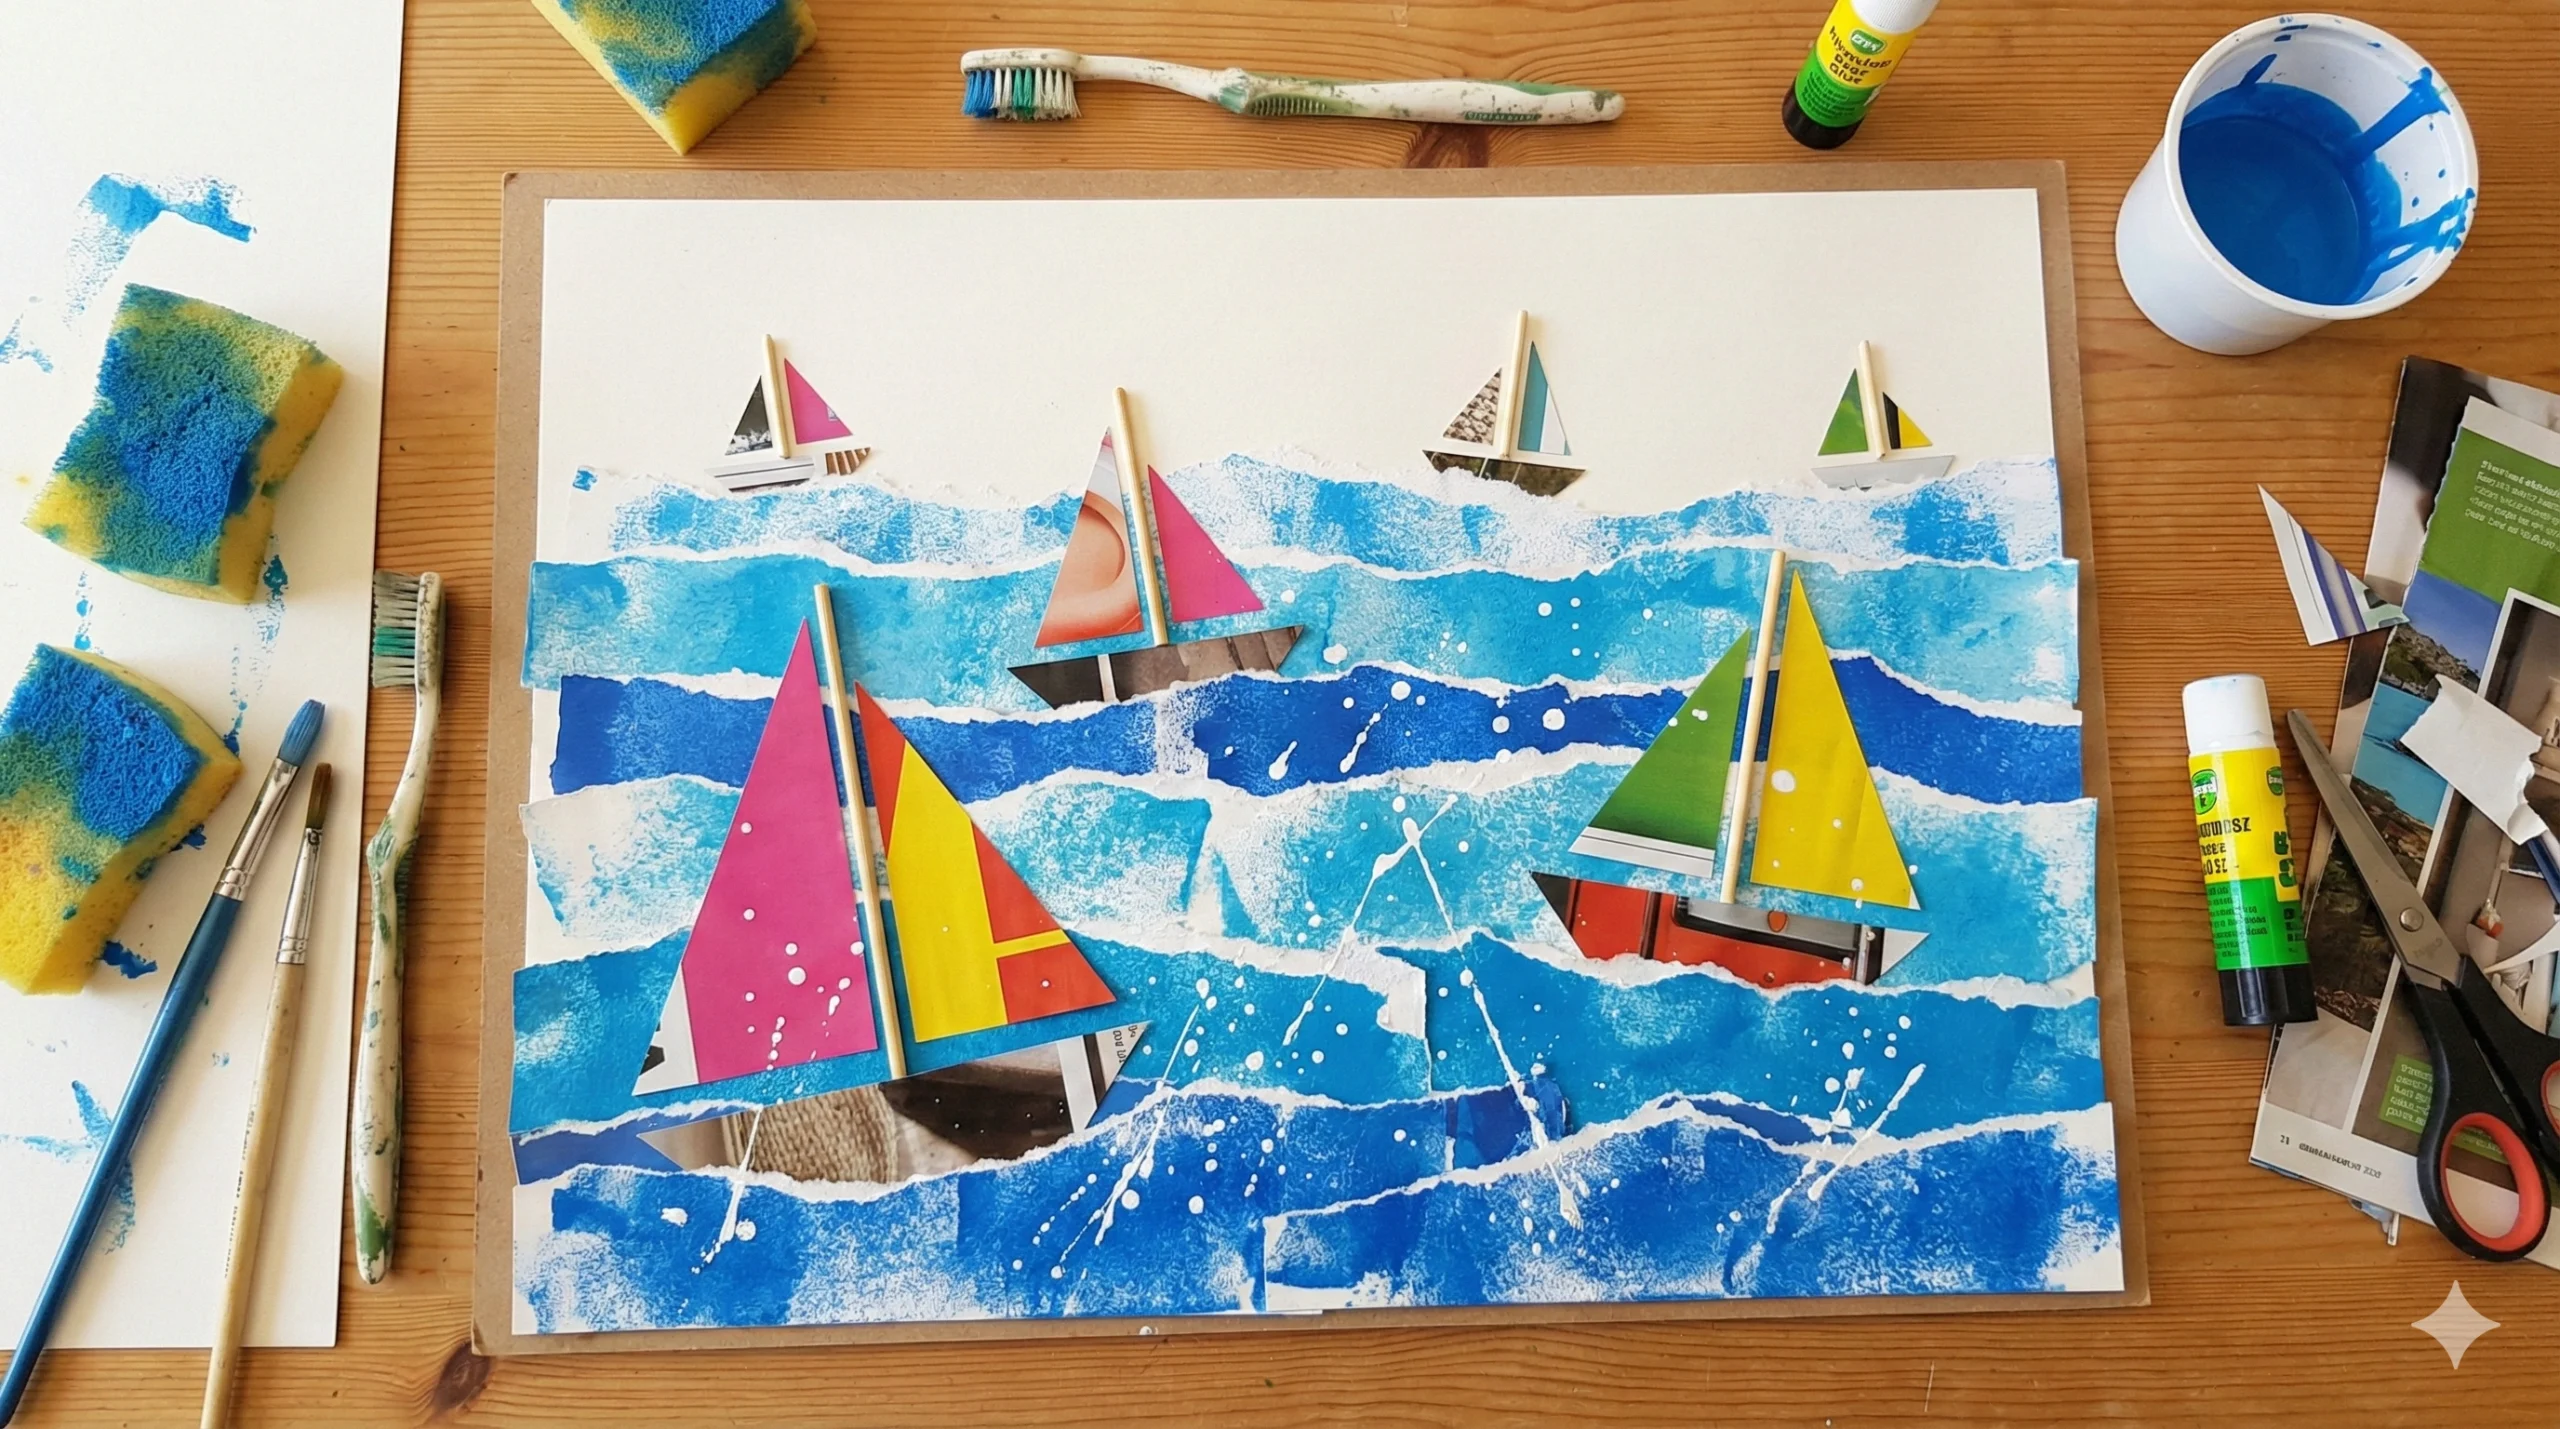
- Understanding Texture: We use sponges and torn paper edges to mimic the rough, frothy texture of ocean waves.
- Learning Perspective: By placing larger boats at the bottom and smaller boats at the top, children learn the fundamental art concept that size equals distance.
- Upcycling Skills: Using old magazines and drinking straws teaches resourcefulness—turning “trash” into treasure.
- Motor Skills: The act of tearing paper (rather than cutting) requires a specific type of fine motor control that strengthens the fingers.
The Supply List: Gather Your Materials
To create your oceanic masterpiece, you will need a few standard art supplies. The beauty of this project is that many of these items can be found around the house.
The Essentials
- Base Material: Rectangle card stock (This is your canvas. It needs to be thick to hold the paint and glue).
- For the Ocean:
- Chart paper or lighter weight drawing paper (to be painted and torn).
- Acrylic or Tempera Paints: Shades of Blue (Dark Blue, Sky Blue) and White.
- Sponges: Kitchen sponges cut into small squares work perfectly.
- For the Boats:
- Old Magazines: Look for pages with interesting colors and patterns.
- Plastic Drinking Straws: These will serve as our 3D masts.
- Tools:
- White Craft Glue (PVA glue).
- An old toothbrush (for the spray effect).
- Scissors.
- A palette or paper plate for mixing paint.
Step-by-Step Instructions
Follow this guide to create your pacific coast-inspired regatta scene.
Phase 1: Creating the Deep Blue Sea
The foundation of this artwork is the water. We want to avoid a flat, boring blue background. The goal is to create movement and depth.
- Prepare the Chart Paper: Lay out a rectangular piece of chart paper. It doesn’t need to be the exact size of your final card stock yet, but it should be wide enough.
- Sponge Painting: Dip your sponge into the dark blue paint, then dip the corner into the white paint. Do not mix them fully on the palette!
- Horizontal Strokes: Drag the sponge across the chart paper in long, horizontal strokes. The unmixed colors will streak together on the paper, creating a beautiful marbled effect that looks like real water currents.
- Layering: Continue this process until the paper is covered. Don’t worry about making it perfect; the messier the strokes, the more organic the waves will look. Let this dry completely.
Phase 2: The Tearing Technique (Making Waves)
This is the secret sauce of this craft. If we cut the paper with scissors, the lines would look too sharp and unnatural. Tearing is the key.
- The Tear: Once your painted chart paper is dry, begin tearing it into long horizontal strips.
- The “White Edge”: Try to pull the paper towards you as you tear. This often reveals the inner white fibers of the paper along the torn edge. Do not trim this off! This white, ragged edge looks exactly like sea foam or the crest of a wave.
- Layering the Ocean: Take your sturdy card stock base. Begin gluing these torn strips from the top to the bottom.
- Tip: Overlap them slightly. The ridges created by the torn paper add physical texture to the artwork, making the waves pop out.
Phase 3: Constructing the Fleet
Now that the sea is ready, we need sailors. We will be using magazine cutouts to make colorful, stylized sailboats.
- Hunting for Colors: Flip through your old magazines. Don’t look for pictures of boats; look for blocks of color. A picture of a red car can become a red sail; a picture of a wooden table can become a boat hull.
- Geometry in Art: Cut out triangles for the sails. You will need different sizes—some large, some medium, and some tiny.
- The Hulls: Cut out semi-circles or trapezoids for the bottom of the boats.
- The Masts: Cut your drinking straws to fit the height of your sails. If you don’t have straws, thin strips of black paper or toothpicks work well too.
Phase 4: Composition and Perspective
This is the step that turns a simple craft into a sophisticated art piece. We are going to arrange the boats to create an illusion of depth.
- Foreground (Front): Place the largest boat hulls and sails at the bottom of the page. This tells the viewer’s eye that this boat is close to them.
- Background (Back): Place the smallest boats near the top of the water line. This makes them look like they are far away on the horizon.
- Glue It Down: Once you are happy with the arrangement, glue the hulls, then the straw masts, and finally the sails. You can tilt them slightly to make it look like they are catching a strong wind!
Phase 5: The Finishing Touch (Sea Spray)
The final step adds atmosphere and energy to the piece. We are going to replicate the salty sea spray hitting the lens of a camera.
- Prepare the Spray: Mix a little bit of white paint with a few drops of water to make it runny.
- The Toothbrush Trick: Dip the bristles of an old toothbrush into the watery white paint.
- Splatter: Hold the toothbrush over your artwork (bristles facing down). Run your thumb along the bristles to flick tiny droplets of paint onto the paper.
- Warning: This can get messy! Put down some newspaper around your work area first.
- Focus: Concentrate the spray around the bottom of the boats where they “hit” the water.
Artistic Concepts Explored
While this is a fun craft, it is grounded in solid artistic theory. Here is what you are actually teaching during this session:
- Atmospheric Perspective: By using size differentiation (big vs. small), we cheat the eye into seeing 3D space on a 2D surface.
- Rhythm and Movement: The repeated horizontal lines of the torn paper create a visual rhythm that mimics the rolling of the ocean.
- Collage: This is a French term meaning “to glue.” It teaches students that art isn’t just about drawing; it’s about assembling distinct parts into a new whole.
Variations for Different Skill Levels
This craft is versatile. Here is how you can adapt it:
- For Preschoolers: Skip the tearing if their hands aren’t strong enough. Pre-cut wavy lines for them. Use stickers for the boats instead of magazine cutouts.
- For Older Students (Class 5-10): Challenge them to create a “stormy” scene. Use greys and purples for the water. Ask them to tear the paper at diagonal angles to create choppy, dangerous waves. They can also add details like seagulls or a lighthouse using fine-tip markers.
Cleanup and Display
Because we used acrylic paints and glue, cleanup is important.
- Wash sponges immediately before the paint dries and hardens.
- Soak the toothbrush in warm water.
- Display Idea: These look fantastic when framed with a simple white border. The clean border contrasts beautifully with the rough, torn edges of the waves.
Conclusion
The “Let’s Go Sailing” craft is more than just a way to pass an afternoon. It is an exploration of color mixing, a lesson in perspective, and a tactile sensory experience. By the end of the session, you won’t just have a piece of paper with glue on it; you will have a vibrant, textured seascape that captures the energy of a Pacific regatta.
b