
Creating in 3D isn’t just about making something look “cool.” It provides several developmental benefits for growing minds:
- Spatial Awareness: Kids learn how objects occupy space and how different parts connect to form a whole.
- Problem-Solving: When a paper tower keeps falling over, a child must figure out how to strengthen the base—this is early engineering in action!
- Fine Motor Precision: Folding, scoring, and tabs require a higher level of dexterity than simple coloring.
- Confidence Boost: There is a unique sense of accomplishment when a flat piece of paper stands up on its own.
15 Spellbinding 3D Paper Crafts to Try Today
These projects are designed to be accessible. We’ve focused on techniques like paper strips, accordion folds, and simple geometric nets.
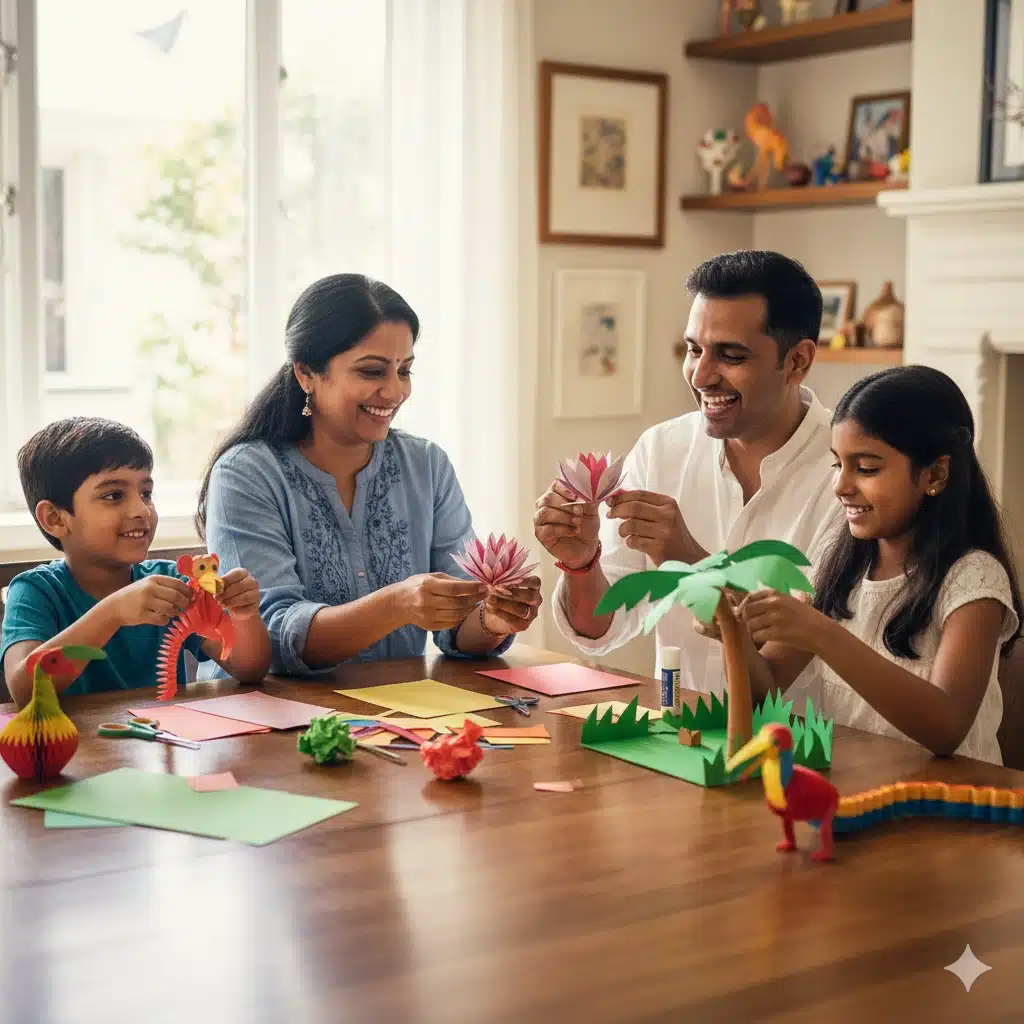
1. The 3D Paper Jungle Scene
Instead of drawing a forest, build one! Use strips of green paper folded at the bottom (creating a “tab”) to glue them upright onto a base.
- The 3D Effect: Loop long strips of paper to create “vines” and use accordion-folded paper to make springy monkeys that bounce when you touch them.
2. Paper Loop Flowers
Instead of flat petals, cut long strips of colorful paper. Fold them into loops and glue the ends to a center circle.
- The Result: A beautiful, textured bloom that rises an inch off the paper.
3. Accordion-Fold Snakes
By interlocking two long strips of paper and folding them over each other, you create a “spring” or accordion effect. Add a head and a flicking tongue, and you have a snake that actually stretches and shrinks!
4. Geometric “Cityscape”
Teach kids about shapes by creating “nets” (the flat 2D shape that folds into a 3D object). A square becomes a cube (building), and a triangle becomes a pyramid (roof).
- SEO Tip: This is a fantastic STEM activity for classrooms.
5. 3D Paper Hot Air Balloons
Cut out four identical balloon shapes. Fold them in half vertically and glue the backs together. When you open them up, you have a symmetrical 3D sphere. Hang them from the ceiling with string for a whimsical nursery decoration.
6. The “Springy” Rainbow
Instead of drawing an arch, cut long strips of the seven rainbow colors. Glue the ends to two “clouds” made of cotton balls. Because the strips are longer than the distance between the clouds, they will arch upward into a perfect 3D bow.
7. Paper Plate Dinosaurs
By cutting a paper plate in half and slotting the pieces together (one for the body, one for the legs/neck), you create a standing Brachiosaurus or Triceratops. No glue required if your slots are tight!
8. 3D Butterfly Cards
When you open the card, the butterfly wings should lift. This is achieved by gluing only the center body of the butterfly to the “V” fold of the card. It’s a classic pop-up technique that never fails to impress.
9. Woven Paper Baskets
Using strips of construction paper, kids can learn the “over-under” technique to weave a functional 3D basket. This teaches patience and pattern recognition.
10. Paper Tube Owls
Don’t toss those cardboard tubes! By folding the top edges inward, you create natural “ears.” Add paper wings and large googly eyes for a wise, standing 3D friend.
11. 3D Fish with Moving Tails
By making several vertical slits along a folded piece of paper (but not cutting all the way through), you can create a fish body that swishes back and forth just like a real one in the water.
12. Paper Cone Christmas Trees
A simple circle with one slit can be rolled into a cone. Layer these cones or decorate a single large one with “ornaments” made of hole-punched paper circles for a forest of festive trees.
13. Floating Paper Clouds
Similar to the hot air balloon, layer several cloud cutouts to create a fluffy, multi-dimensional storm or fair-weather sky.
14. 3D Sunburst Art
Use yellow paper strips to create “tubes.” Glue these tubes around a central sun face. The rays will point outward toward the viewer, creating a stunning sun-sculpture.
15. The “City in a Box” (Shadow Box)
Use an old shoe box to create a 3D diorama. Place objects at different depths—some in the foreground, some in the background—to teach the concept of perspective.
Essential Techniques for 3D Success
To help your child master the third dimension, teach them these three “pro” paper moves:
- The Tab: Always leave an extra half-inch of paper at the bottom of a cutout. Fold it over—this “tab” is where you apply the glue to make the object stand up.
- Scoring: Use a blunt edge (like a ruler or a dried-out pen) to “dent” the paper before folding. This ensures a crisp, straight line every time.
- The Slot: Instead of glue, cut two slits (one on each piece of paper) and slide them together. This “X” join is the basis of many 3D structures.
Conclusion: Let Their Imagination Pop!
The jump from 2D to 3D is a milestone in a child’s creative journey. It encourages them to look at the world from different angles—literally. Whether they are building a bustling paper city or a springy jungle, they are learning the fundamentals of geometry, engineering, and art.