
Switching to paper-based decor isn’t just an environmental choice; it’s a creative one.
- Biodegradable & Recyclable: Unlike plastic baubles that sit in landfills for centuries, paper ornaments can be recycled or composted.
- Customizable: You aren’t limited to what is available in the store. You can match your ornaments to your specific home decor theme.
- Family Bonding: Making these ornaments is a wonderful afternoon activity for kids and adults alike, fostering a sense of accomplishment.
Supplies You Will Need
To create these stunning 3D ornaments, you likely already have everything you need in your craft drawer:
- Thick Craft Paper: Choose bright, vibrant colors. Cardstock or heavy construction paper works best as it holds its shape.
- Large Round Beads: About 2 cm in diameter. These add weight and a professional finish.
- String and a Large Needle: For assembly.
- Pencil and Scissors: For marking and cutting your shapes.
- Craft Glue: A strong adhesive or a glue stick.
- A Circular Template: A glass or a compass to ensure all your circles are identical.
Step-by-Step Guide: Making Your 3D Paper Ornament
Step 1: Prepare Your Circles
The foundation of this 3D ornament is the circle. The choice of paper is vital here; avoid flimsy printer paper. You want something with “body.” Choose colors that contrast with your tree. Since most Christmas trees are green, try using vibrant reds, oranges, golds, or even a deep royal blue to make the ornament pop.
- Using your template, trace and cut out 12 identical circles.
- Precision is key—the more uniform the circles, the more symmetrical your 3D ornament will be.
Step 2: The Folding Process
Once your 12 circles are cut, it’s time to give them dimension.
- Take each circle and fold it exactly in half.
- Press down firmly on the crease. You now have 12 neat semicircles. These folds act as the “ribs” of your 3D sphere.
Step 3: Glueing the Segments
Now, we begin to build the 3D structure.
- Take one semicircle and apply glue to one of its outer faces.
- Press a second semicircle against it, aligning the edges perfectly.
- Continue this process until you have glued all 12 semicircles together in a stack. Do not glue the first and last segments together yet!
Step 4: Adding the String and Beads
Before we close the ornament into a sphere, we need to add the hanging mechanism.
- Thread your needle with a piece of festive string or twine.
- Tie a large knot at the bottom and slide on one of your large beads.
- Lay the string down the center “spine” of your glued paper stack.
- Slide a second bead onto the top of the string. This bead will sit at the top of the ornament.
Step 5: Completing the Sphere
- Apply glue to the remaining two open faces of your paper stack.
- Bring them together, sandwiching the string in the middle, and press firmly.
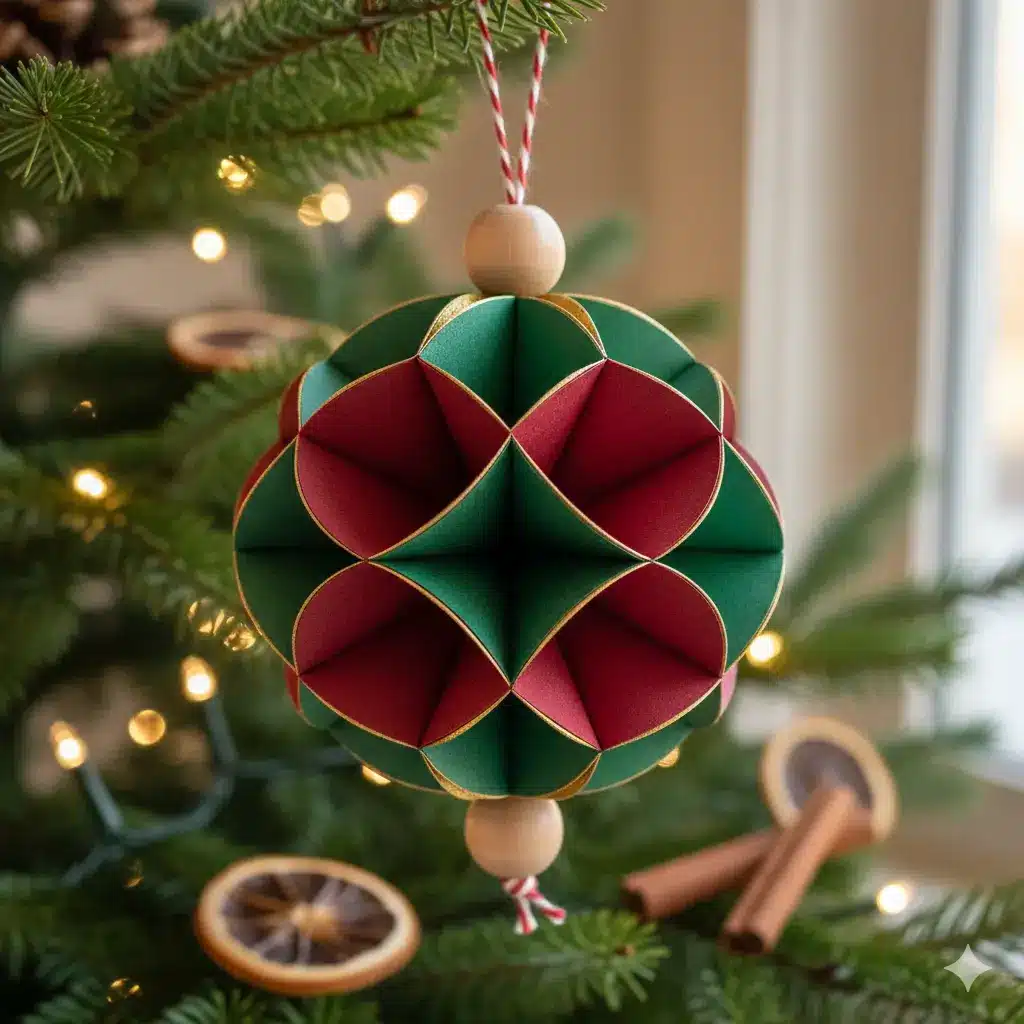
- Fan out the 12 segments evenly. You will see a beautiful, multifaceted 3D star or globe shape emerge.
Creative Variations to Try
Once you master the basic circular ornament, you can experiment with different styles:
The “Ombre” Effect
Use three different shades of the same color (for example, light pink, medium pink, and hot pink). Alternate the colors as you glue the semicircles together to create a beautiful gradient effect.
Patterned Paper
Mix solid colors with patterned scrapbooking paper. A mix of solid red and a red-and-white polka dot pattern creates a whimsical, candy-cane-inspired look.
Different Shapes
You aren’t limited to circles! You can use this same “glued stack” technique with heart shapes, star shapes, or even diamond shapes to create a variety of ornaments for your tree.
Sustainability Tips for the Holidays
Making paper ornaments is a great start, but here are a few more ways to reduce waste this December:
- Eco-Friendly Wrapping: Use old newspapers, brown butcher paper, or even fabric (the Japanese art of Furoshiki) to wrap your gifts.
- Natural Decor: Supplement your paper ornaments with dried orange slices, cinnamon sticks, and pinecones. They look beautiful and smell amazing!
- Quality Over Quantity: Invest in decorations that can be used for years, or focus on handmade items that can be safely returned to the earth.
The Environmental Impact of Your Craft
By spending an hour making these 3D ornaments, you are actively participating in the circular economy. Every handmade ornament is one less plastic bauble produced in a factory and shipped across the ocean. Furthermore, these ornaments make thoughtful, personalized gifts for teachers, neighbors, and friends.
In a world where 12,500 tonnes of decorations are dumped in landfills every year, your papercraft project is a small but powerful statement of care for our planet.
Conclusion
This 3D Christmas Ornament Papercraft is a testament to the fact that beauty doesn’t have to come at the cost of the environment. With just a few sheets of thick craft paper and a bit of glue, you can create a show-stopping decoration that will last for years.
The texture and depth of the 12-layer paper sphere catch the holiday lights